Thickness sander - version 2 -plans
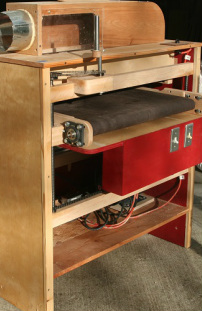
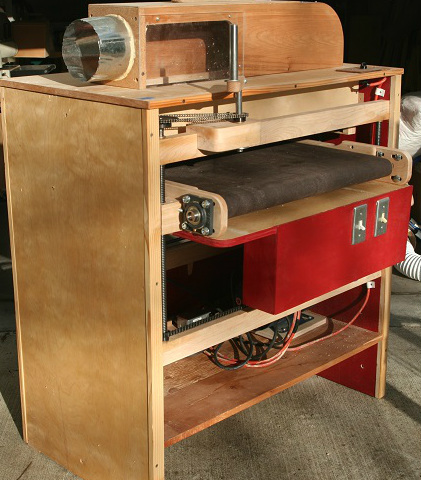
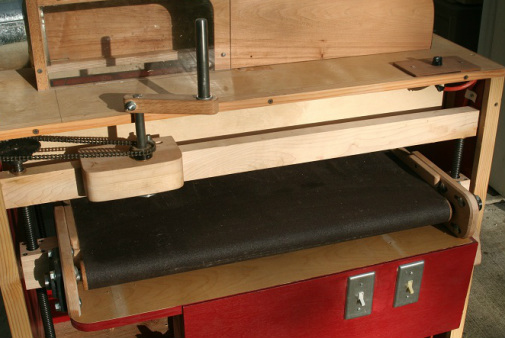
Ever since seeing Norm Abrams use his thickness sander at the New Yankee workshop, I wanted one, but they are very expensive. This sander can be built for less than 1/3 the cost of an equivalent store bought model and is very accurate, reliable, and easy to use. Adjustments are easy to make and stay put - it's one of my "go to" machines, and is used on almost every project.
Building this thickness sander was a very rewarding project.
I have put well over 200 hours into producing a set of plans and instructions to build the sander. The plan and instuction package are available to buy. They include sketchup plans with printable PDF files, material list, parts supplier list, assembly instructions, and general usage techniques.
Some minor changes to the original design have been made to eliminate the need to weld. Metal work is still necessary, but is limited to cutting mild steel and putting shoulders on acme screws, which can be accomplished via a bench grinder or metal lathe. You'll also need to drill and tap threads for 1 screw, but it wouldn't be hard to eliminate that step. To use a bench grinder for the acme screw shoulders, click here for some free bench grinder table plans. My acme screw shoulders were ground using a similar method.
Easily printable 2 dimensional drawings are included in the downloadable plans (PDF files).
Additional links:
The Shigshop.com thickness sander home page.
Using the Shigshop.com thickness sander.
Purchase the Shigshop.com thickness sander plans.
Customer built sanders.
The Shigshop.com thickness sander home page.
Using the Shigshop.com thickness sander.
Purchase the Shigshop.com thickness sander plans.
Customer built sanders.
A couple of the changes made for version 2
New nut assemblies
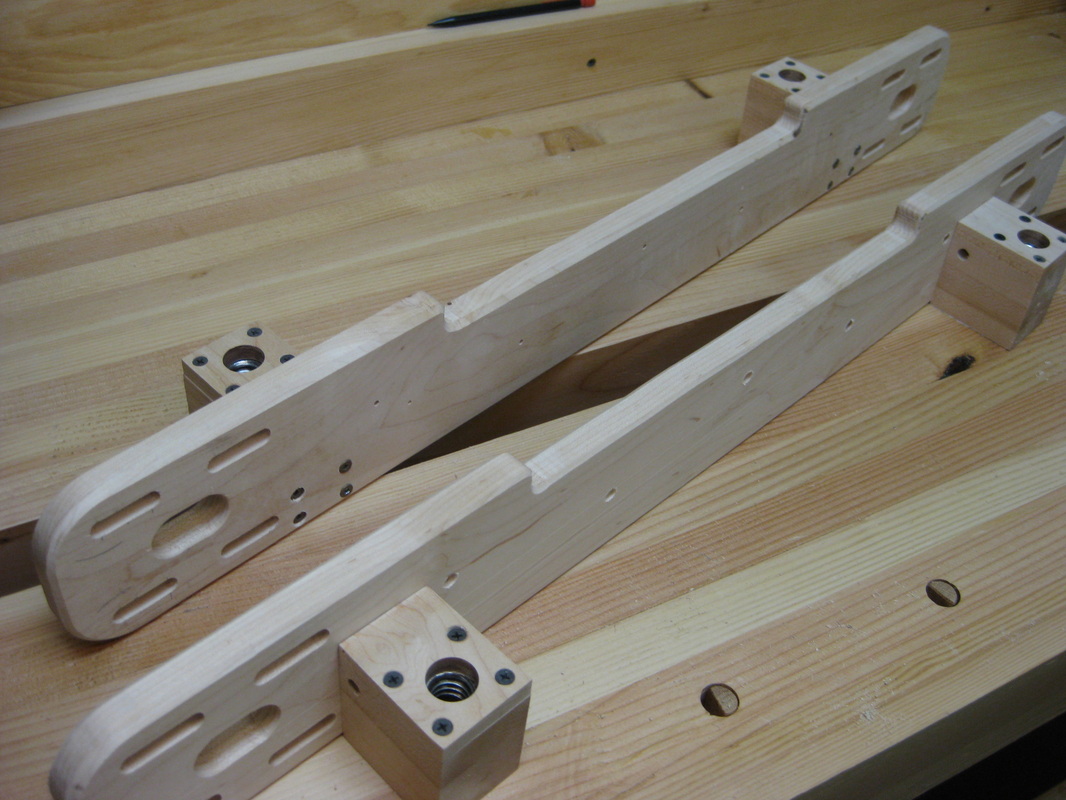
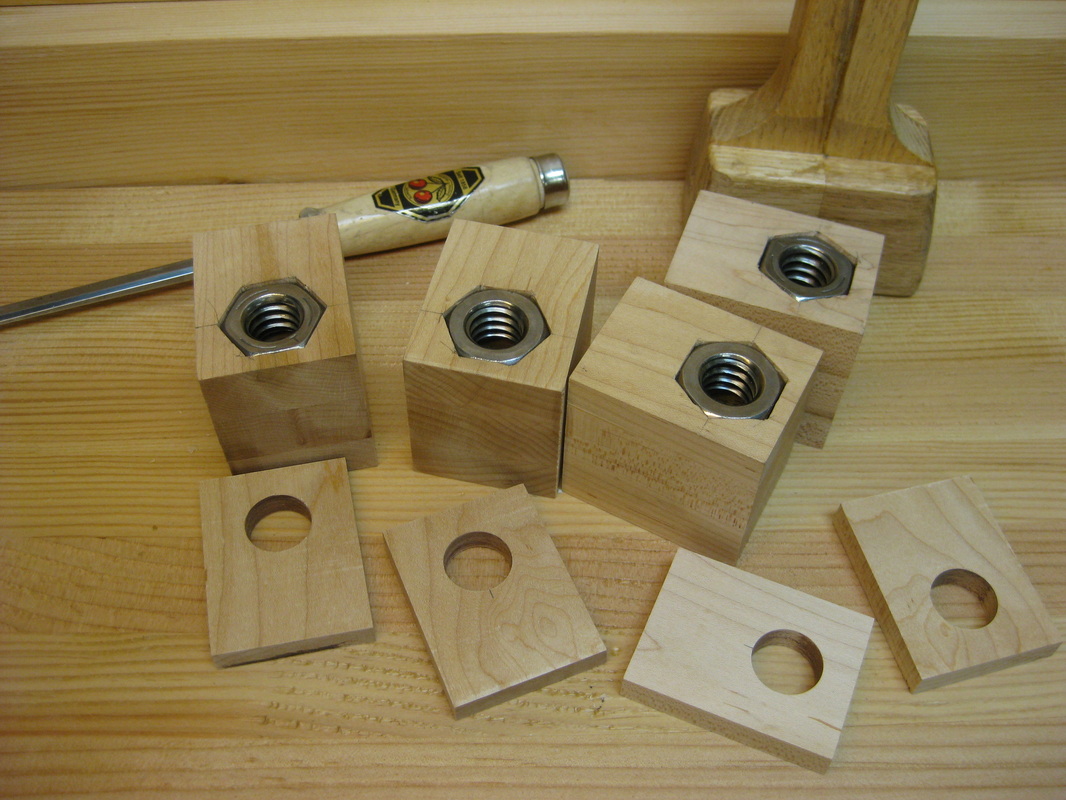
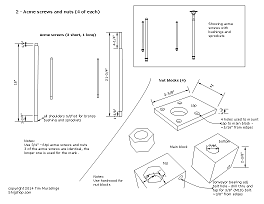
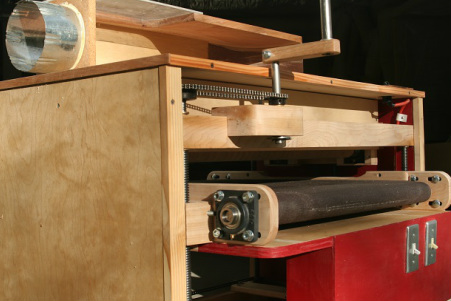
These are the version 2 conveyor platen sides with acme nut assemblies. On the original design, I welded the acme nuts onto a plate and screwed that plate to the sides. Here, the nuts are captured in a hardwood block and the block gets screwed onto the sides, otherwise, the sides are the same as the orginals.
These blocks were fun and simple to build.
Below, I describe some of that process.
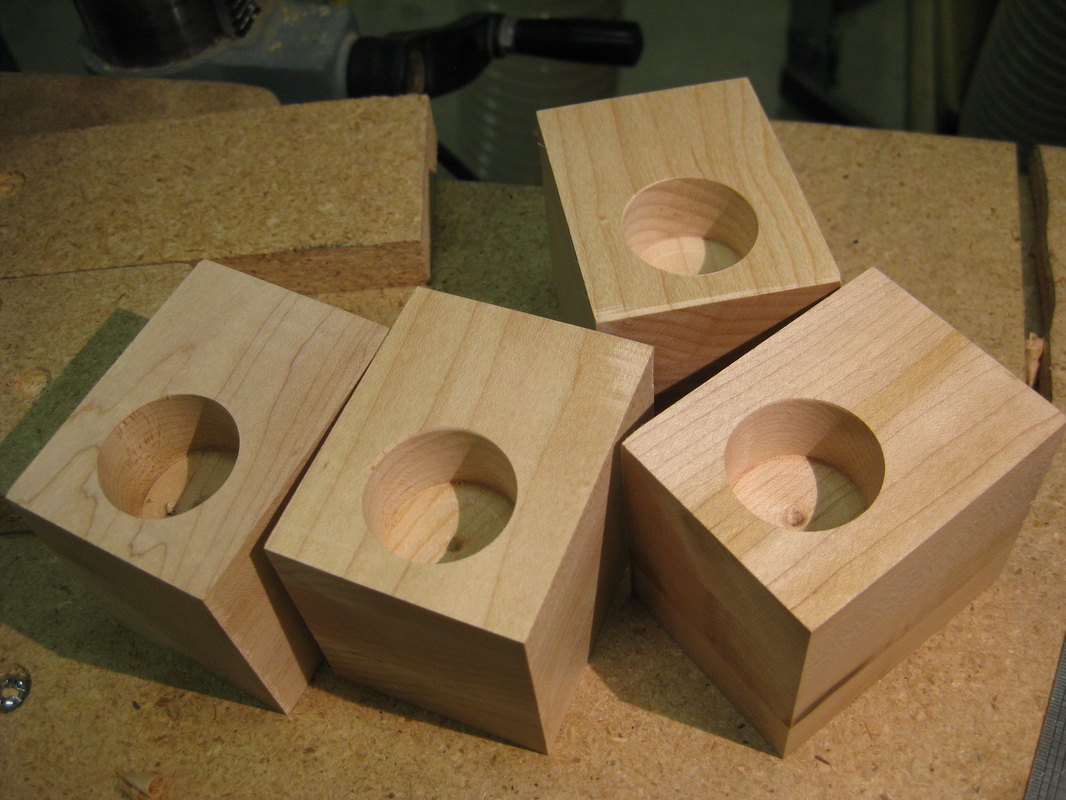
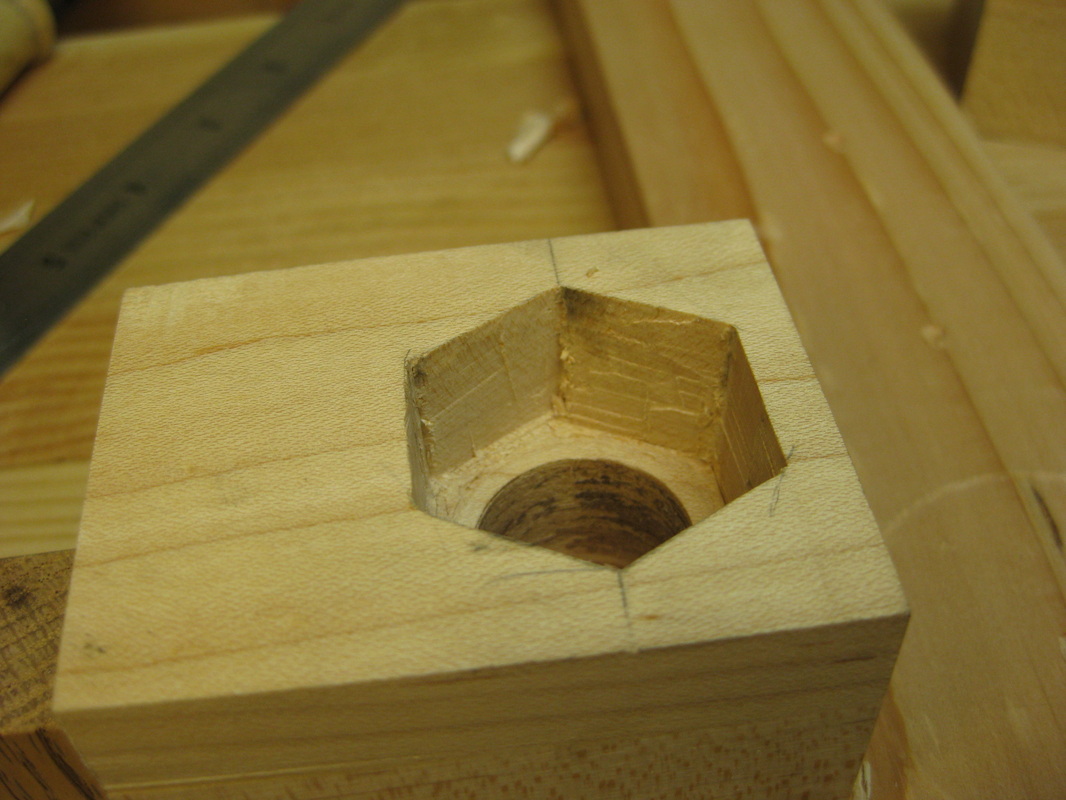
I first glued up and cut some stock that was the right size for the blocks, then drilled a counter bore whose diameter was close to the distance between the nut flats, and at a depth just shy of the nut thickness.
After the counter bores were done, I completed the through holes with a forstner bit that was a little larger than the acme screws. I used 3/4" acme screws and chose a 7/8" forstner bit for the holes.
Caps for the block were also drilled at this time using the same 7/8" bit.
After the counter bores were done, I completed the through holes with a forstner bit that was a little larger than the acme screws. I used 3/4" acme screws and chose a 7/8" forstner bit for the holes.
Caps for the block were also drilled at this time using the same 7/8" bit.
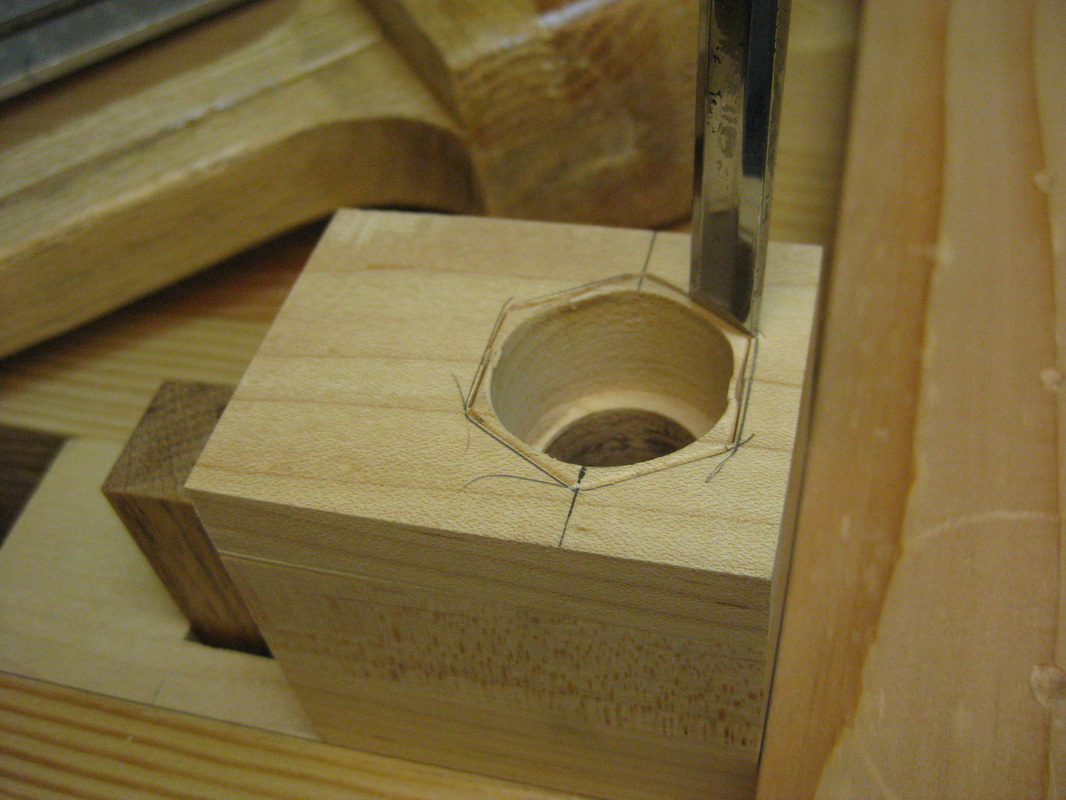
A nut was used to outline the shape centered over the counter bore with a pencil. Using the counter bore as a depth gauge, I used a sharp chisel and mallet to carve out the shape of the nut.
Because of the counter bore, this was very fast. The initial shape only took a few minutes - it was intentionally left a bit undersized.
Because of the counter bore, this was very fast. The initial shape only took a few minutes - it was intentionally left a bit undersized.
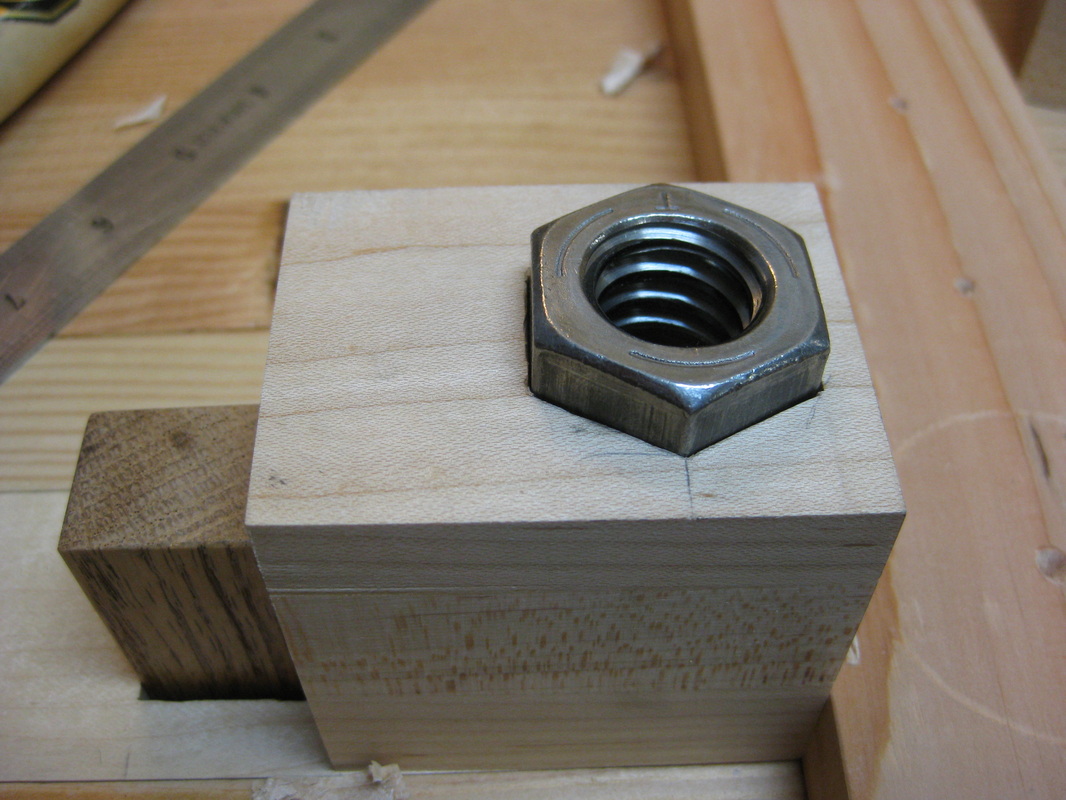
As I got close to the final size, I test fit the nut.
Just stuck it in the mortise, gave it a little tap, and pulled it out.
Just stuck it in the mortise, gave it a little tap, and pulled it out.
That process left little marks on the inside of the hole where the nut had rubbed against the mortise - you can see a couple in this pic.
Using the chisel, this time with no mallet, I pared away the marks, test fit the nut again, and pared away the marks again, repeating until the nut seated itself.
Using the chisel, this time with no mallet, I pared away the marks, test fit the nut again, and pared away the marks again, repeating until the nut seated itself.
Working on a good bench and vise, with some nice dry hardwood (maple in my case), and a sharp chisel, this was a very satisfying process.
New drum flange bearings
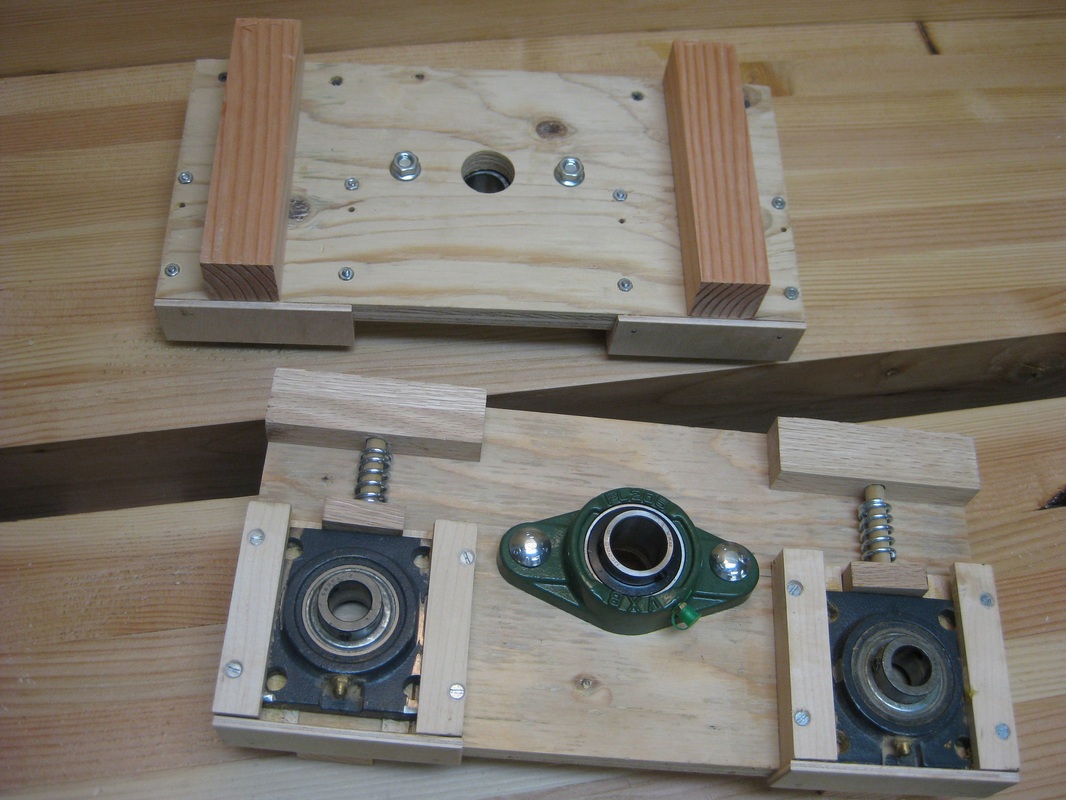
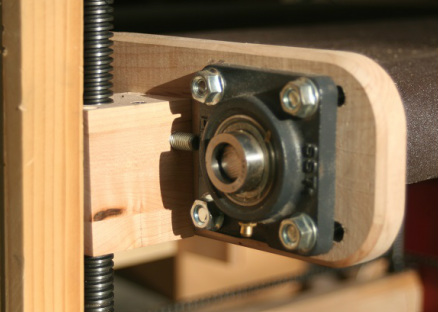
On the original sander, for the sanding drum, I had used pillow block bearings that were left over from my old sander. That was a kludge because I bolted a piece of angle iron to those bearings so that I could mount them to the drum plates.
On version 2, I replaced those old bearings with some nice 2 bolt flange bearings.
The thickness sander Sketchup plans and building instructions
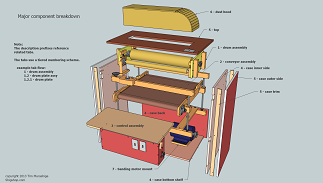
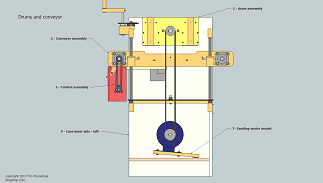
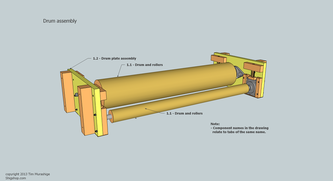
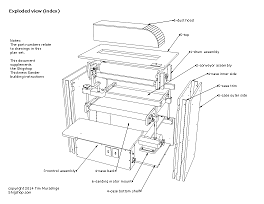
The Sketchup model has over 40 drawings. They are very detailed, enough so that the machine could be built just from those.
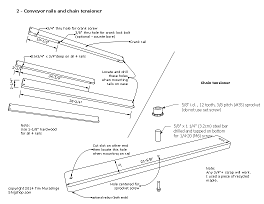
Also included are a set of 2 dimensional plans (PDF files), that can easily be printed for shop use.
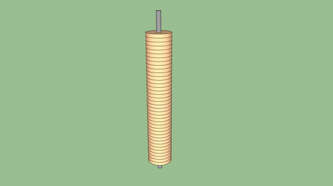
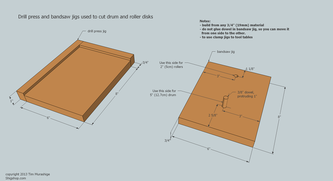
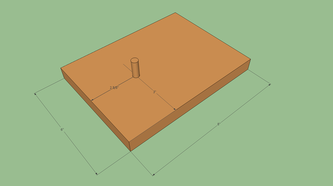
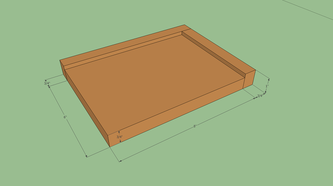
Plans to build special jigs used to make the disks for the the sanding drum and compression/conveyor rollers are included.
For an accomplished woodworker, the machine is not difficult to build. Typical woodworking tools can be used for all wood parts. If you want a sander like this, I suppose you are pretty far along in building out your shop equipment, which means you probably already have a table saw, bandsaw, drill press, router, and maybe a jointer and planer. Although, you can build this machine without some of those, they will make it easier. For the metal parts a portable bandsaw, bench grinder, files, and thread taps are all you need. A portable bandsaw is recommended as it would be pretty difficult to cut through the acme screws and 1" steel bar with a hacksaw. You could use a chop saw or plasma torch I suppose...
My instructions step you through build, set up, alignment, and general usage. I also provide a list of materials, cut diagrams, as well as suppliers that I used. The instructions are browser based, so they are easy to use.
The width of the sander can be changed, I don't recommend going too much wider, maybe an inch or 2, but you can easily build one narrower. The build instructions call out which pieces need to be adjusted.
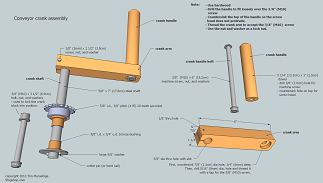
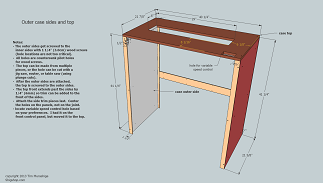
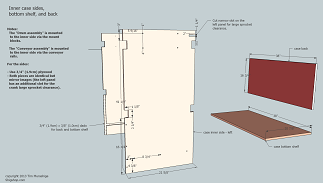
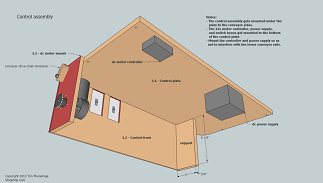
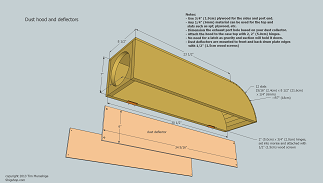
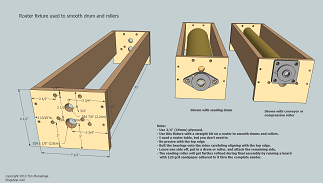
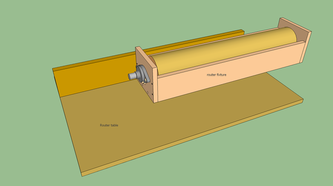
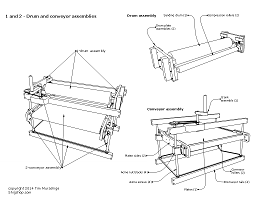
Here is a peek at a few of the over 40 drawings in the Sketchup plans.
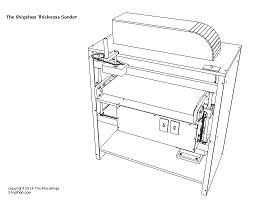
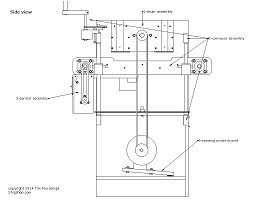
A look at some of the printable drawings...
The plans
The downloadable plans and instructions will give you all the information necessary to build a thickness sander similar to the one pictured and described here.
This set of plans and instructions are very complete - well over 200 hours went into developing them (alas... I lost count long ago...) - they include over 40 drawings in the Sketchup model, 21 printable drawings on 8-1/2" x 11" paper, 100+ pictures in the instructions detailing the build - over 11mb compressed data. Were you to print out the instructions and printable drawings, you would end up with almost 175 pages!
Deciding on parts and procuring them is a big task on a project like this. Included in the package are material and supplier lists. The supplier list has links to their websites with suggested search terms that worked for me to find specific items. I remember spending many nights in 2010 (when I built the original sander) figuring out what I needed and where to get it, so these lists should be a big help to some of you.
The original sander that I built was used for almost 3 years. To create these plans and instructions, I tore down that machine and rebuilt it, using some of the old parts, but where appropriate, I made new parts. This version of the machine is simpler and as robust as the original. I anticipate many years of service from it.
Some workshop requirements
Dust collection is a must. Before considering this machine, please ensure you have that part of your shop set up.
I have a fairly well equipped shop with a table saw, band saw, drill press, benches, vises, planer, jointer, portable band saw, and bench grinder, as well as hand tools. You can certainly build the sander without some of those tools, but they will make the job easier.
About Sketchup
Sketchup has become a de facto standard for workshop tool and furniture designs - mainly because it's powerful and there is a free version available. For those of you not familiar with Sketchup, included are instructions on how to do basic navigation within Sketchup models. Also included are easily printed drawings in a PDF files, making Sketchup or learning it a non-requirement.
By default, my plans use imperial measurements - included are instructions to convert the Sketchup model to metric (all critical dimensions have been verified). The drawings have notes that sometimes refer to dimensions. For these, I have specified both metric and imperial measurements.
Click here to download Sketchup.
And for those that have no intention of learning anything about Sketchup, I have included easily printable 2 dimensional drawings (in PDF files).
Materials
Other than wood, screws, nuts and bolts, the materials you will need to gather are:
The plans include a list of suppliers.
Some parts, such as bearings, shafts, sprockets, and acme screws are imperial sizes, as those are the only ones available in my area. It shouldn't be difficult to substitute those parts with their metric equivalents and parts local to you.
Note: Due to various electrical codes and requirements throughout the world, I do not provide instructions for the electrical wiring.
The downloadable plans and instructions will give you all the information necessary to build a thickness sander similar to the one pictured and described here.
This set of plans and instructions are very complete - well over 200 hours went into developing them (alas... I lost count long ago...) - they include over 40 drawings in the Sketchup model, 21 printable drawings on 8-1/2" x 11" paper, 100+ pictures in the instructions detailing the build - over 11mb compressed data. Were you to print out the instructions and printable drawings, you would end up with almost 175 pages!
Deciding on parts and procuring them is a big task on a project like this. Included in the package are material and supplier lists. The supplier list has links to their websites with suggested search terms that worked for me to find specific items. I remember spending many nights in 2010 (when I built the original sander) figuring out what I needed and where to get it, so these lists should be a big help to some of you.
The original sander that I built was used for almost 3 years. To create these plans and instructions, I tore down that machine and rebuilt it, using some of the old parts, but where appropriate, I made new parts. This version of the machine is simpler and as robust as the original. I anticipate many years of service from it.
Some workshop requirements
Dust collection is a must. Before considering this machine, please ensure you have that part of your shop set up.
I have a fairly well equipped shop with a table saw, band saw, drill press, benches, vises, planer, jointer, portable band saw, and bench grinder, as well as hand tools. You can certainly build the sander without some of those tools, but they will make the job easier.
About Sketchup
Sketchup has become a de facto standard for workshop tool and furniture designs - mainly because it's powerful and there is a free version available. For those of you not familiar with Sketchup, included are instructions on how to do basic navigation within Sketchup models. Also included are easily printed drawings in a PDF files, making Sketchup or learning it a non-requirement.
By default, my plans use imperial measurements - included are instructions to convert the Sketchup model to metric (all critical dimensions have been verified). The drawings have notes that sometimes refer to dimensions. For these, I have specified both metric and imperial measurements.
Click here to download Sketchup.
And for those that have no intention of learning anything about Sketchup, I have included easily printable 2 dimensional drawings (in PDF files).
Materials
Other than wood, screws, nuts and bolts, the materials you will need to gather are:
- acme screws and nuts - large 3/4" allthread (threaded rod) could substitute.
- sprockets and roller chain
- cold rolled steel bar
- bronze bushings and flange bearings
- motor to run the sanding drum with related electrical components (switch, wire, etc.)
- motor, controller, and power supply for the conveyor, with related electrical components (switch, wire, etc.)
- v belt pulleys and v belt
- large sanding belt for the conveyor
- springs for the compression rollers
- Velcro tape (adhesive backed hook)
- sandpaper rolls (loop backed)
The plans include a list of suppliers.
Some parts, such as bearings, shafts, sprockets, and acme screws are imperial sizes, as those are the only ones available in my area. It shouldn't be difficult to substitute those parts with their metric equivalents and parts local to you.
Note: Due to various electrical codes and requirements throughout the world, I do not provide instructions for the electrical wiring.
The Shigshop.com thickness sander version 2
A very big thank-you to Matthias Wandel (www.woodgears.ca) for reviewing the plans and suggesting some great improvements.
Customer comments
Steve, from the UK writes:
What I found to be easy was the navigation through the project, one could easily click from one part of the project to another part so one always knew where you were in the scale of the project;
Steve has built some other machines that were very involved - specifically, Matthias Wandel's bandsaw.
What I found to be easy was the navigation through the project, one could easily click from one part of the project to another part so one always knew where you were in the scale of the project;
- The project was broken down into bite sized chunks, and with the ability to cross reference to the sketch up model, one could see progression;
- The use of the sketch up gave one a 3D image so you could see in your minds eye how the part that you were making fitted into the complete design - and make adaptations if required (IE smaller width);
- The use of 'notes' on sketch up was very informative;
- The method to change from imperial to meter was a nice touch and potentially very useful for the wider audience;
- 9 MB worth of data - one certainly gets a lot for ones money;
- Materials list, many self build woodworkers are 'experienced' at sourcing wood and other materials via cheaper methods. To be able to build a £1000 machine for potentially a 1/5 of the price is a challenge in it.
- In my opinion these plans are excellent, and good value for the purchaser.
Steve has built some other machines that were very involved - specifically, Matthias Wandel's bandsaw.
Additional links:
The Shigshop.com thickness sander home page.
Using the Shigshop.com thickness sander.
Purchase the Shigshop.com thickness sander plans.
Customer built sanders.
The Shigshop.com thickness sander home page.
Using the Shigshop.com thickness sander.
Purchase the Shigshop.com thickness sander plans.
Customer built sanders.

