
Reference 1 Speakers
My son's inexpensive college speakers turned out pretty sweet - especially when mated with his subwoofer - although he thinks they make the sub substandard (heh). Those were the "Speakers in a Day" that incorporate full range drivers, - he's reporting excellent performance from them.
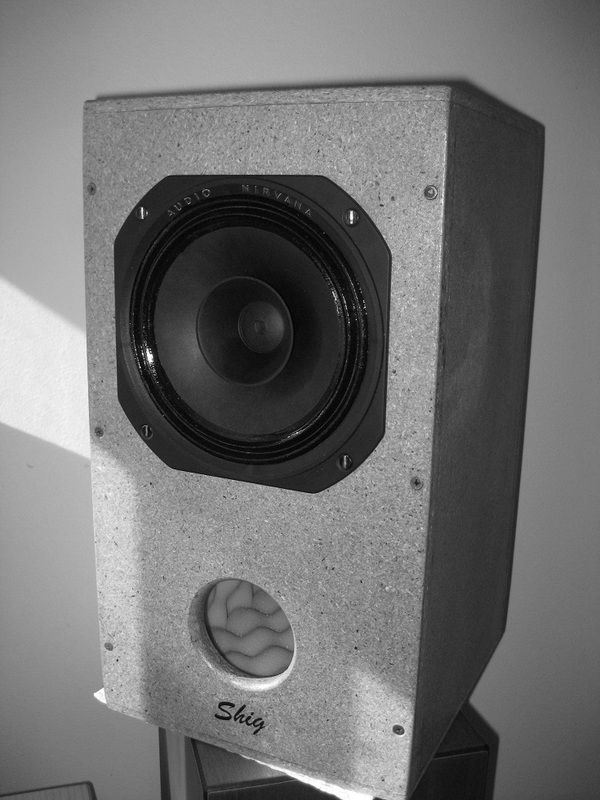
Speakers in a Day
|
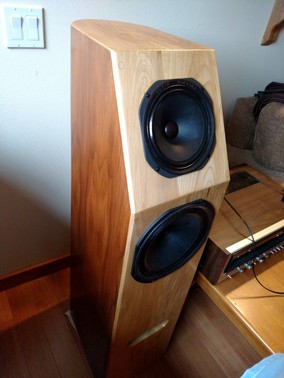
Shigshop Reference 1
|
The design
When I came across the drivers we used in those speakers (from Audio Nirvana), I figured a pair for me would be fun to build. These new speakers had to kick it up a notch in size, looks, sound, and of course, build difficulty,. The cabinets would be something a little more unusual than just a rectangular box - and with enough volume so a subwoofer would not be necessary.
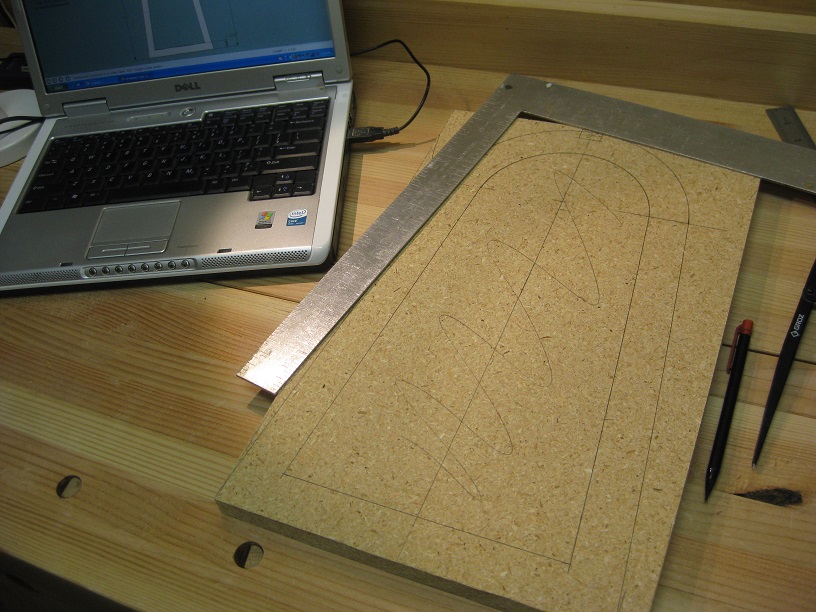
I played around with CAD designs for awhile before starting the build.
I played around with CAD designs for awhile before starting the build.
|
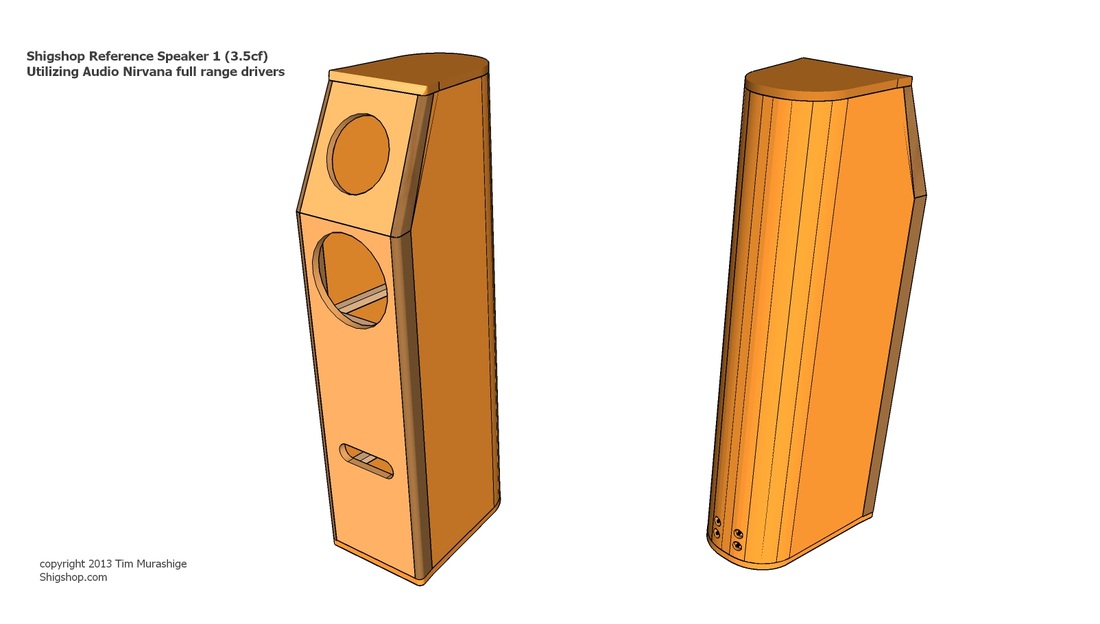
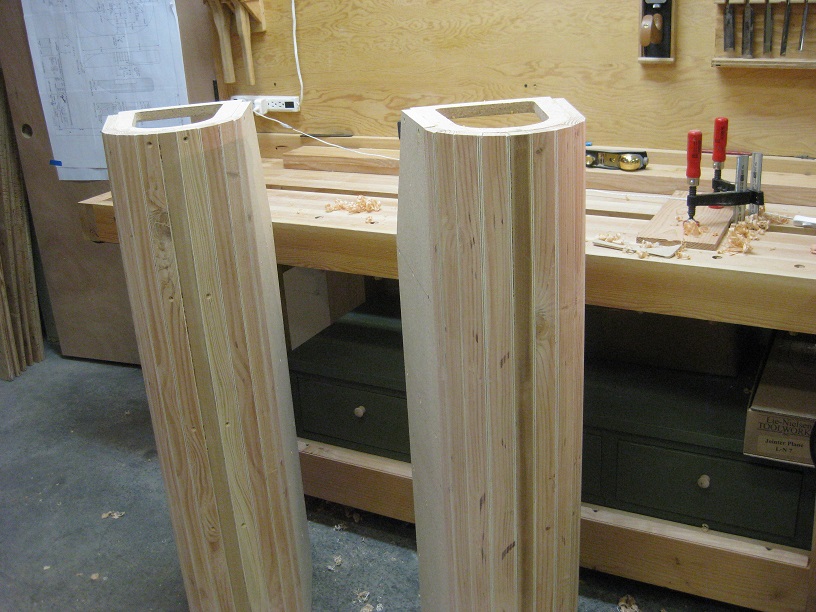
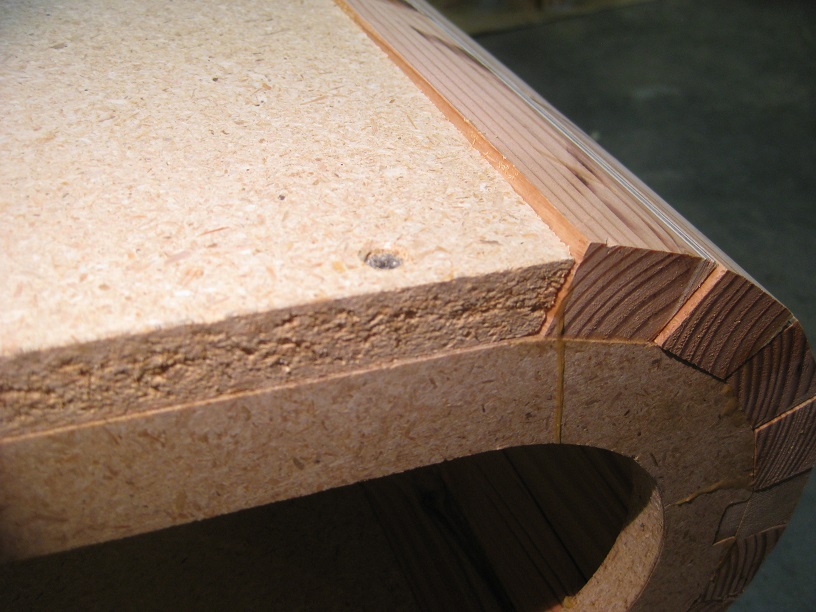
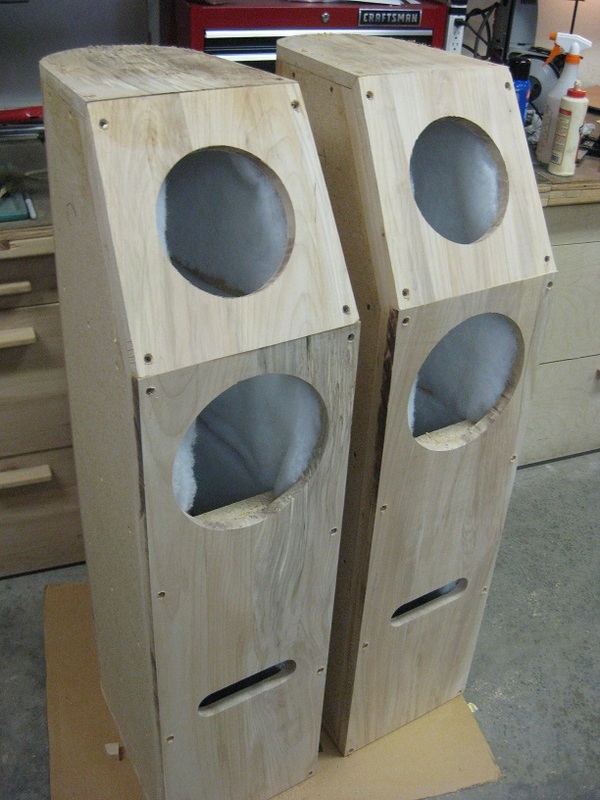
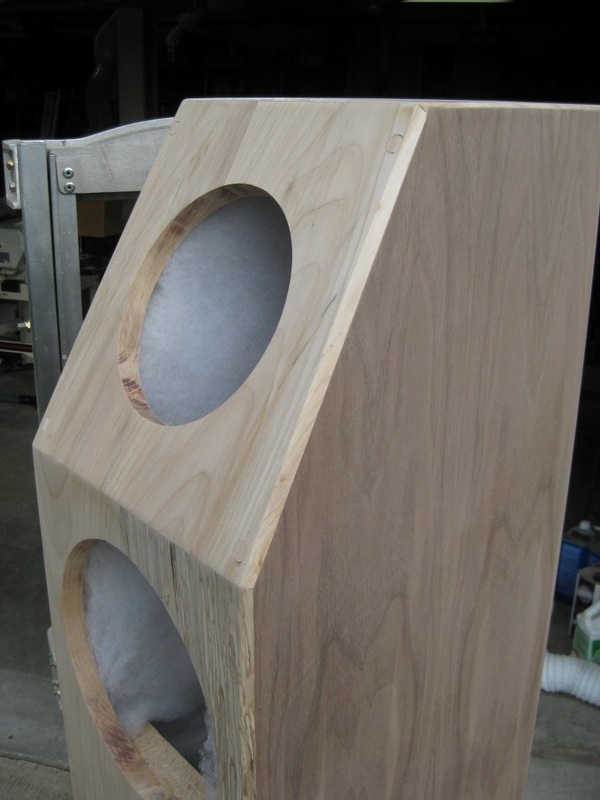
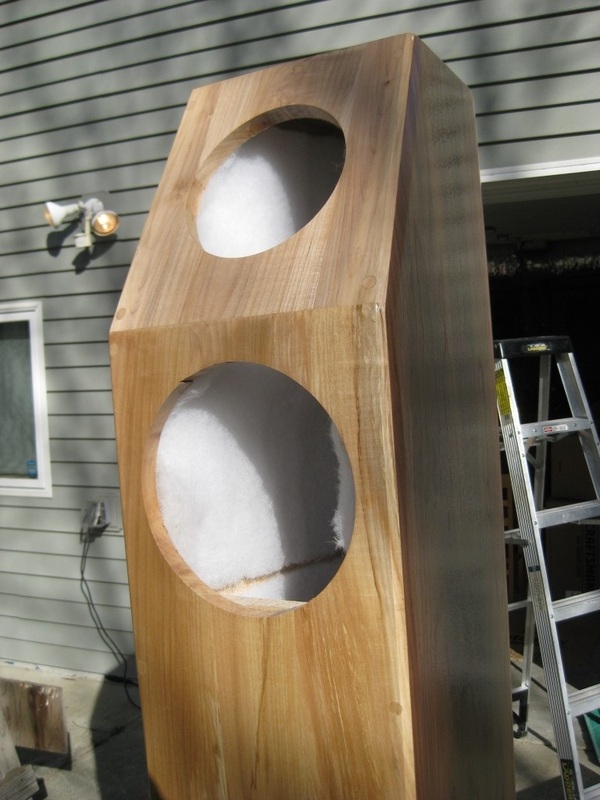
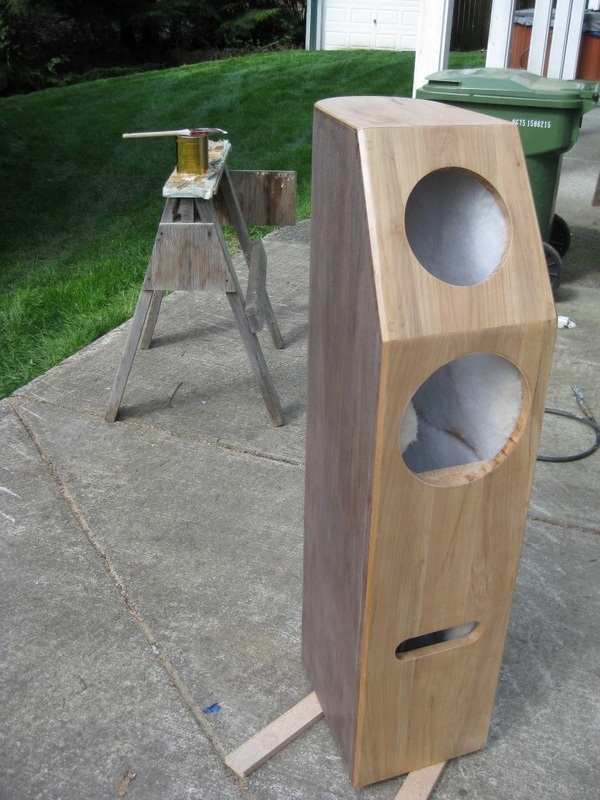
The cabinets are 48" tall with an internal volume of 3.5 cubic feet. The front edge has a 1/2" chamfer while the top and bottoms got 1/4" round overs.
Each cabinet houses 2 full range drivers - a 10" below an 8" driver. Full range drivers mean separate tweeters, midranges and associated crossover networks are not required. The angle of the top speaker baffle brings both drivers into closer time alignment as well as more fully disperse the sound in the high ceiling room where these are going. Time aligning the drivers attempts to align the acoustic centers of the speakers in the vertical plane. Basically, to help the sound from the each driver reach your ears at the same time. I just think the cabinets look totally cool! The cabinet volume and port design probably contribute more to the sound. The area of my port is 14", which is the same area on the cabinets recommended by David at Audio Nirvana, although on his cabinet design, he used 2 round holes to achieve the same area. The volume of my cabinets are 20 percent larger than David's. Each driver is wired individually to its own set of jacks and driven off A/B switches from an amp. This keeps the speakers at 8 ohms but requires 2 pairs of terminals on each cabinet, and 2 pairs of wires to each speaker from the amp. It also makes it easy to run combinations of lower, upper, or both drivers. Shorting the terminals so only 1 pair of wires could be run to each speaker is possible, which will make them 4 ohm (nominal). |

|
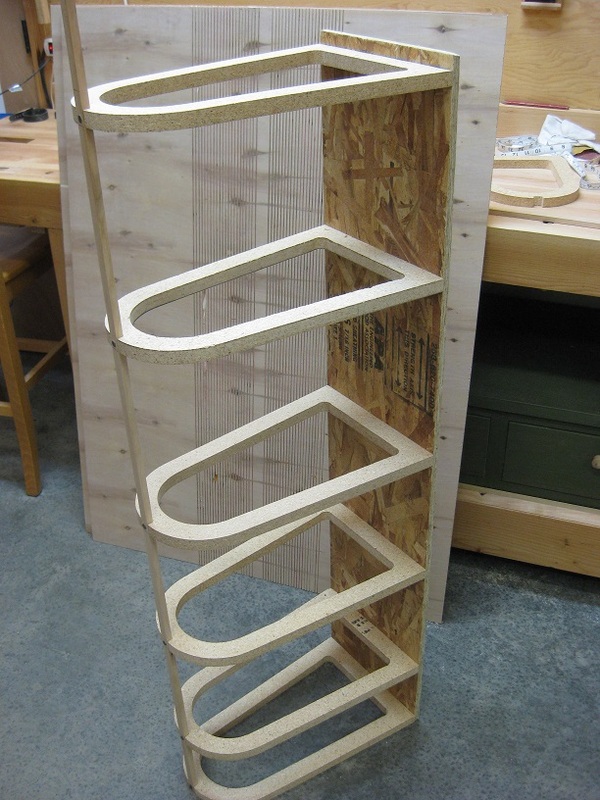
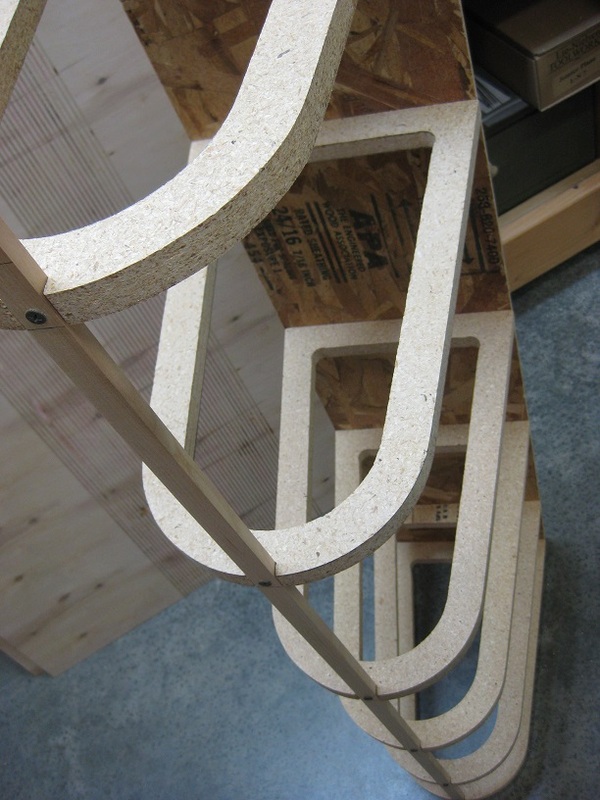
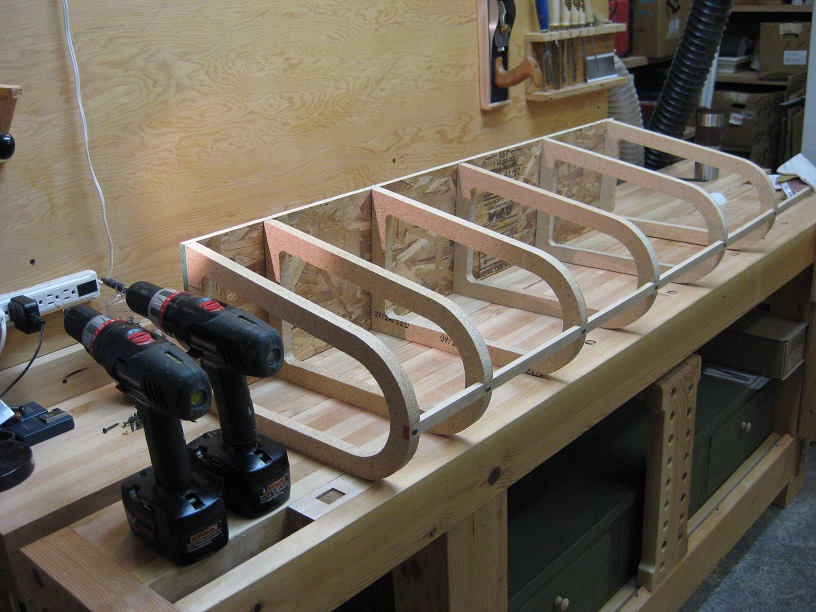
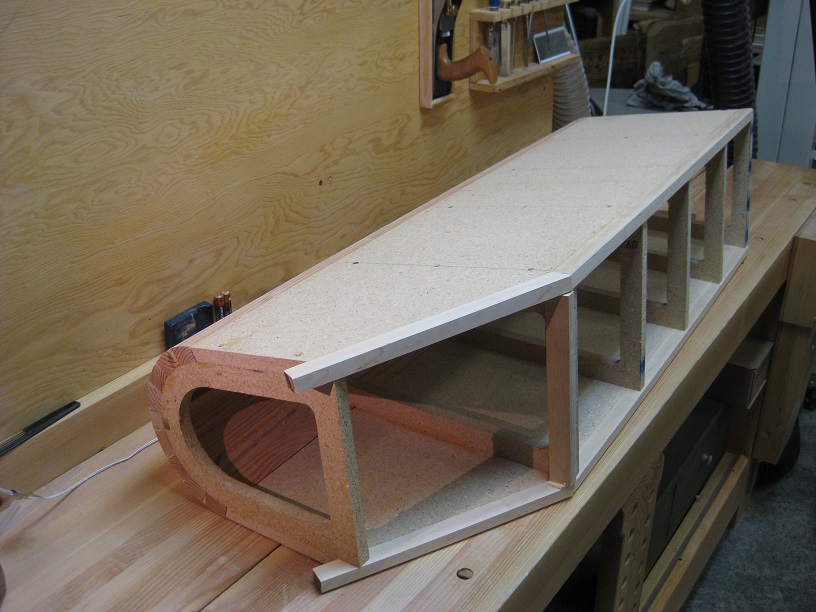
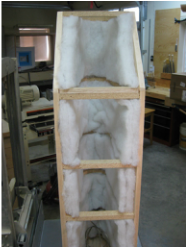
Here's an exploded view of the build. The bracing is ample, yet fairly lightweight. They help form the shell during the build; and reduce low frequency vibrations that affect the sound (the curved back also helps in that respect). The drivers get surface mounted, so a routed shoulder is not required. The port size takes up an area of 14". For placement of the port, I used a golden ratio interval between the center of the 10" driver and the bottom of the cabinet.
The front baffles, top, and bottom are solid maple and just under 1" thick, which is another departure from my other speakers which were either MDF or particle board. The braces and sides are made out of particle board. The sides and back got a laminate of paper backed walnut veneer. |
The components

|
|
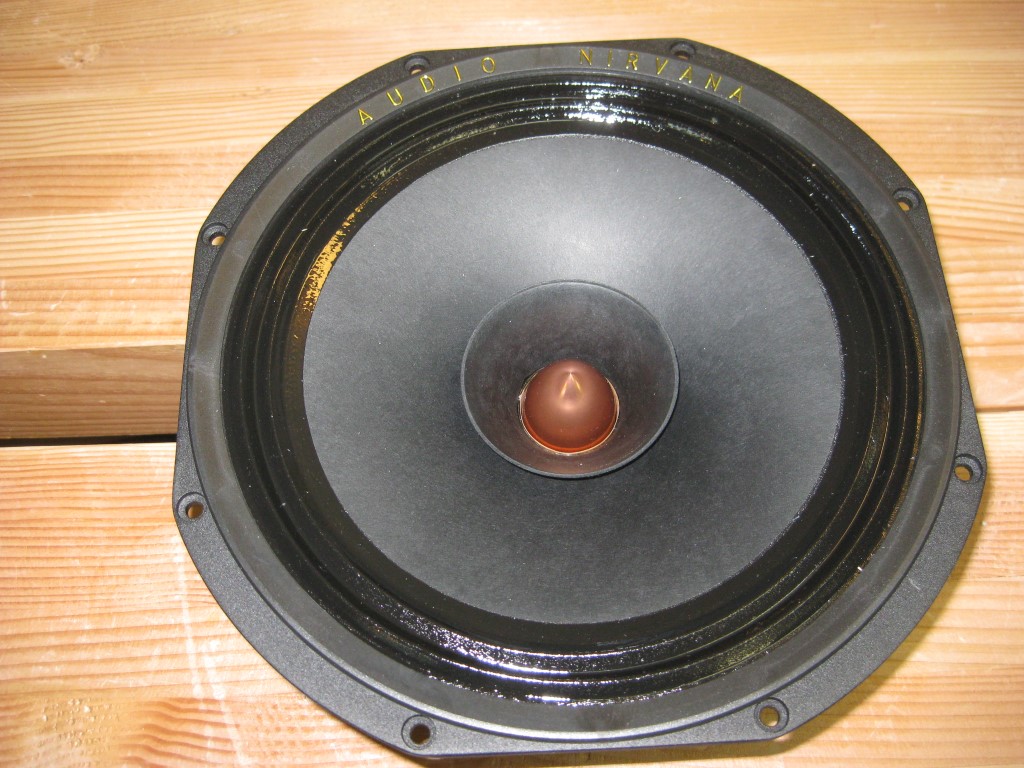
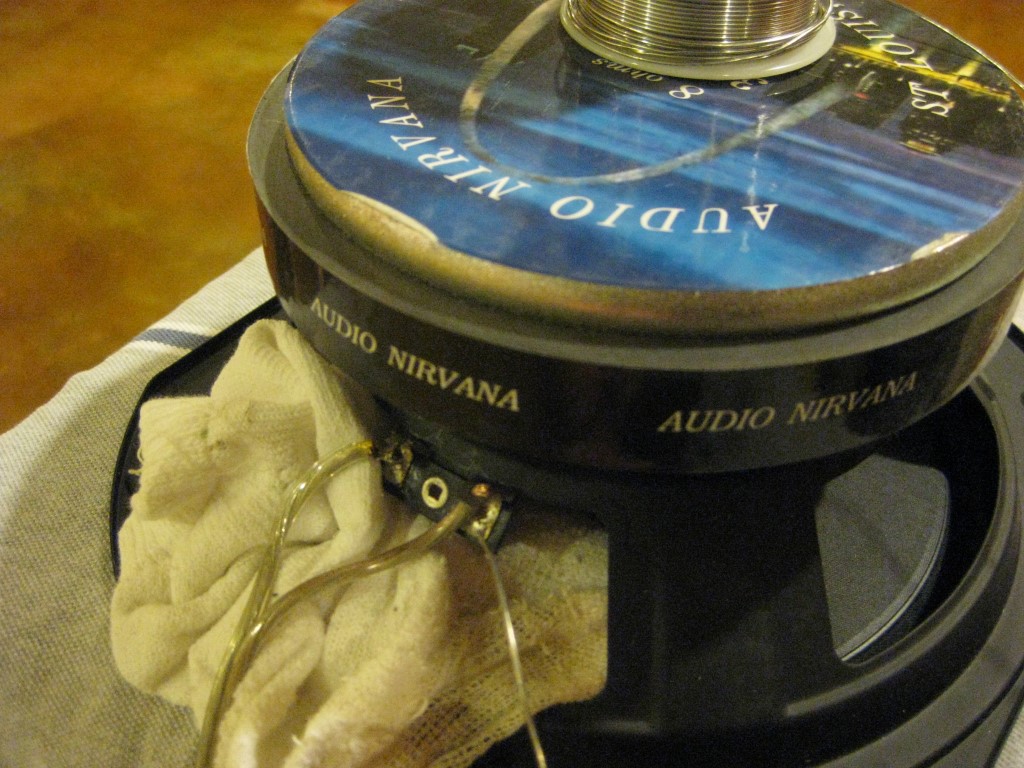
Here are the drivers. 8" (top) on left and 10" (bottom) on right. These are high quality drivers with accordian style suspension.
Audio Nirvana makes a full line of these - I'm pretty sure they make a wider range than anybody else. They also make some nice tube amps. The Audio Nirvana website: www.commonsenseaudio.com. More on Driver Upgrades here. |
The Build
Because of the curved cabinet and non square angles, this was a fairly challenging build. There are a few different options on how to form the curved shell. One method is to glue up thin strips around the curve. Another is to steam bend 1/4" plywood (or other wood) and build up laminates. Yet another way is to laminate pieces of 1/4" plywood that are kerf cut to allow an easy bend around the brace curve. There's also such a thing called "bendable plywood", but it is hard to find and fairly expensive. I chose to try the kerf cut plywood method first...
Making the braces
Brace stock for 1 cabinet.
|
Laying out the shape.
|
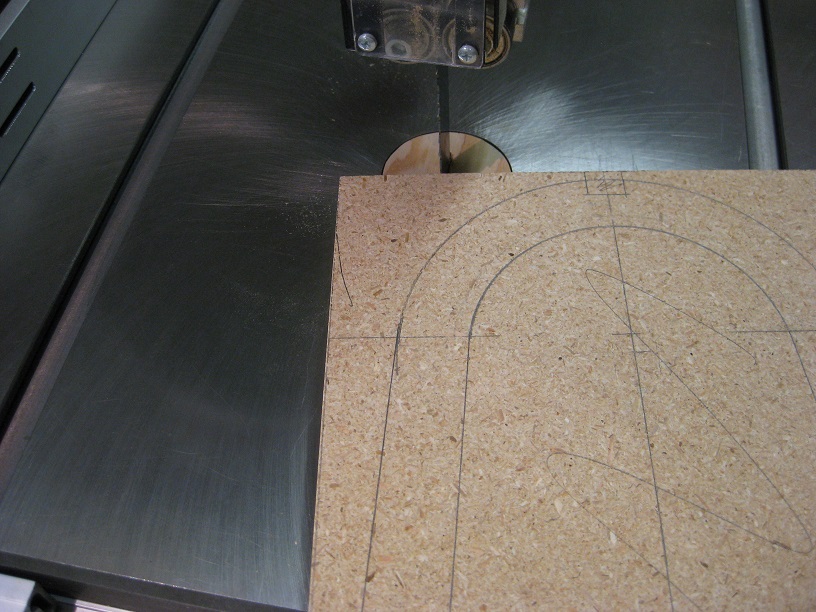
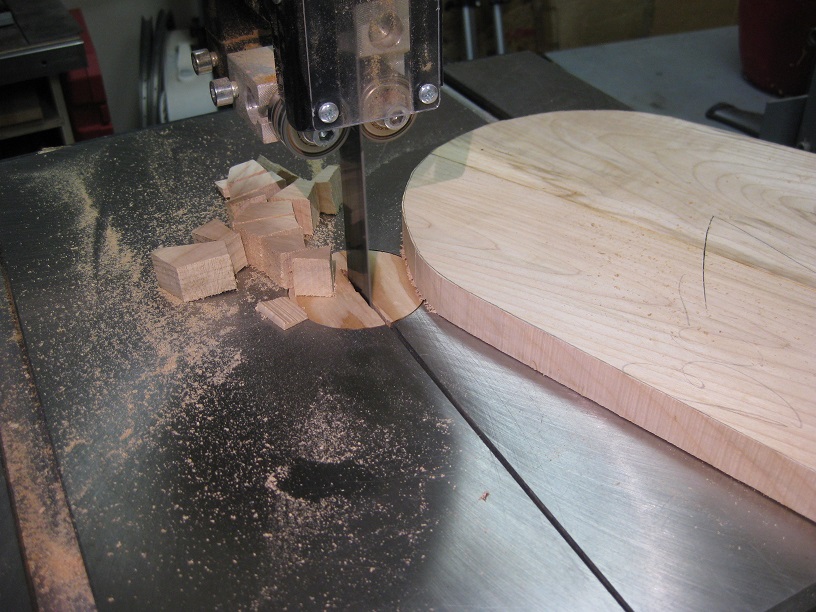
Rough cut the outside on the bandsaw.
|
I started fabricating the braces by cutting up some particle board into enough stock for one speaker. I drew the shape on the boards and cut them out on the bandsaw.
|
Drilling hole so I can use the scroll saw to remove the center sections.
|

Scroll sawing.
|
On the inside of each brace, I drilled a hole and removed excess material with a scroll saw, being careful to stay slightly inside my line.
|
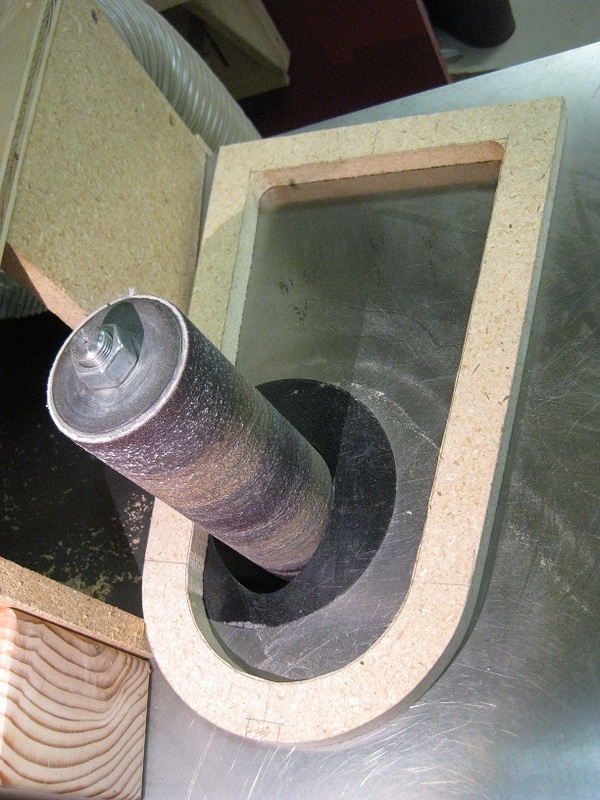
Refining the inside cutout on the oscillating spindle sander. The outer edge was done on the edge sander.
|
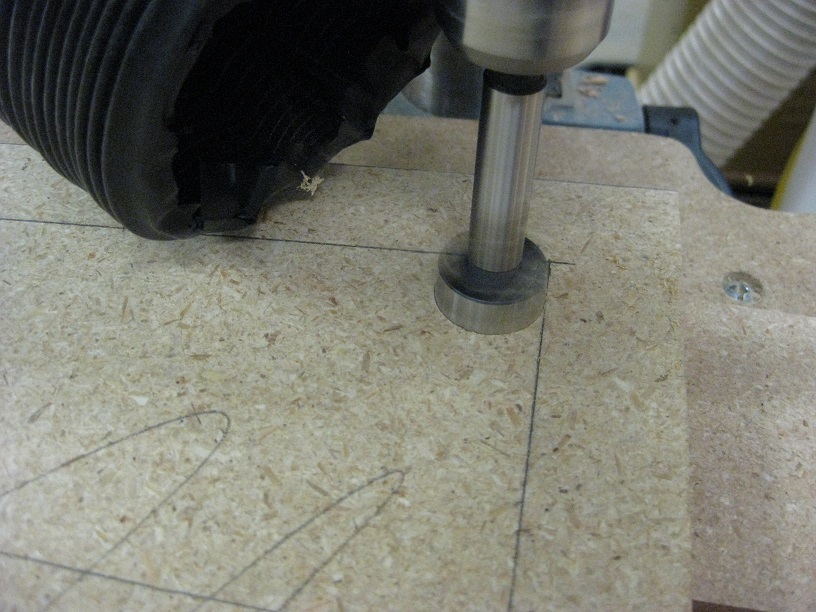
The top sanded piece is being used as the template for all of the others. Using double sided tape, it gets adhered to each of the unsanded braces.
|
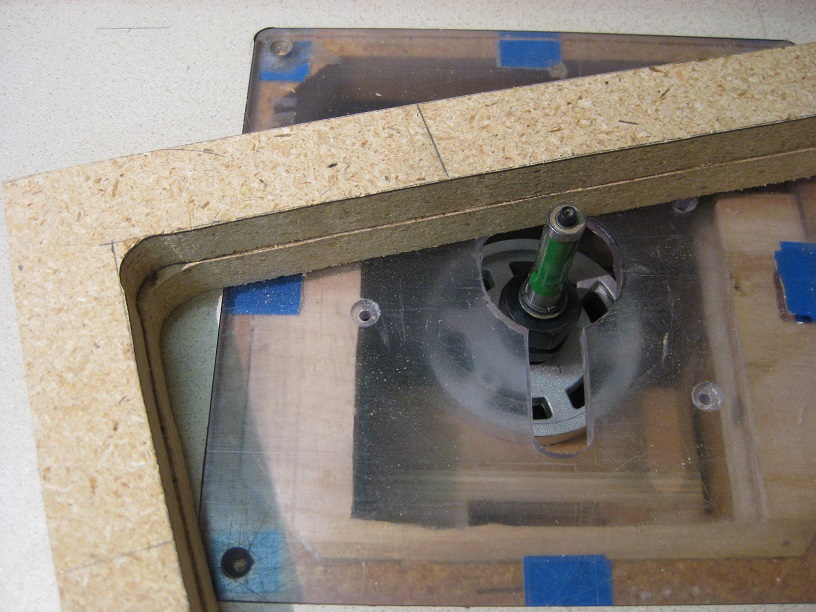
A template bit is then used on the router table to make each brace the exact same size.
|
Then, I refined one piece to a nice shape on the spindle and edge sanders.
The rest of the pieces were not sanded. Using double sided carpet tape, I attached my nice, sanded piece to each of the rough cut pieces. Via a template bit on my router table, each piece was copied to match the sanded piece. Using this method, all of the braces were identical. |
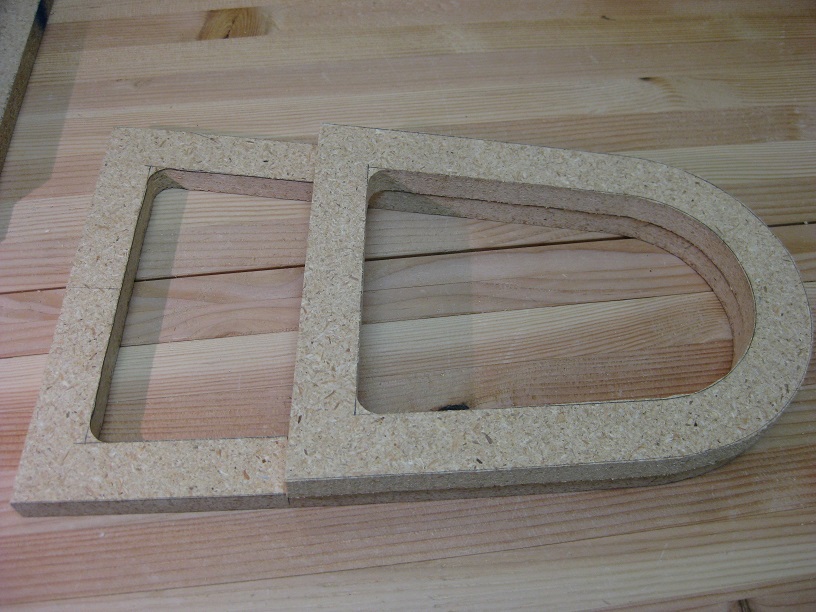
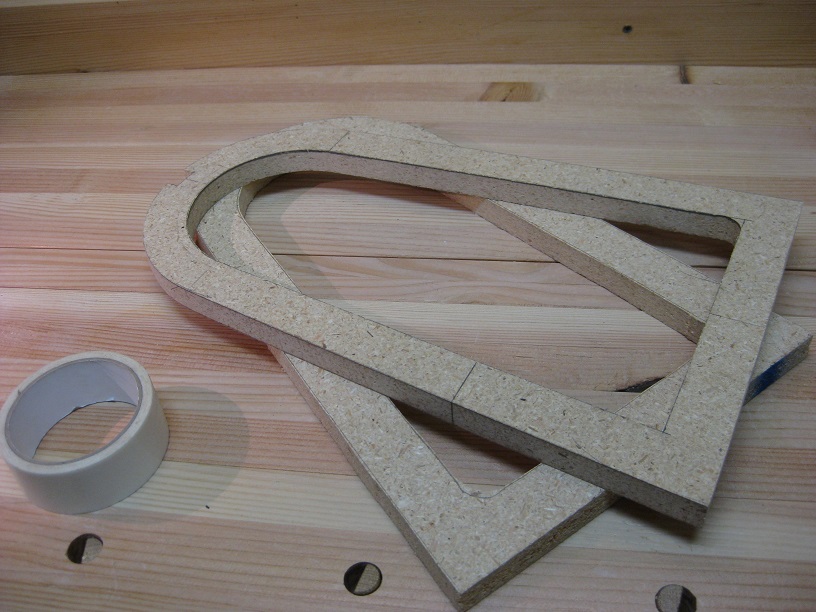
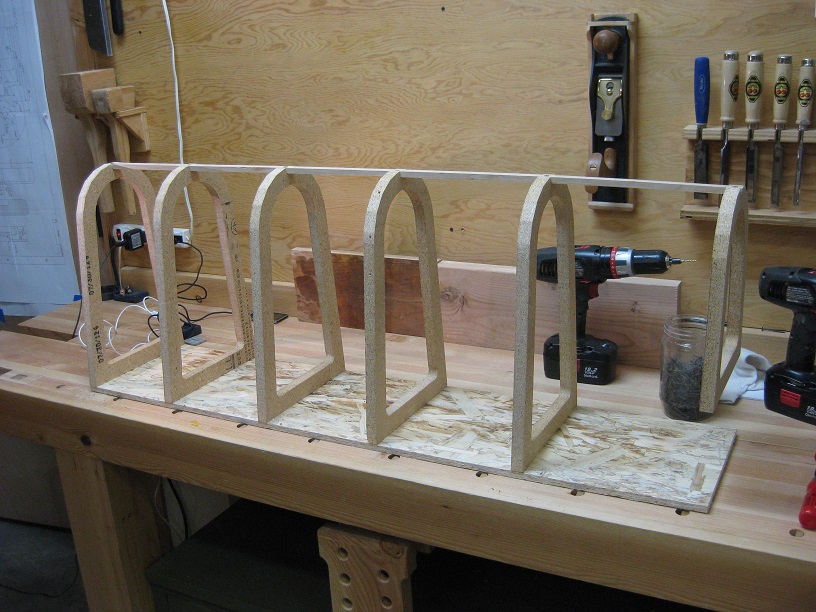
The top brace is a little smaller.
|
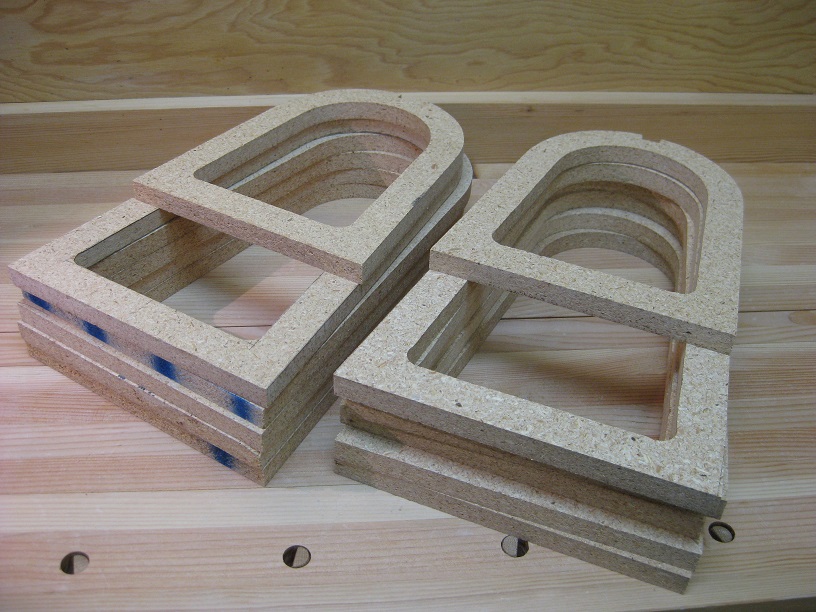
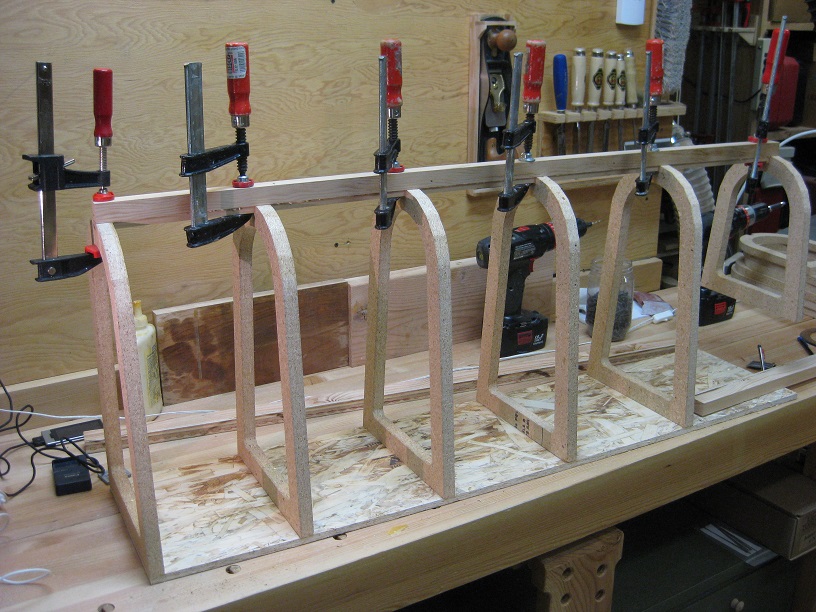
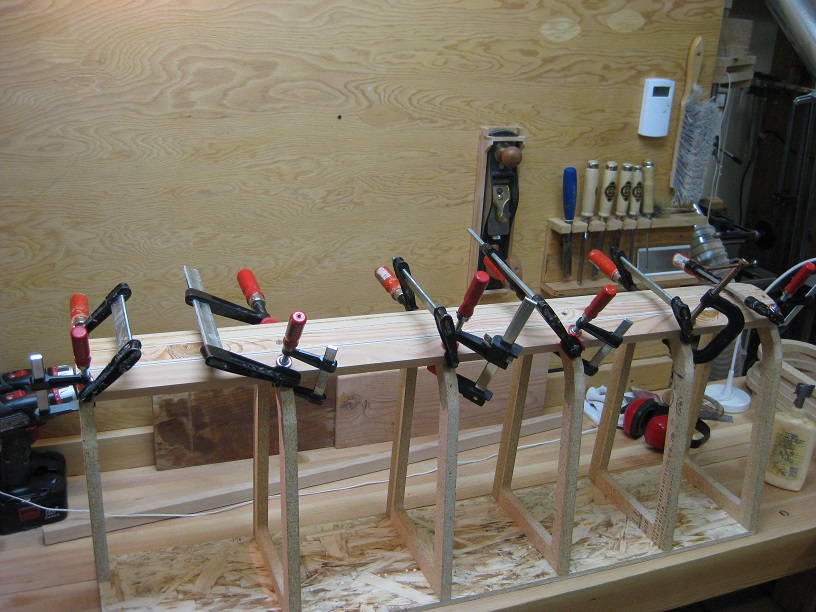
The braces for both speakers are complete.
|
The top brace is shorter than the others, but the curve and aft section are identical to the other braces. Carefully taping those shorter braces to my "template" brace, I was able to route them to size.
The whole process was repeated one more time to get enough braces for both speakers. |
Sides and back
This is a form that is used to wrap plywood around to form a curve.
Before applying the 1/4" plywood, it's first kerf cut, then wetted out. Heat or steam would help even more, but I didn't go there...
|
|
Once the braces were complete, it was time to start on the sides and curved back.
The braces were attached to a temporary baffle - which was a piece of chipboard scrap. Spacing between braces wasn't too important because this form is just being used to build up the back. As laminations are wrapped around the form, they won't be permanently attached. This way, I would be able to use the same form for both speakers. After the main braces were on the temporary baffle, the rear vertical brace was attached, which ensured each brace is held perpendicular to the front. Next, a couple pieces of 1/4" plywood were cut to size so they could be wrapped around the form. The plywood was oriented so the main plys are vertical, which will make it easier to bend. This plywood has a very thin outer veneer. The layer just under that is the thickest, so I use it to set my orientation. Then, a series of kerfs, 1/4" apart were cut into the plywood where it will be bent around the curve. |
Ready for the first ply.
|
I was hoping for an even curve, but you can definitely see plenty of edges on it here...
|

in this pic it doesn't look too bad, but there are some gaps between the plywood and braces.
|
Using sheetrock screws, the plywood was attached to the form and worked around the curve.
|
It was difficult to install the plywood and the curve didn't appear very uniform, but that wasn't my main concern. Each speaker would require 3 plys with a layer of glue between them. Thinking about doing this 5 more times (for 2 speakers) and dealing with the glue, I realized it wasn't going to work. There was also a concern about not compressing subsequent laminates tight enough which could lead to other problems. I had to come up with another plan.
Sides/back attempt 2
After realizing the plywood bending wouldn't work for me, I decided to use slats to form the curve.
Braces for one speaker ready for the center slat. In this pic, you can see the vertical brace (thin strip on top). That piece wasn't necessary with this method, but I just left it on as it posed no issues and fills the gap cut for it on the braces.
|
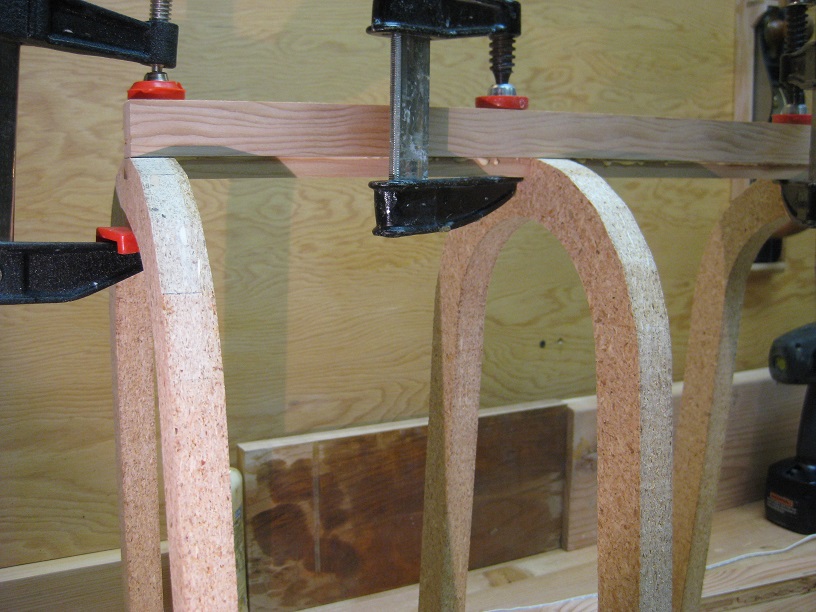
The first center slat was easy to clamp.
Starting with the center slat.
|
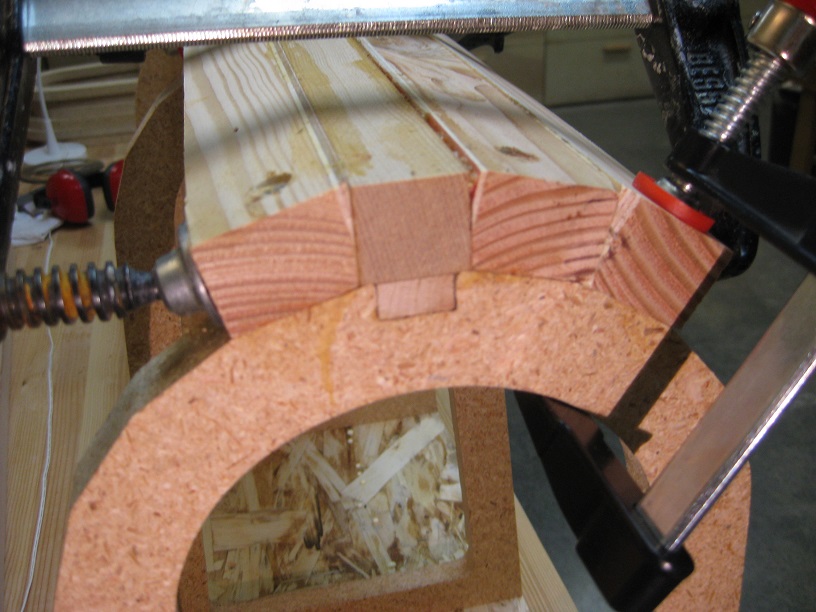
Each cabinet got a flat center slat with 8 angled slats radiating from it to form the curve (4 on each side of the center slat). Each slat only required 1 side to have a non 90 degree angle and are 15/16" thick by about 1-1/4" wide. Based on the stock I had on hand, it was easiest to laminate some boards to be 1-1/4" thick and rip the 15/16" slats from those. To do so, I glued a piece of 1/4" plywood to a 1" thick fir board.
The braces were also slightly modified to have a flat spot for the slats to sit on. |
|
You can see the flat spots on the visible brace on the left side of this pic. In this clamping scheme, the glue for the slat on the left is already cured.
|
This glue up was relatively straightforward, compared to having to deal with plywood laminates.
|
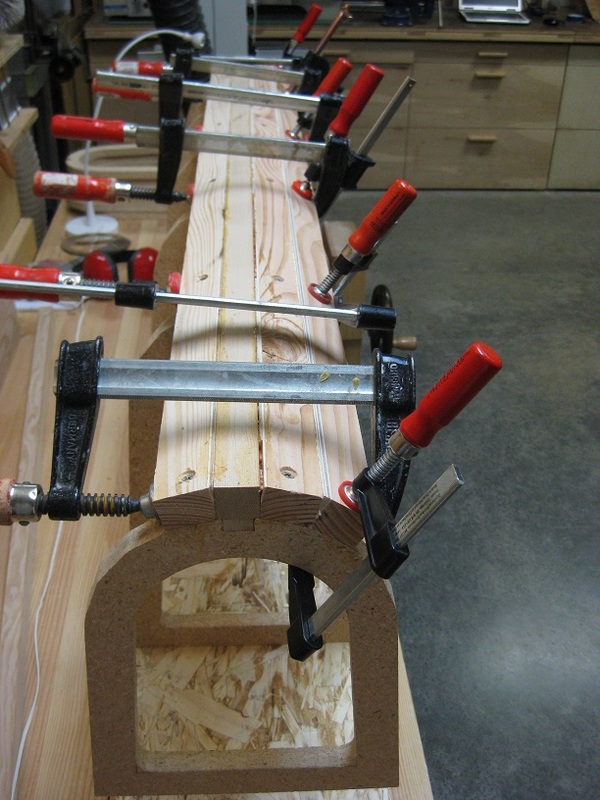
First, the center slat was glued and clamped on the braces. The slats adjacent to that were glued and screwed. Those screws were going to have to come out later to fair out the curve. On subsequent slats, I realized that gluing and clamping was sufficient - no need for screws.
A protractor was used for each new slat to get the angle required for ripping on the table saw. |
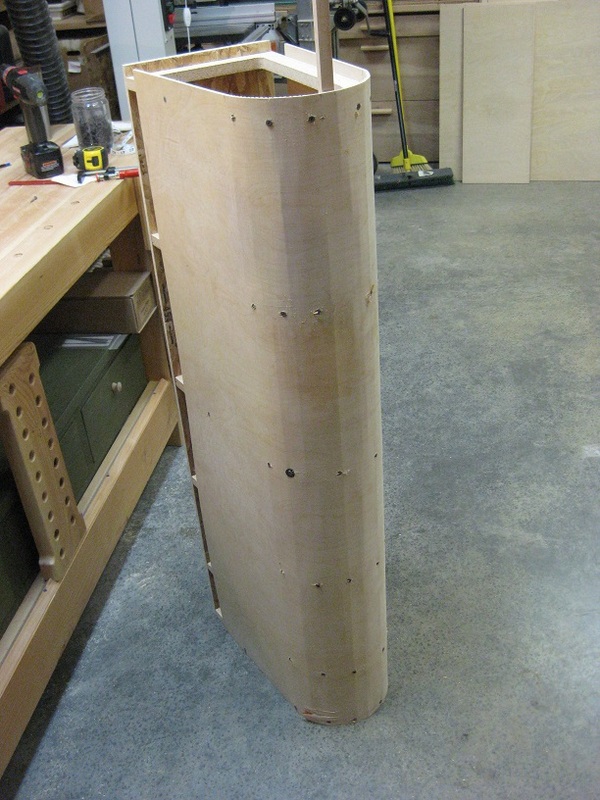
The back is on... Now, the sides

|
|
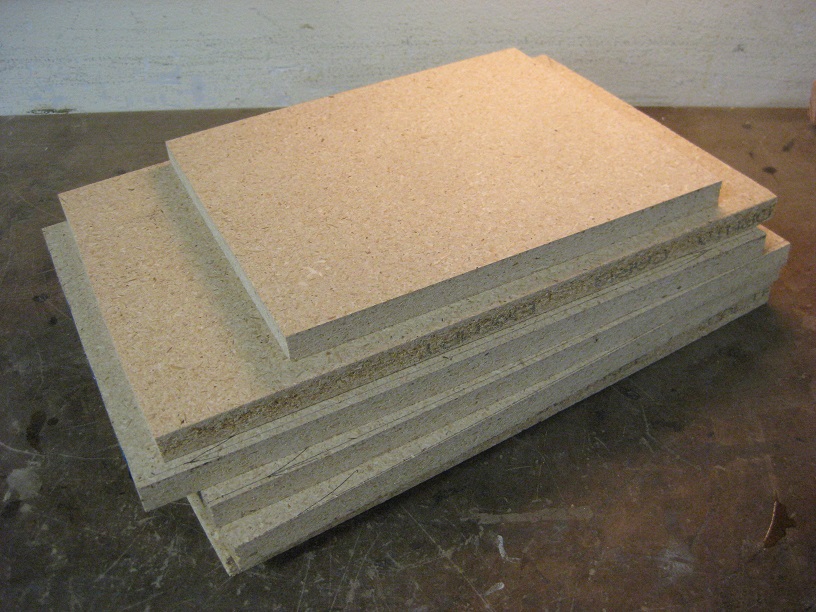
Compared to the back, the sides were simple. A piece of particle board left over from the 'Speakers in a day" project was used. After cutting them to size, they were attached with glue and screws. These screws are permanent and were countersunk so the holes could be filled and leveled prior to the final veneer.
The sides were left a little short to the front for a hardwood edge. In hindsight, I should have made the sides even with the front. These speakers are going to end up getting 3/4" thick hardwood front baffles, so I probably didn't need the hardwood edge on the sides - they certainly don't hurt anything though. |
Back to the back...
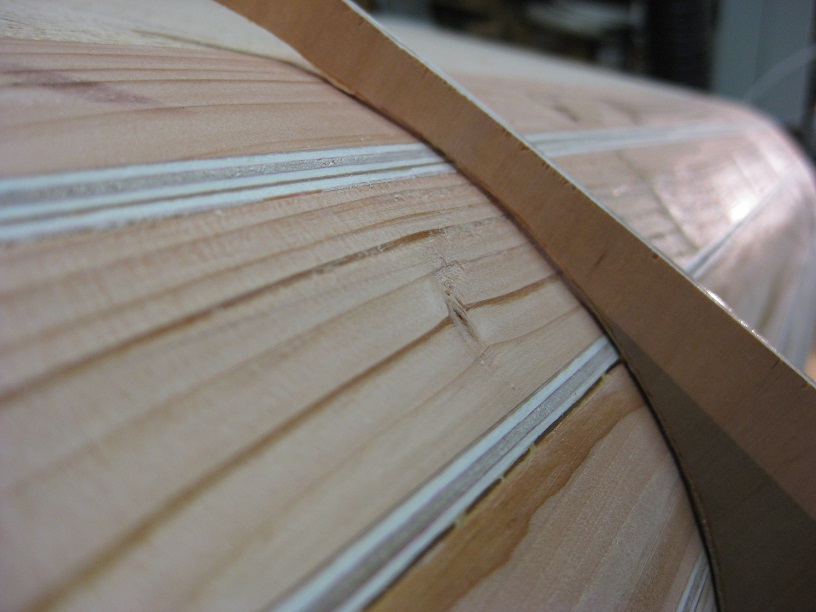
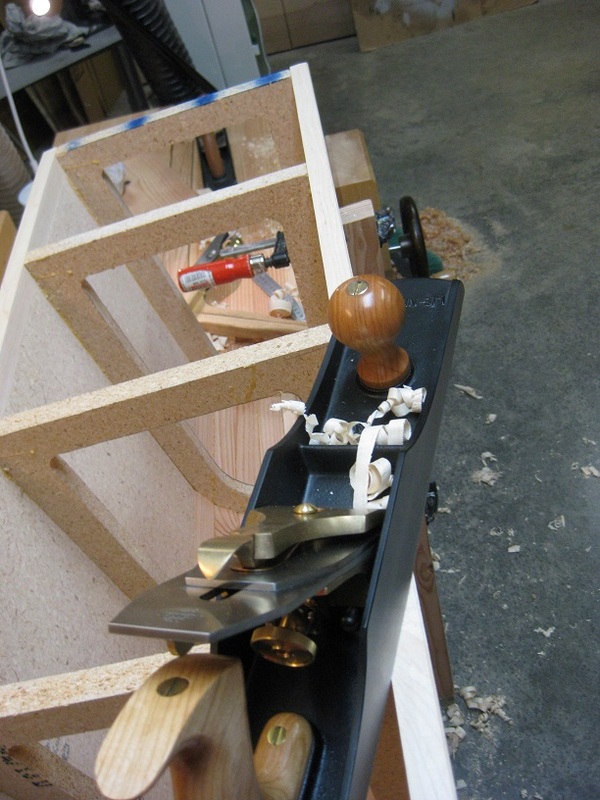
The slats were intentionally cut thicker than the sides so I could plane them down and get a nice fair curve to them.
|
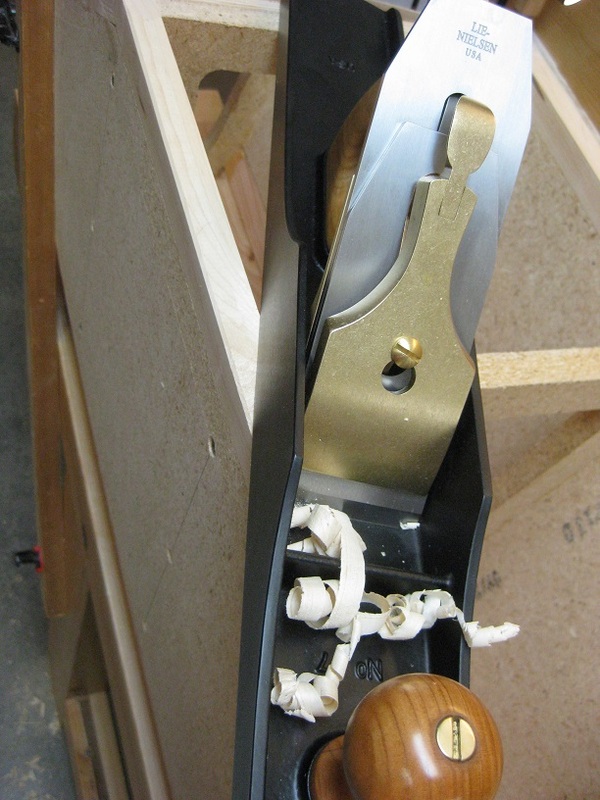
These were my tools of choice to work the curve down - jack and block planes, and my roubo bench.
|
I made a curved profile guide out of a scrap and a used backlight to help plane down to a nice curve.
|
At this point the backs are a little rough - they need to be rounded somewhat.
I honed up a couple nice hand planes, made a curved gauge and used 'em to get a decent curve. This was a fun task - way better than dealing with lots of glue and plywood laminates! |
Hardwood edges
Hardwood edges glued on.
|
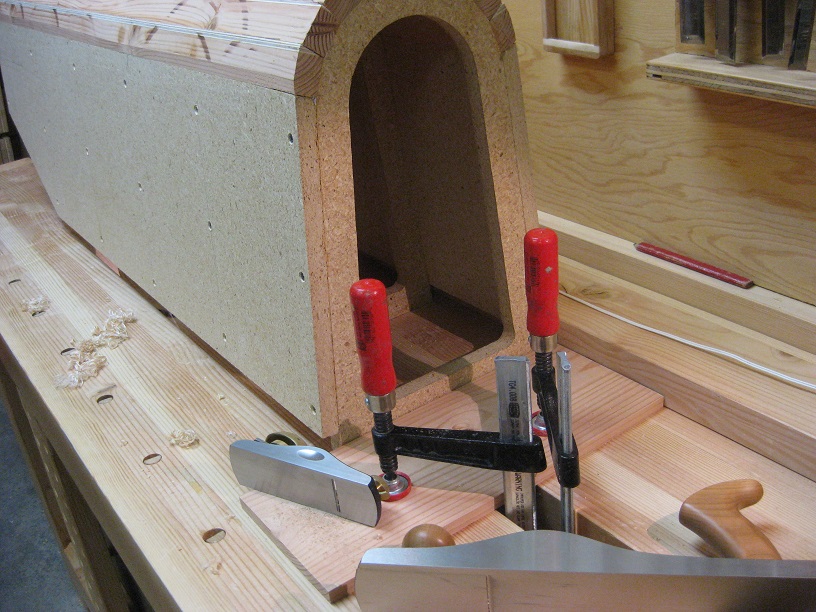
Planing the edges true to the braces.
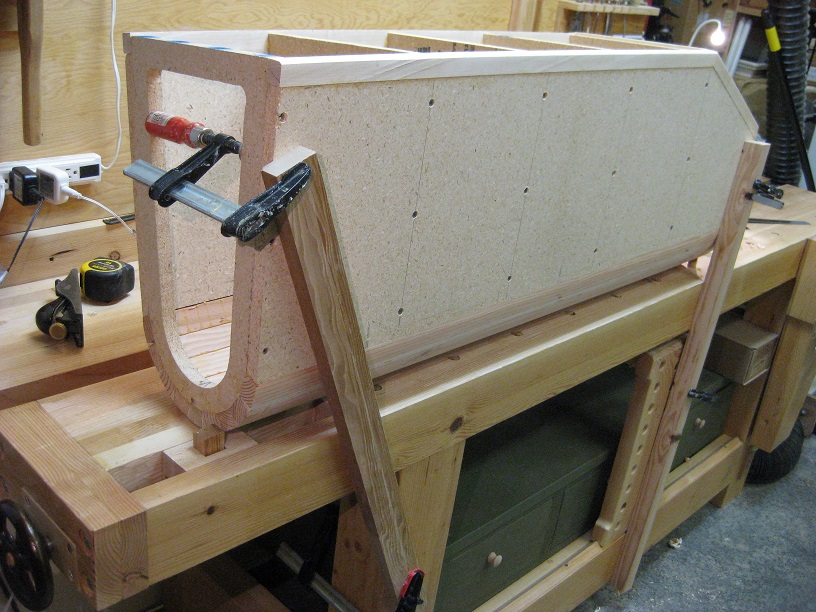
One of my work holding techniques on the bench. I used the dogsled vise often during the build...
|
The front baffles, tops and bottoms are solid maple. To make the sides even with the fronts, maple edges were glued on and planed flush with the braces and sides - as mentioned, I should have just made the sides even with the front.
The jack plane worked great for this task. |
Bottoms
Gluing and screwing the bottoms on.
|
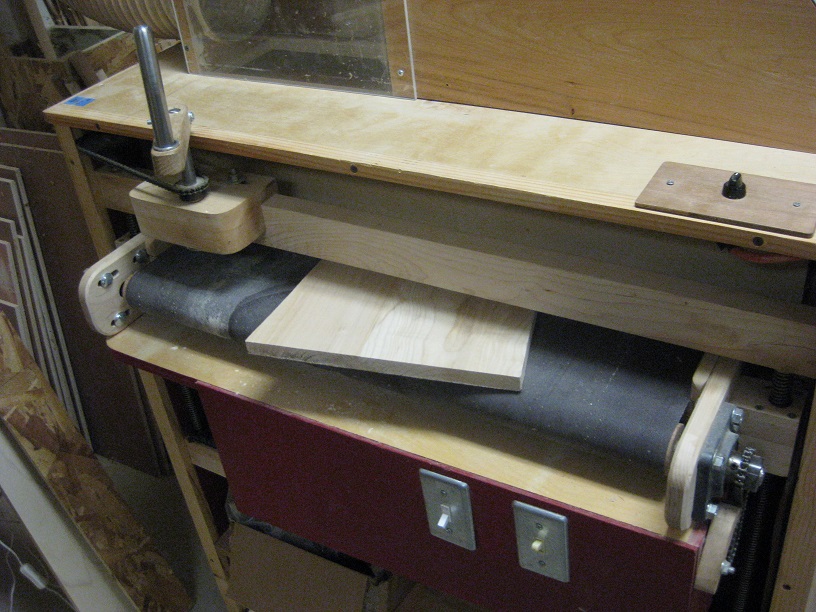
Sanding via the Shigshop thickness sander ;)
|
A bunch of panels were cut and glued up - enough for the bottoms, tops, and baffles.
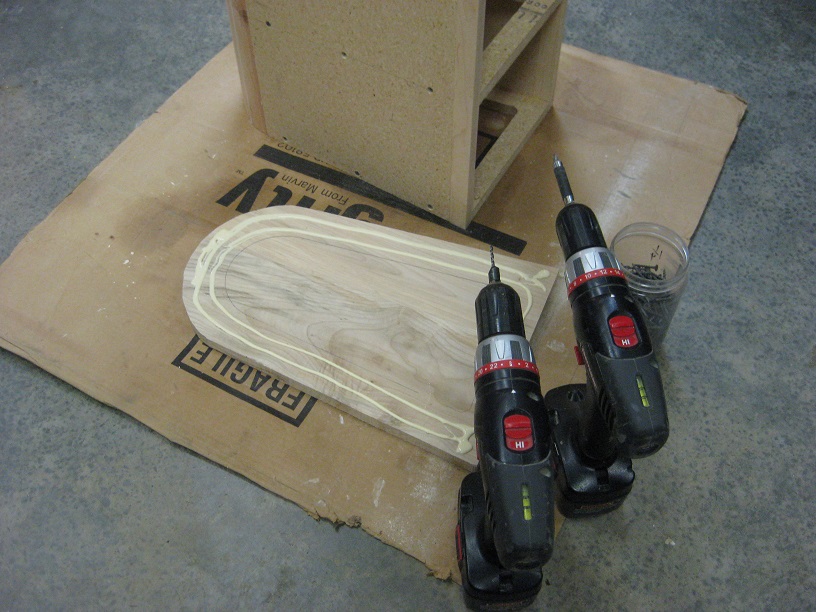
For the bottoms, the final shape was determined by setting the speakers on the rough stock, tracing with a pencil, then cutting them out on the bandsaw. Rough sanding was done on the thickness sander with 120 grit. I was able to glue the bottoms on using screws from the inside through the bottom brace. |
Terminals and insulation
Before the baffles and top went on, the insides had to be finished up. This meant wire terminals and sound insulation need to be installed.
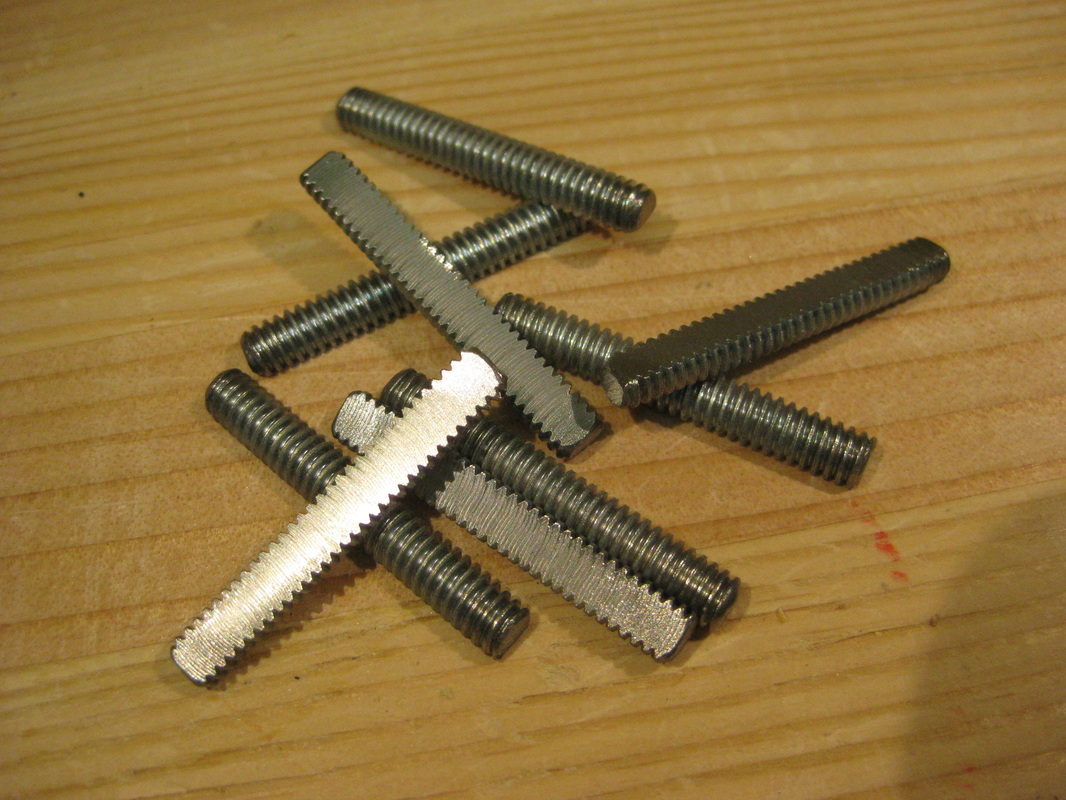
For terminals, 1/4-20 allthread rod was cut to length and milled flat on one side.
|
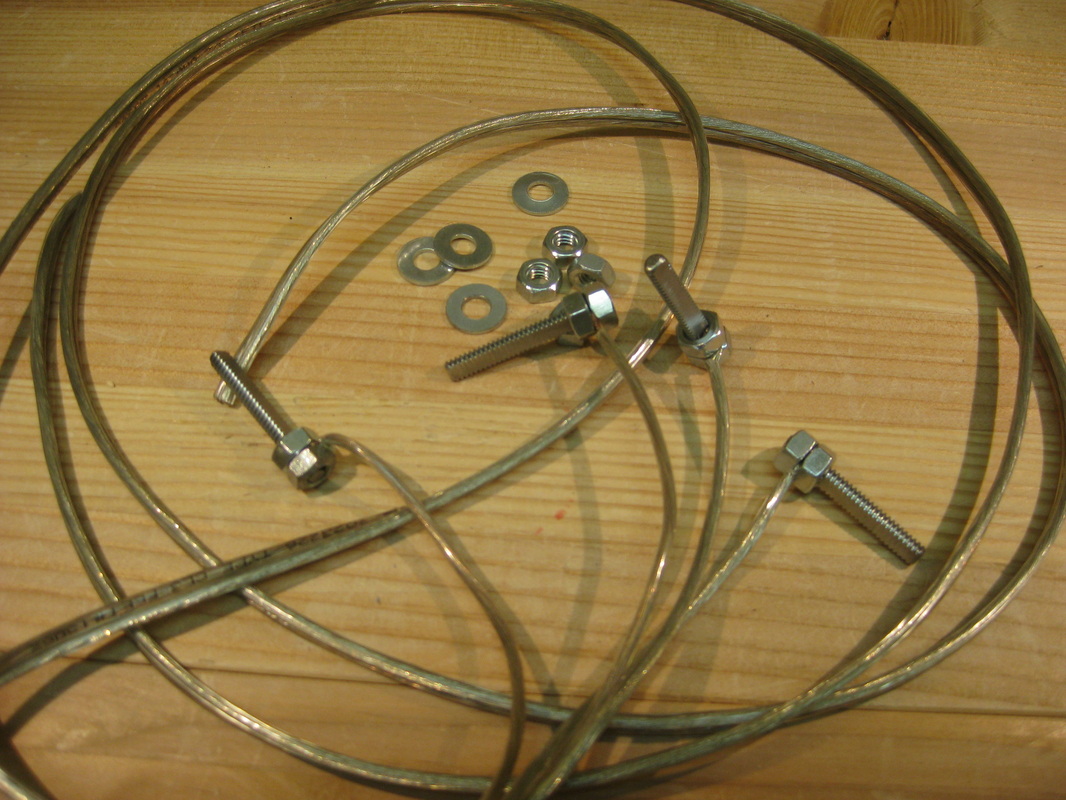
Wires, nuts, and washers complete the terminals.
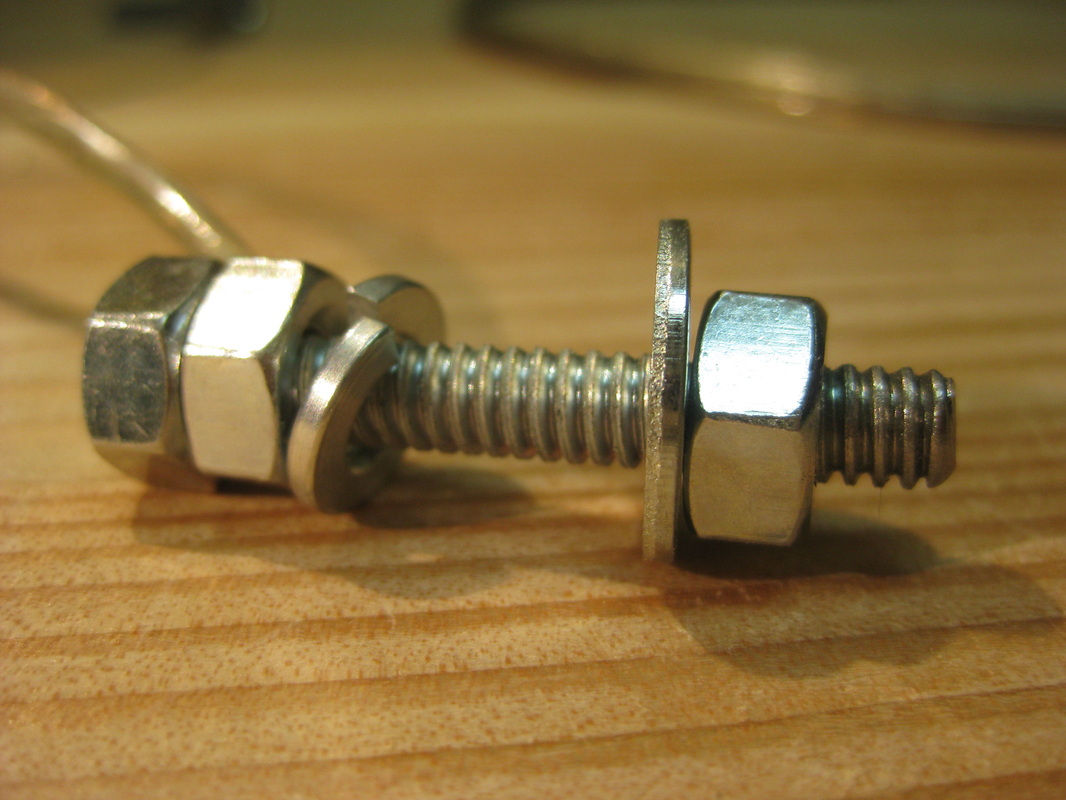
Here's one of the terminals. This pic shows the washer/nut orientation. The flat side of the threaded rod is on the other side in this pic.
|
1/4-20 allthread, nuts, washers, and speaker wire were used for the terminals. First, I milled a flat section onto the allthread and cut it to length. The flats will make it easier to attach the speaker wires because when a nut is screwed on, a gap is formed between the nut and screw. It's kind of like having a hole in the screw for the wire, but milling the flat was easier for me to do. Some wire was cut to length and attached to the terminals via 2 pinch nuts.
|
|
Poly insulation was cut into strips and installed with adhesive spray. The poly was recommended by David, from Audio Nirvana.
|
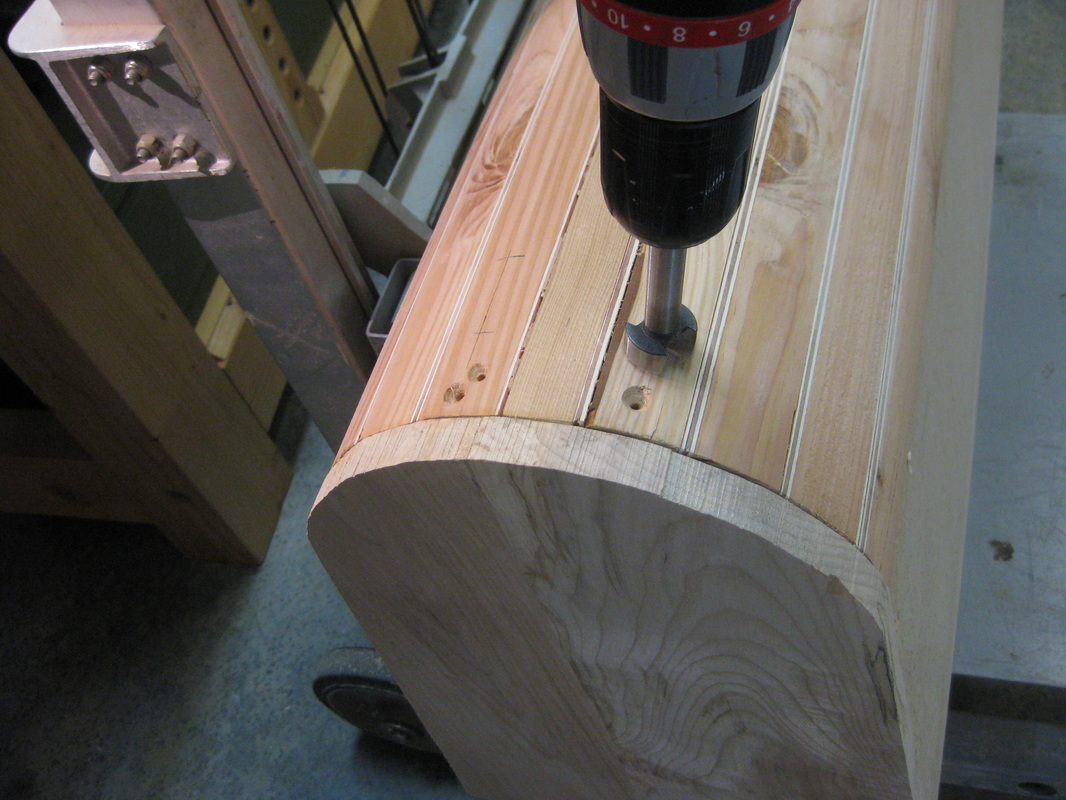
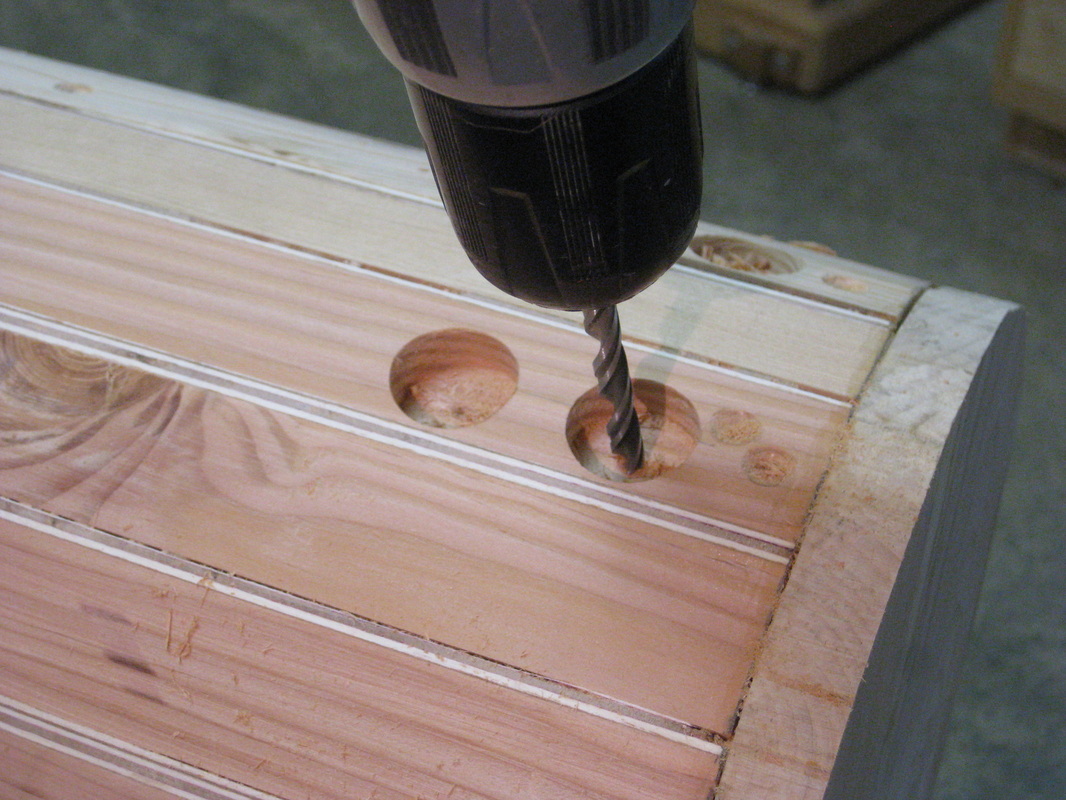
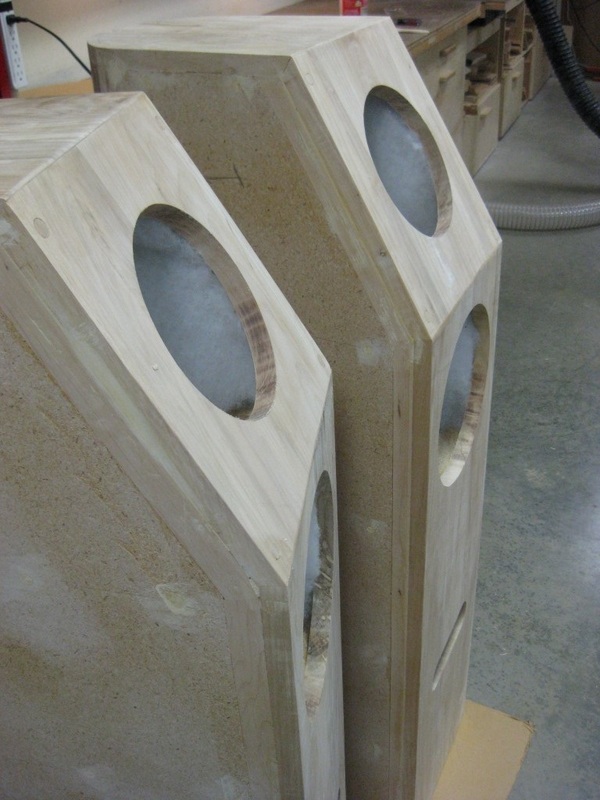
4 terminal holes were then countersunk and drilled into each back. Each cabinet gets 2 full range drivers. Having 4 terminals will enable me to bi-amp the speakers in such a way that each driver can be separately amped.
The terminals can always be shorted if I only want to run 1 pair of wires to each speaker. Spray adhesive was used to attach the poly insulation. |
Front baffles, tops, and some prep for finish, and veneer
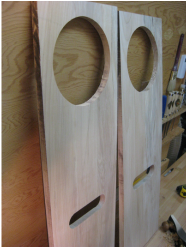
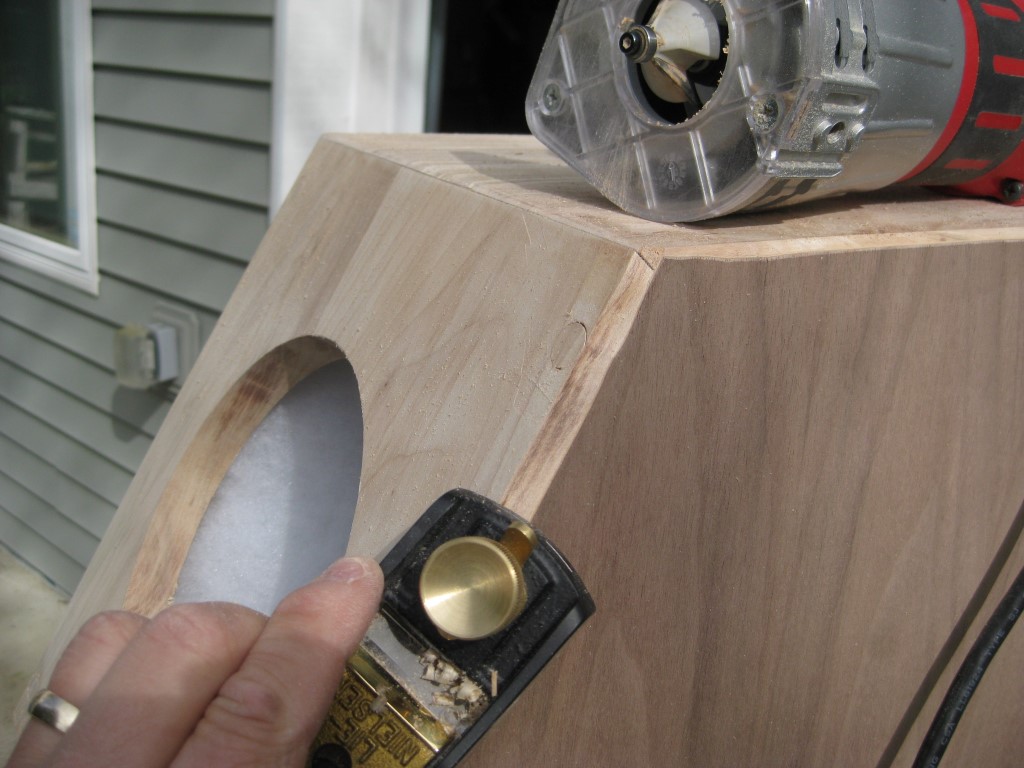
I cut the holes out via the drill press, a scroll saw, saber (jig) saw, and spindle sander. A jig saw was used to finish the speaker holes because the panels were a little too big for the throat on my scroll saw. A fly cutter on the drill press could have been used, but I just don't like using those on my little press.
|
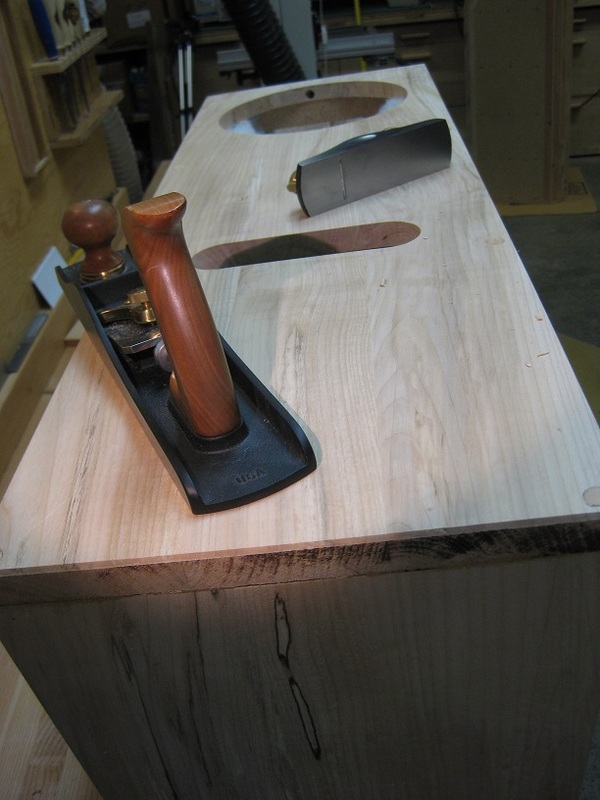
Beveling the top edge of the main baffle with the jack plane. All I did here was draw a line parallel to the edge about 3/16" down and planed at an angle until the front top edge and line were even.
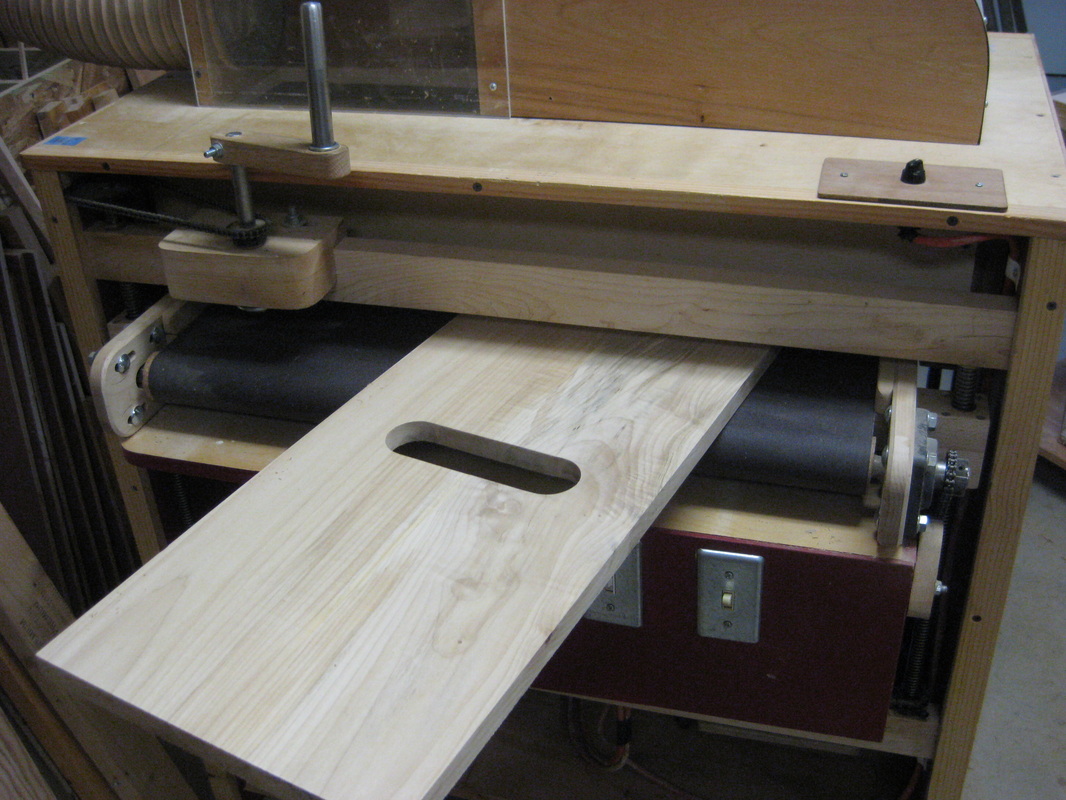
Sanding on the thickness sander.
|
Each speaker has a lower and upper front baffle. The lower ones get a 10 inch speaker and a port. Because the upper baffle is at an angle, I beveled the edge on the lower to accept another bevel on the top baffle. Then, I ran them through the thickness sander. Panels like this are very nice in the sander. Used with a powerful dust collector, you get an almost dust free environment for an otherwise very messy operation. A nice flat evenly sanded panel is the result. It's much less physical work than just using hand planes and/or palm sanders.
|
They are starting to look like speakers!
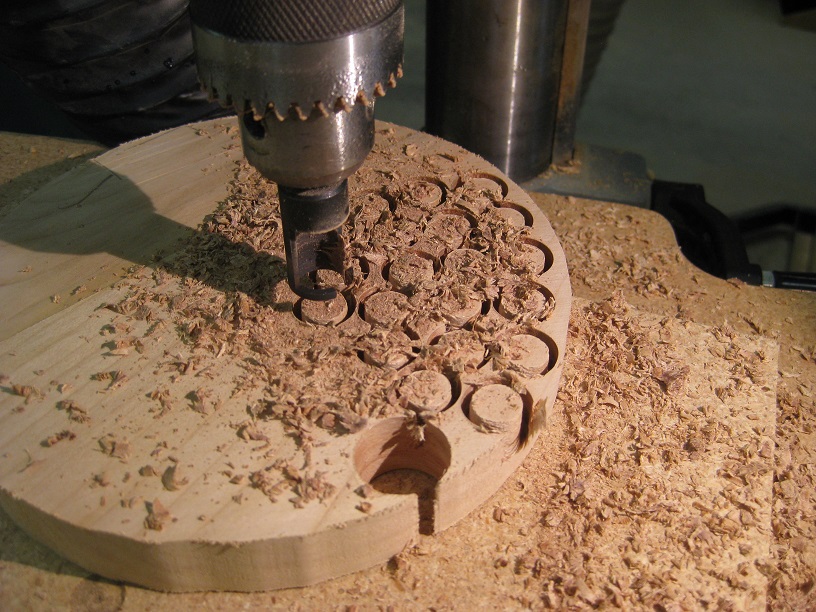
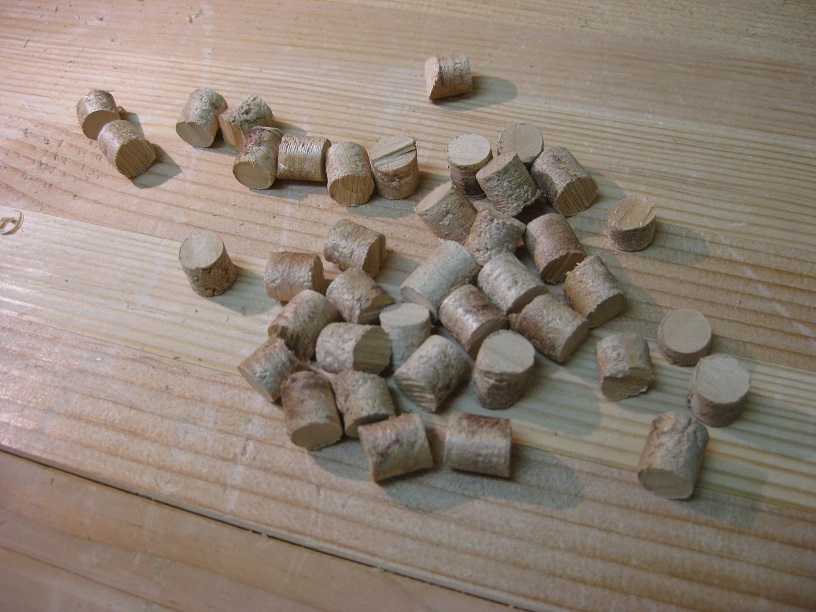
Cutting 1/2" plugs from a speaker hole scrap.
|

Making 7/16" countersinks 1/2".
|
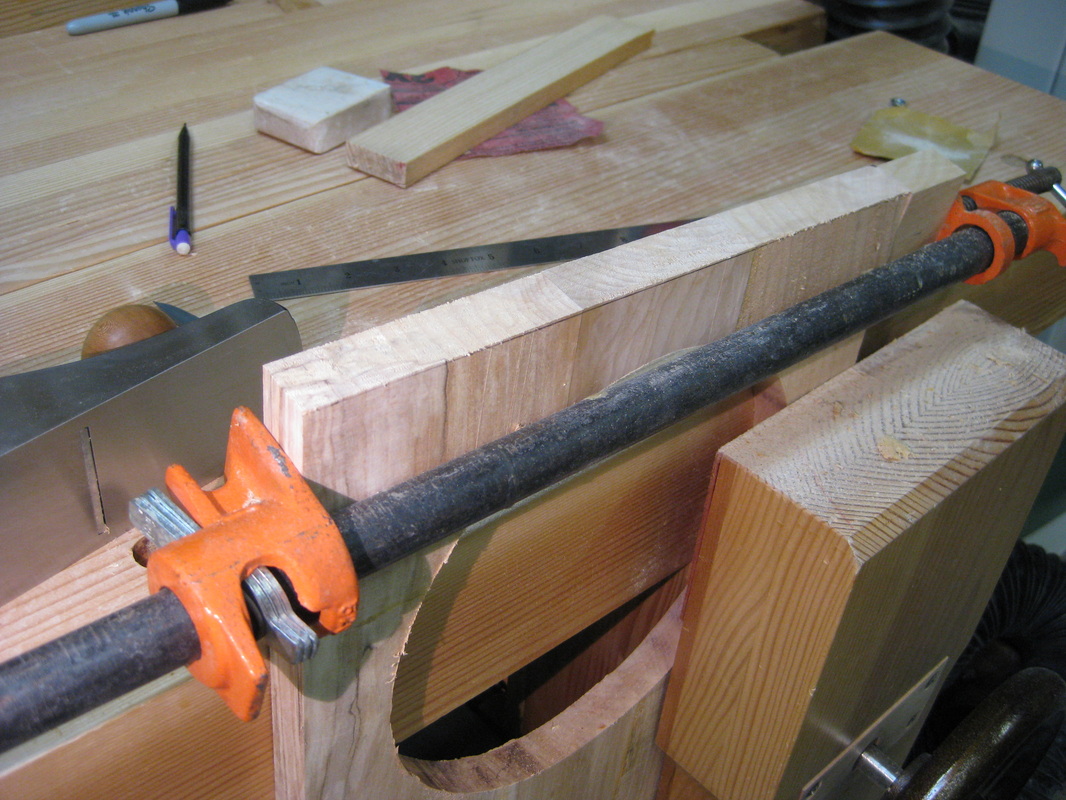
The two front baffle pieces were beveled on their mating edges to make nice mitered joints. All of the panels were glued and clamped with countersunk screws.
The countersunk holes got plugged. The countersink bit I used had a diameter of 7/16" but the closest plug cutter I had was 1/2". So as not to have to buy a 7/16" plug cutter which would have held me up, I decided to make the countersinks 1/2". To do that, I extracted each screw and used a board with a 1/2" hole in it positioned over each original countersink to guide a 1/2" forstner bit to create a new countersink that would now match plugs that I could make with my plug cutter. |
Leveling the plugs.
|
|
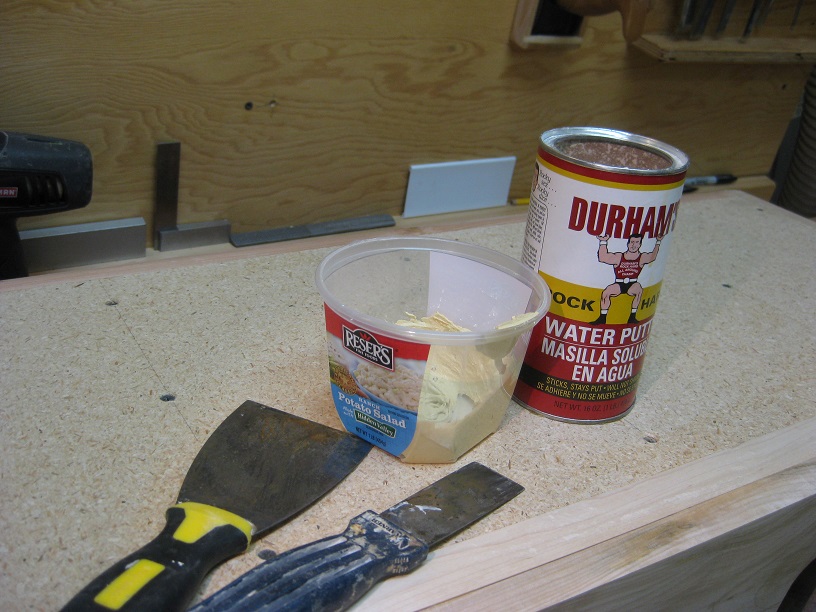
A shot after the plugs and filler added and smoothed.
|
After all of the plugs were glued in, they were rough leveled with the jack and finished with the block planes. Screw holes on the sides were then filled with a water based filler.
|
Contact cement is applied to both sides and allowed to cure to a tack before attaching.
|
One down, one to go.
|

Here, you can see a small bubble that had to be repaired. This one was on an edge.
Fixing that bubble...
|
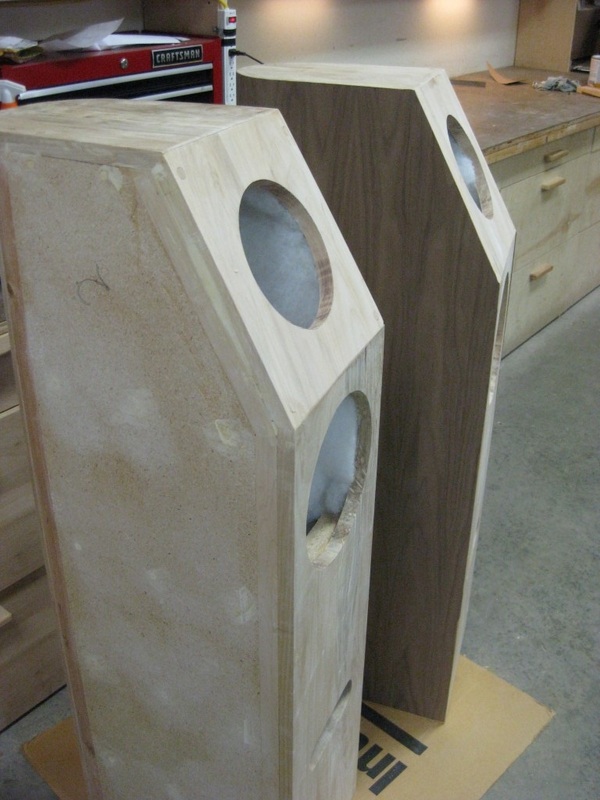
Paper backed walnut veneer was cut to size and attached using contact cement. It's inevitable for a few spots to bubble up. I use an exacto knife and yellow glue to get these spots fixed. For the bubble in the 3rd picture, I removed a very thin wedge shaped slit, then glued it down.
|
Finish
The bevel on front is first roughed with a router and finished with a block plane.
|
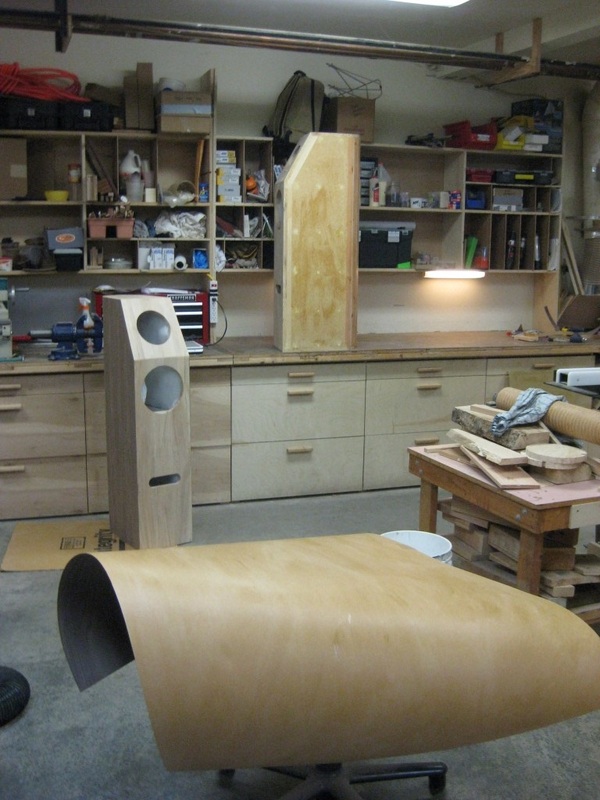
Starting to look sweet!
|
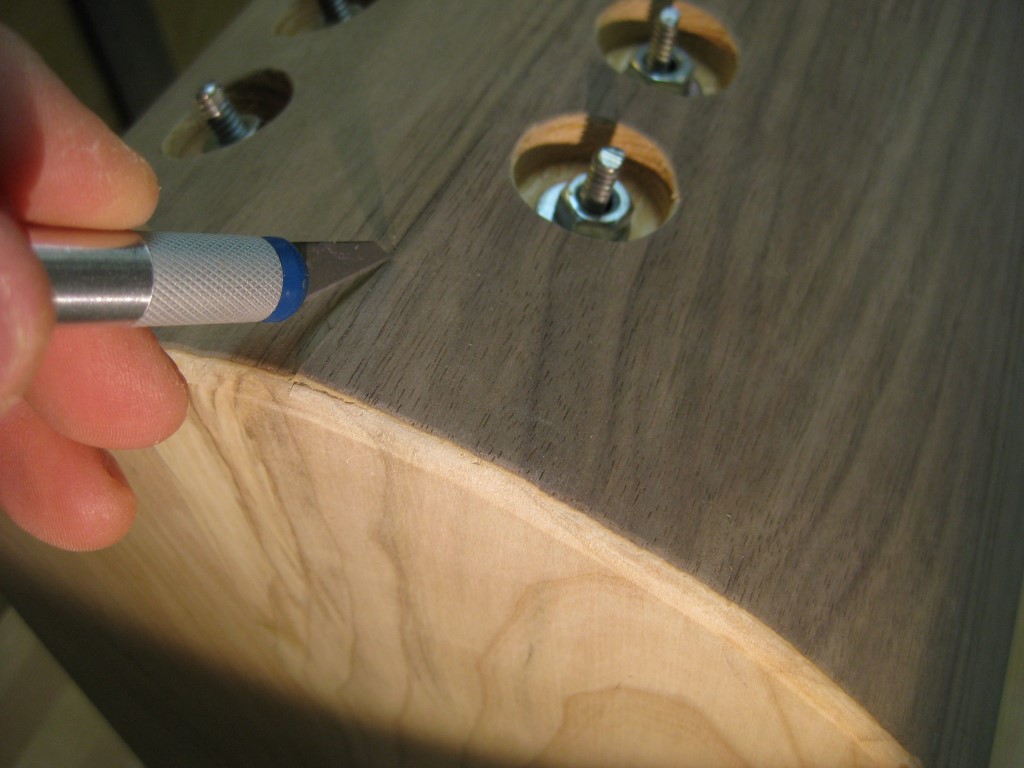
I decided to put a large bevel on the front with a round over on the top. The round over was done with a handheld router while the bevel was first routed to remove most of the material, then refined with a block plane.
The cabinets got a good thorough sanding with 220 grit paper using a random orbital palm sander. |

I had a very nice day to apply the initial coats of poly. Lots of thin coats - probably 5 or 6.
|
When sanding the poly to even the surface, you want to sand down to the low spots. As soon as the whole surface is dull, you've reached the goal. Here, you can see the back has been sanded, but the side hasn't, along with a few low spots on the back. Since it was going to be a satin finish, a few low spots wouldn't matter.
|
All sanded after the initial poly coats.
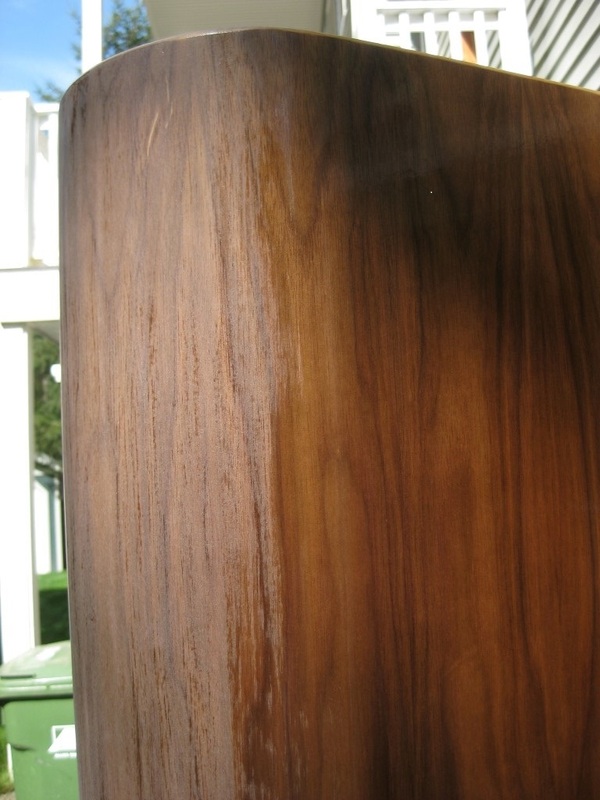
Another shot right before the final poly coats. They are getting a satin finish. I couldn't find any water based satin poly, so an oil based was used.
|
About 5 or 6 initial coats of water based polyurethane were applied. Putting multiple coats on goes very quick because it only requires about 15 or 20 minutes (depending on conditions) to dry between coats. The next day, I gave it a good sanding , again with the 220 grit. This sanding is to even out the surface and is the reason why I put so many coats on to begin with.
|
Final assembly
The 8" drivers get soldered connections. I stuffed a rag over the cone to prevent any accidental solder or flux drips from damaging it. Note: the 10" drivers have screw terminals - no need to solder those.
|
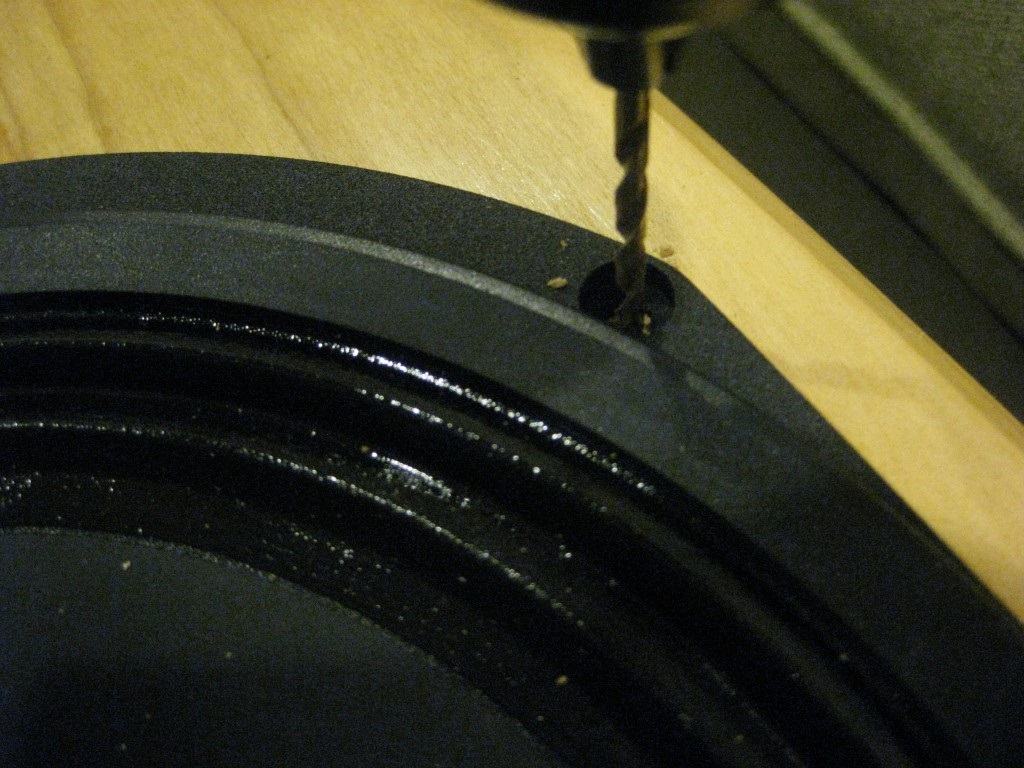
The speaker mounting holes are used to locate the holes in the cabinets - fairly straightforward doing it this way. You just need to be careful to get the drill centered.
|
Next, I tapped the holes to accept a screw. The front baffles on these are maple, which allowed me to use some round headed screws I had. Those screw heads got painted black first.
|
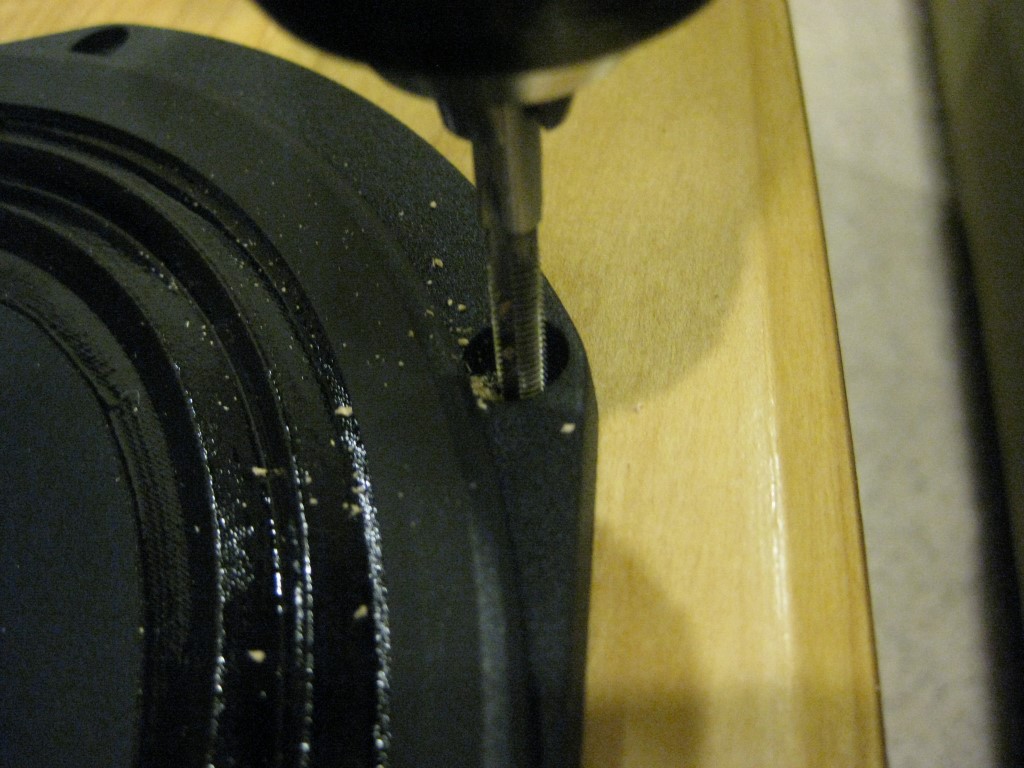
After attaching the speakers to the terminal wires, the only thing left to do was to mount the drivers in the cabinets. I had some nice round headed screws that got painted black. The drivers were lined up, holes drilled and tapped, followed by the screws.
Once the final screw was driven home, the speakers are certified complete! |
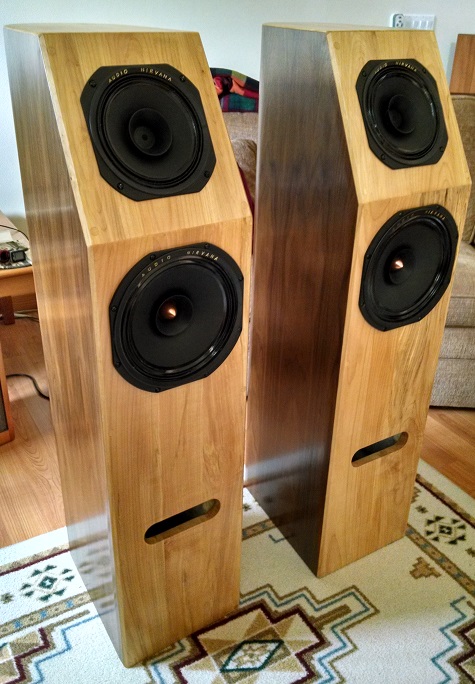
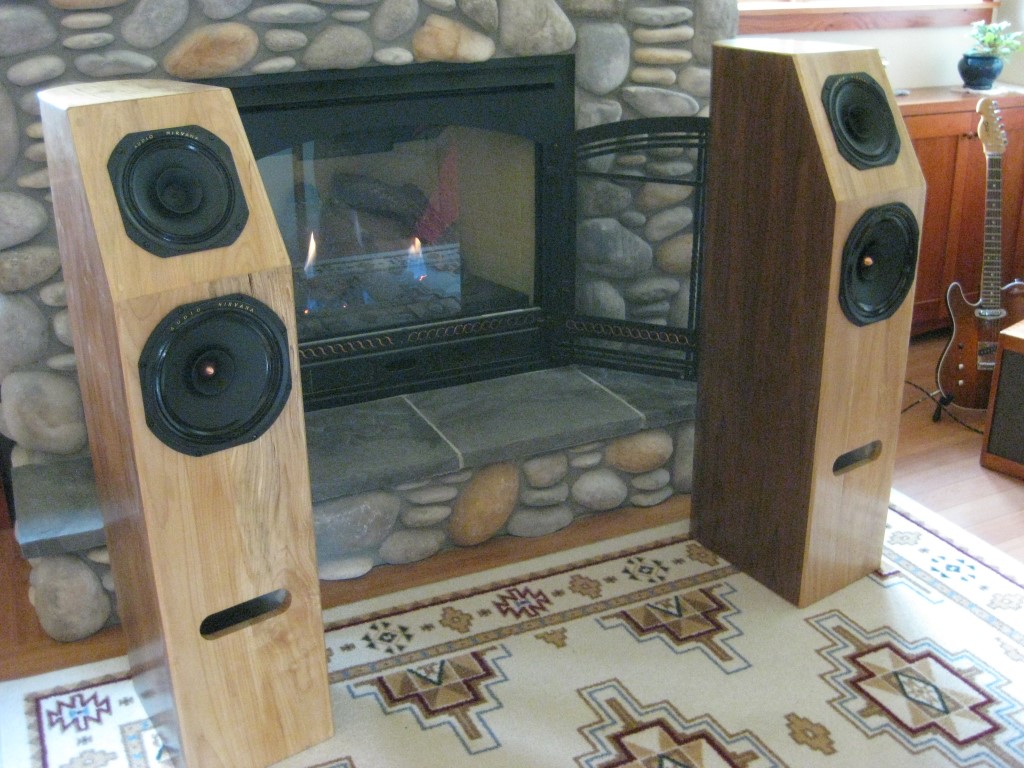
WOW!
|

|
Final thoughts...
They turned out great and required a few hours of use to completely break in, even before that completed, they sounded incredible. Plenty of bass, midrange, and highs - all well balanced with great detail, clarity, and imaging. Of course trying to describe what a speaker sounds like is a bit fruitless. Needless to say, these monsters rock - and at any volume - it's very easy to make them shake the house! The angled top driver helps disperse the sound in the high ceiling great room where they reside. The sound is one thing, but the look is something else.
I started out on a mission to create some nice heirloom quality speakers that were something other than a box with 90 degree corners. The cabinet build had a high degree of difficulty, which translated into taking much longer than anticipated (pretty much par for the course ;), but I'm very pleased with the result.
For me, building stuff like this is much more satisfying than obtaining it in any other way. It took awhile to get my shop set up so things like this are possible (shops are never complete - always something to add, change, or remove..:), but it has been well worth the effort and shop time is always too short.
Use the "contact me" button below if you are interested in getting a set of plans for these cabinets.
Take care and keep building cool stuff!
