Links to the Shigshop.com thickness sander pages
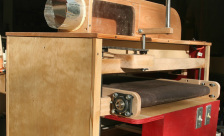
Thickness sander homepage.
Preview of Shigshop.com thickness sander plans.
Using the Shigshop.com thickness sander.
Preview of Shigshop.com thickness sander plans.
Using the Shigshop.com thickness sander.
Purchase the plans |
$18
Click the "Add to cart" button to buy the plans. You will be prompted to log into your paypal account, or create one. Then, you will receive a prompt and email with a download link. Click here to email me if you need to work out a different payment option, but for now, paypal will be the easiest. |
The plans
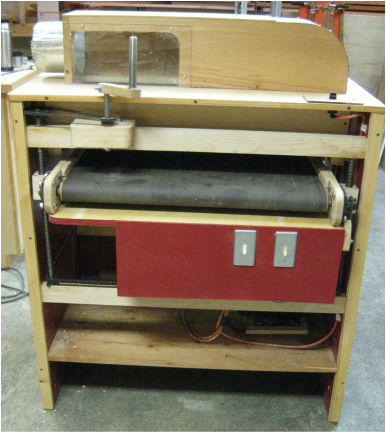
This set of downloadable plans and instructions will give you all the information necessary to build a thickness sander similar to the one pictured and described on Shigshop.com.
This is the first set of plans and instructions I have made available - they are very complete - I spent over 200 hours developing them - they include over 30 drawings and 100 pictures detailing the build - almost 10mb of compressed data.
Deciding on parts and procuring them is a big task on a project like this. Included in the package are material and supplier lists. The supplier list has links to their websites with suggested search terms that worked for me to find specific items. I remember spending many nights in 2010 (when I built the original sander) figuring out what I needed and where to get it, so these lists should be a big help to some of you.
The original sander that I built was used for almost 3 years. To create these plans and instructions, I tore down that machine and rebuilt it, using some of the old parts, but where appropriate, I made new parts. This version of the machine is simpler and as robust as the original. I anticipate many years of service from it.
Some workshop requirements
Dust collection is a must. Before considering this machine, please ensure you have that part of your shop set up.
I have a fairly well equipped shop with a table saw, band saw, drill press, benches, vises, planer, jointer, portable band saw, and bench grinder, as well as hand tools. You can certainly build the sander without some of those tools, but they will make the job easier.
About Sketchup
Sketchup has become a de facto standard for workshop tool and furniture designs - mainly because it's powerful and there is a free version available. For those of you not familiar with Sketchup, I also include instructions on how to navigate within my Sketchup models.
By default, my plans use imperial measurements - included are instructions to convert the Sketchup model to metric (all critical dimensions have been verified). The drawings have notes that sometimes refer to dimensions. For these, I have specified both metric and imperial measurements.
Click here to download Sketchup.
Materials
Other than wood, screws, nuts and bolts, the materials you will need to gather are:
The plans include a list of suppliers.
Some parts, such as bearings, shafts, sprockets, and acme screws are imperial sizes, as those are the only ones available in my area. It shouldn't be difficult to substitute those parts with their metric equivalents.
Note: Due to various electrical codes and requirements throughout the world, I do not provide instructions for the electrical wiring.
This set of downloadable plans and instructions will give you all the information necessary to build a thickness sander similar to the one pictured and described on Shigshop.com.
This is the first set of plans and instructions I have made available - they are very complete - I spent over 200 hours developing them - they include over 30 drawings and 100 pictures detailing the build - almost 10mb of compressed data.
Deciding on parts and procuring them is a big task on a project like this. Included in the package are material and supplier lists. The supplier list has links to their websites with suggested search terms that worked for me to find specific items. I remember spending many nights in 2010 (when I built the original sander) figuring out what I needed and where to get it, so these lists should be a big help to some of you.
The original sander that I built was used for almost 3 years. To create these plans and instructions, I tore down that machine and rebuilt it, using some of the old parts, but where appropriate, I made new parts. This version of the machine is simpler and as robust as the original. I anticipate many years of service from it.
Some workshop requirements
Dust collection is a must. Before considering this machine, please ensure you have that part of your shop set up.
I have a fairly well equipped shop with a table saw, band saw, drill press, benches, vises, planer, jointer, portable band saw, and bench grinder, as well as hand tools. You can certainly build the sander without some of those tools, but they will make the job easier.
About Sketchup
Sketchup has become a de facto standard for workshop tool and furniture designs - mainly because it's powerful and there is a free version available. For those of you not familiar with Sketchup, I also include instructions on how to navigate within my Sketchup models.
By default, my plans use imperial measurements - included are instructions to convert the Sketchup model to metric (all critical dimensions have been verified). The drawings have notes that sometimes refer to dimensions. For these, I have specified both metric and imperial measurements.
Click here to download Sketchup.
Materials
Other than wood, screws, nuts and bolts, the materials you will need to gather are:
- acme screws and nuts - large 3/4" allthread (threaded rod) could substitute.
- sprockets and roller chain
- cold rolled steel bar
- bronze bushings and flange bearings
- motor to run the sanding drum with related electrical components (switch, wire, etc.)
- motor, controller, and power supply for the conveyor, with related electrical components (switch, wire, etc.)
- v belt pulleys and v belt
- large sanding belt for the conveyor
- springs for the compression rollers
- Velcro tape (adhesive backed hook)
- sandpaper rolls (loop backed)
The plans include a list of suppliers.
Some parts, such as bearings, shafts, sprockets, and acme screws are imperial sizes, as those are the only ones available in my area. It shouldn't be difficult to substitute those parts with their metric equivalents.
Note: Due to various electrical codes and requirements throughout the world, I do not provide instructions for the electrical wiring.
Disclaimer...
Upon the purchase of these plans, please do not distribute or copy them in any manner - they are only for the personal use of the original purchaser.
Although a big effort has been made to ensure these plans will produce a good safe machine, Shigshop.com cannot assume any liability as a result of any usage of the plans or machines built with them.
Building this machine should only be attempted by experienced woodworkers familiar with all common tools found in a wood shop. When using woodworking machines, always ensure safety devices are properly functioning and appropriate clothing, glasses and ear protection are worn.
Be careful and proceed at your own risk - adhere to standard safety practices and you should be ok.
Buy the thickness sander plans |
$21
Click the "Add to cart" button to buy the plans. You will be prompted to log into your paypal account, or create one. Then, you will receive a prompt and email with a download link. Click here to email me if you need to work out a different payment option, but for now, paypal will be the easiest. |

