The original Shigshop.com thickness sander
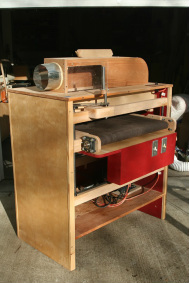
This page has some pictures and information on the original version of my thickness sander.
Additional links:
Thickness sander homepage.
Preview of Shigshop.com thickness sander plans.
Using the Shigshop.com thickness sander.
Purchase the Shigshop.com thickness sander plans.
Thickness sander homepage.
Preview of Shigshop.com thickness sander plans.
Using the Shigshop.com thickness sander.
Purchase the Shigshop.com thickness sander plans.
The original sander
I wanted the sander to have an adjustable speed conveyor, and to be wide as my old sander, which got it's drum recycled on this machine.
To develop a set of plans and instructions, I have since rebuilt the machine. During that development process, a few changes were made to eliminate some of the metal work - specifically, the need to weld. So the new one became version 2, this page shows some details of the original machine.
To develop a set of plans and instructions, I have since rebuilt the machine. During that development process, a few changes were made to eliminate some of the metal work - specifically, the need to weld. So the new one became version 2, this page shows some details of the original machine.
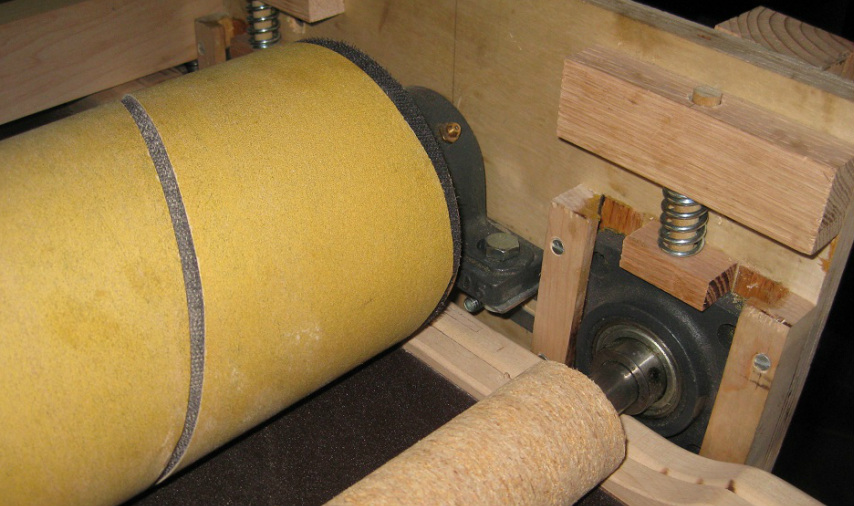
DrumsThere are 5 drums - 1 for sanding, 2 for compression, and 2 for the conveyor mechanism - all are 28" long. The drums are formed from particle board disks which were cut on a band saw, refined by mounting them on a sled then run over a straight bit on a router table. That was sufficient to complete the compression and conveyor rollers. The sanding drum was further refined by running rough sandpaper adhered to a board through the machine after it was pretty close to complete.
This picture shows some bearings and one of the compression mechanisms. 1" cold rolled 1018 steel rod used for the sanding drum extends through the side panel and has a v belt pulley attached to it. I used pillow block bearings for the sanding drum, since that is what I had from the previous machine. Version 2 replaces these with some nice 2 bolt flange bearings. |
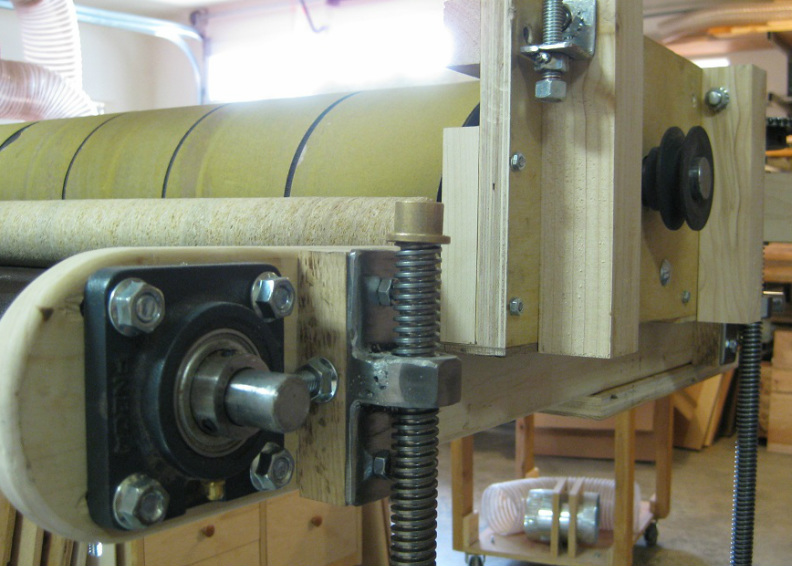
Feed alignment, vertical travelThis picture shows conveyor bearings, acme screws, nuts, and bronze bushings used for vertical travel, as well as the sanding drum pulley. Aligning the conveyor rollers is accomplished by an adjustment screw that presses against the bearing flange whose mounting screws go through slots in the platen sides (you can just barely see one in the photo next to the 4 bolt bearing).
|
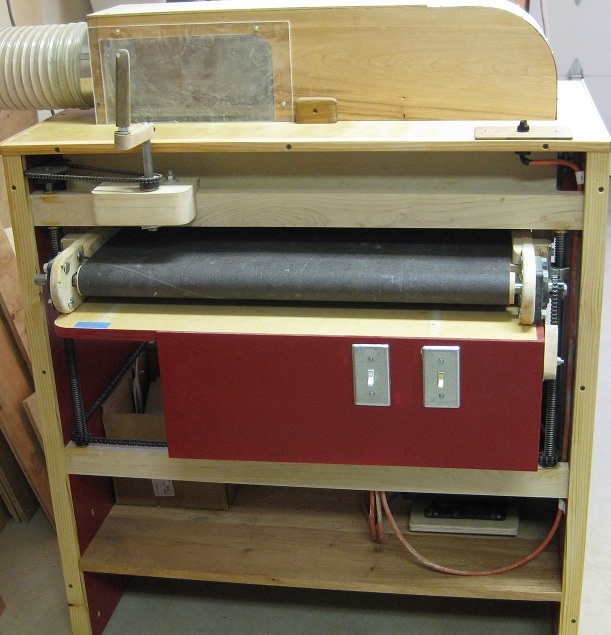
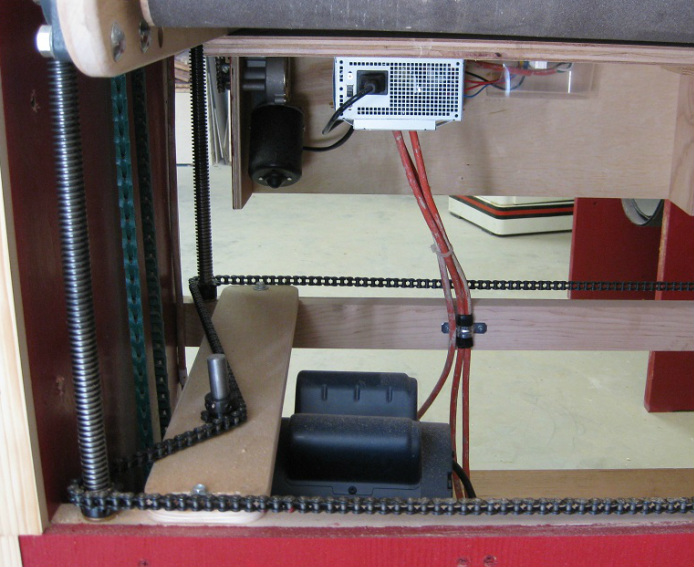
More detail...Here, you can see the chain/sprocket and tension mechanism used to link 4 acme screws that raise and lower the feed table. In the front view picture toward the top of this page, you can see the crank ratio is reduced via large and small sprockets which facilitates micro adjustments. Even with this ratio, I turn the crank less than 1/4 turn on subsequent sanding passes. The pic here also shows the small feed motor, power supply, controller (under plastic cover), the main sanding motor, and it's link belt.
|
The sander sides are made from 1.5" plywood (two .75" pieces laminated). The bottom shelf and top are .75" thick - the top has a large slot for the dust collection hood.
I have been very satisfied with the performance of this sander. Initial power planing of parts bring them very close to final thickness dimension. A few passes on this sander with 180-220 grit after all machining and before final assembly means there is usually very little additional sanding necessary on a complete piece before finish.
The machine has been in constant use for the last 2+ years and has been a huge benefit. Full construction plans and instructions have been developed and are now available. They include many photos with descriptions, a full Sketchup plan, printable drawings on 8-1/2" x 11" paper, plus building/tuning procedures and usage techniques.
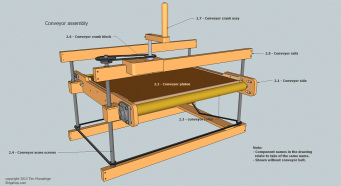
Plan previewI rebuilt the original when I was creating the plans and instructions. During that process, some minor changes were made to ease construction. It is as robust as the original, but eliminates the need to weld and incorporates flange bearings instead of my old pillow block bearings used on the original sander.
|
Purchase the plans (version 2) |

