
A homemade climbing board
What is a climbing board? Well, it's a piece of exercise equipment that is used by rock climbers for strengthening and practice. For Christmas, my son asked for one. So, what did I give him? A CAD drawing of one. HO! HO! HO! Commercial versions are available, but what's the fun in that? Building one is much more interesting. Every time he hangs on it, he'll appreciate how it came to be.
The design
|
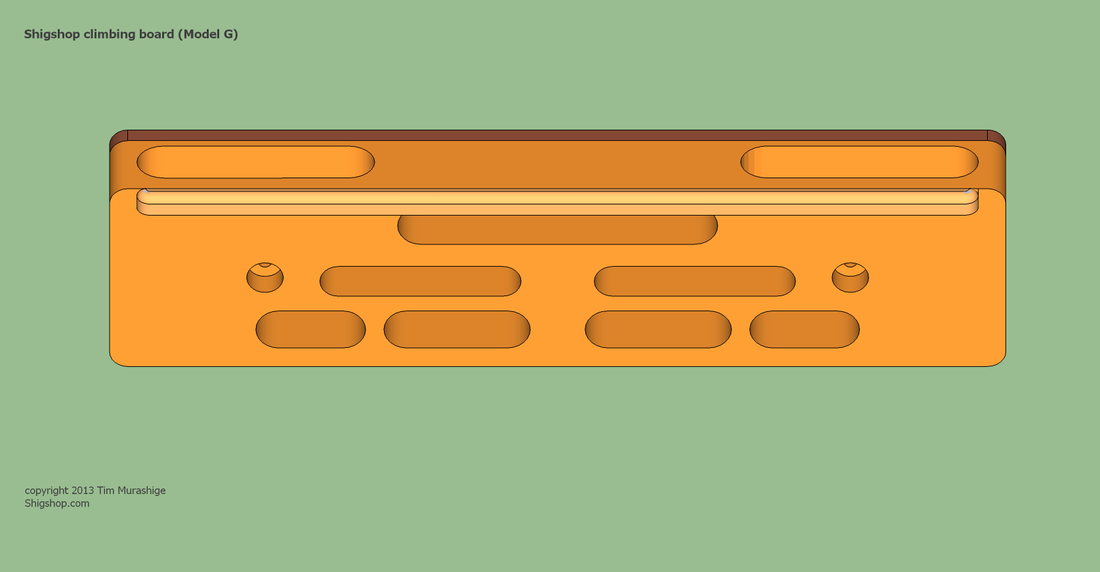
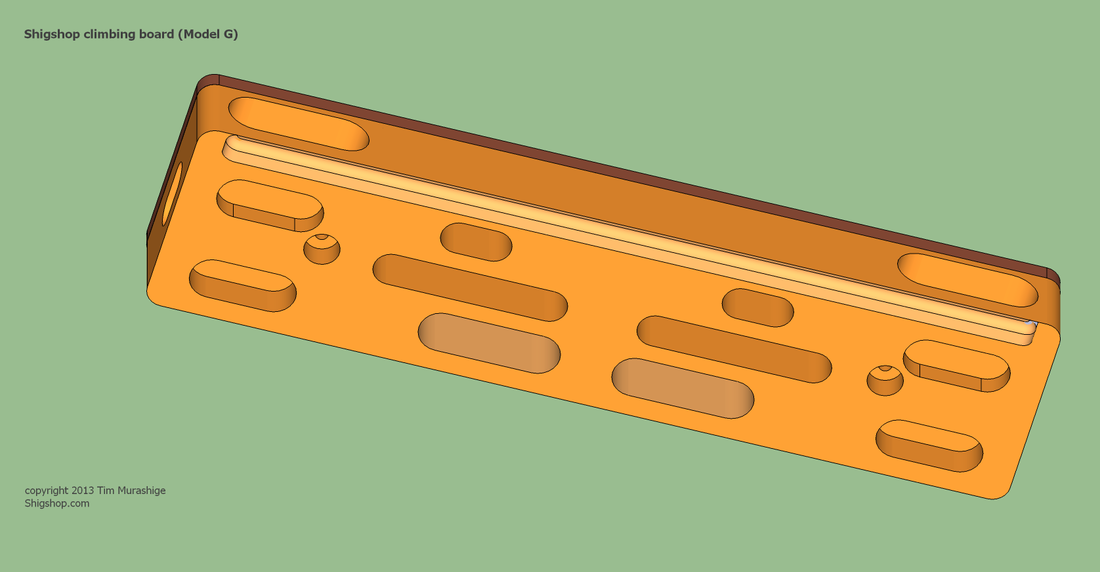
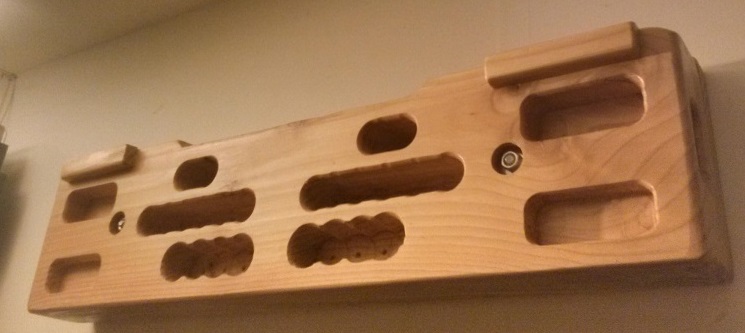
I looked at some pics of some climbing boards and came up with this. I'm not a climber, so there was lots of swagging going on here. I figured it would be easy to bore through the main board on the drill press with a forstner bit, then clean up the holes with a chisel. That meant all of the front holds would be 2 1/4" deep, which is the thickness of the board.
The edge in front of the top mortises was going to be fairly narrow (1/2"), so I added a cleat to make that spot, which is good for basic pull ups, to be a bit more comfortable. |
|
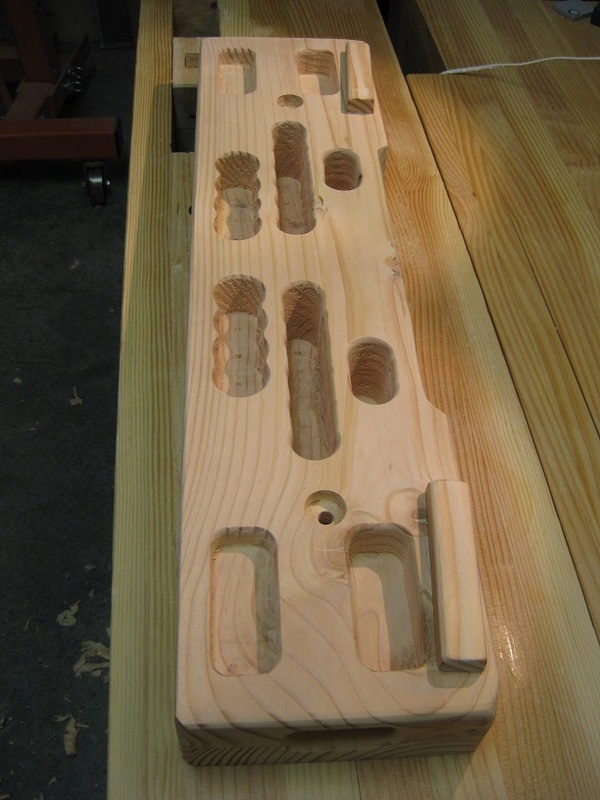
After my son studied the plans for a couple minutes, he decided they could be improved. He removed some holds and added others. The depths now vary on the front holds. The top mortises are narrower which makes the area between them a larger hang spot - he had other plans for that spot as you'll see below. He also added some shallow holds on the sides. Imagine putting your index and middle fingers in those side holes with your thumb in the top corner holes - then doing a few pull ups. That's gotta hurt!
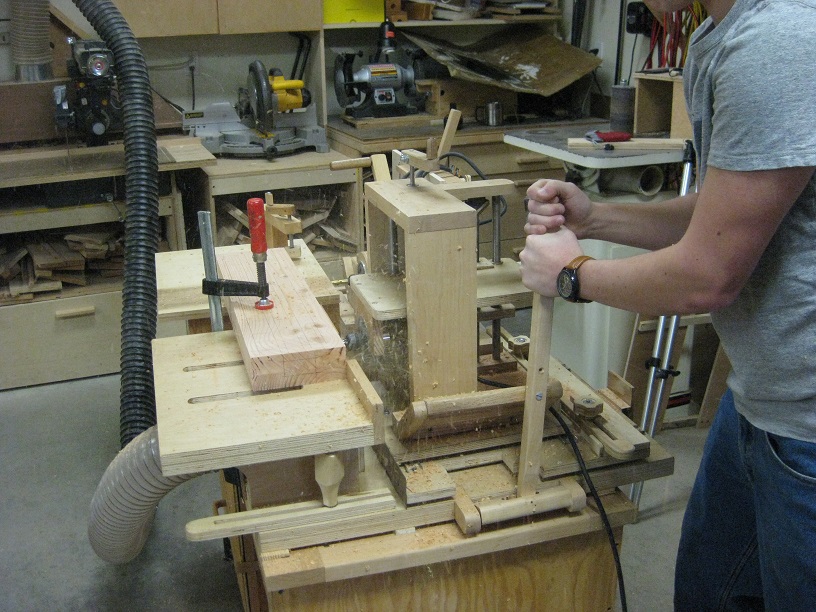
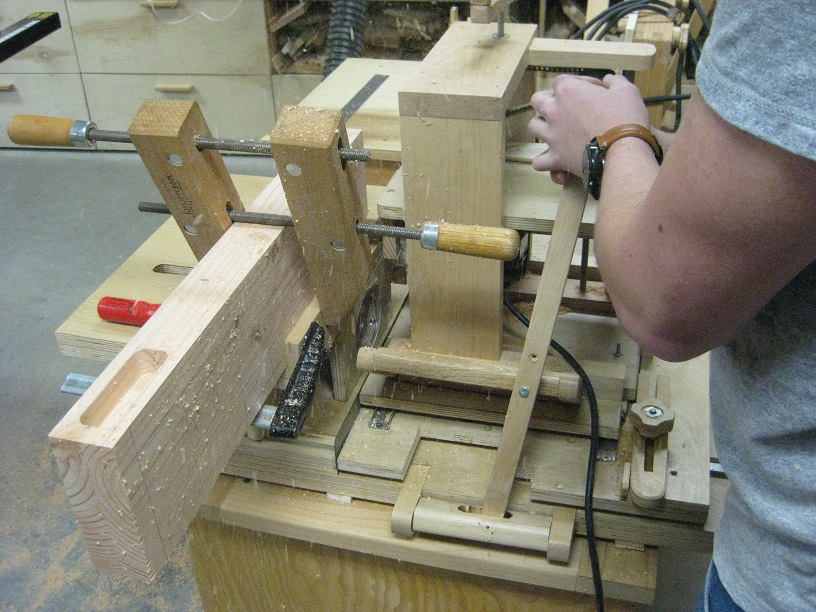
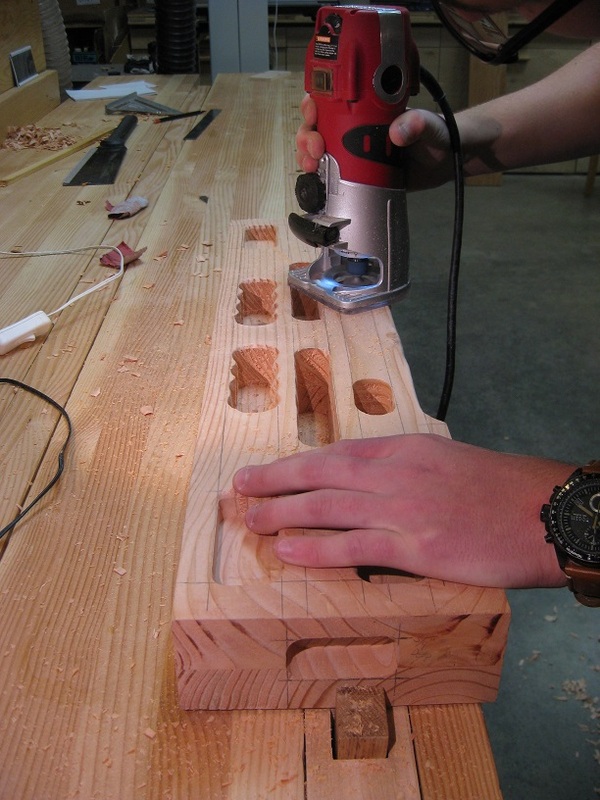
With the new design, I didn't want to use the drill press on the shallow mortises. As you'll see below, using a slot mortiser solved the problem. That particular machine has seen quite a bit of action, it's simple and effective. For this board, there was quite a bit of machining to do - it took the good part of the afternoon to complete. |
The build
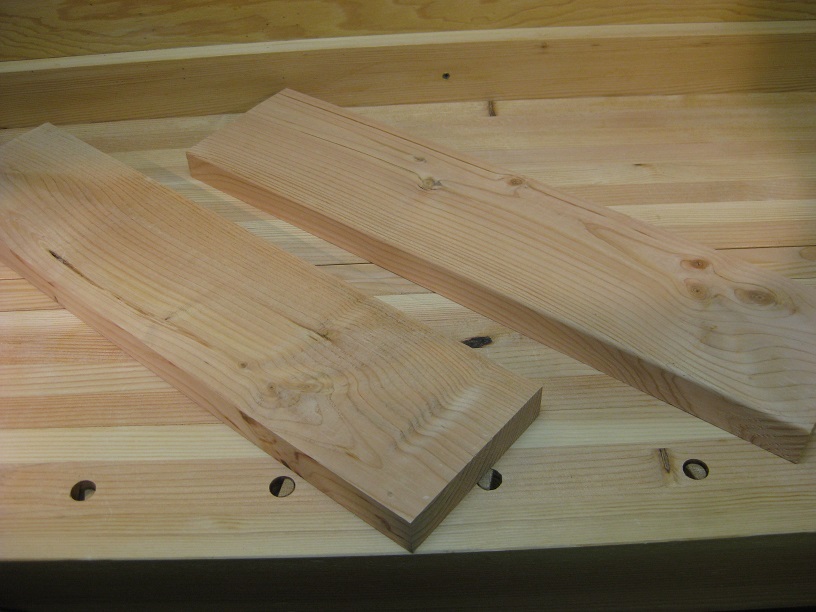
Two pieces cut from a 2x10 - the main board is 2 1/4" thick.
|
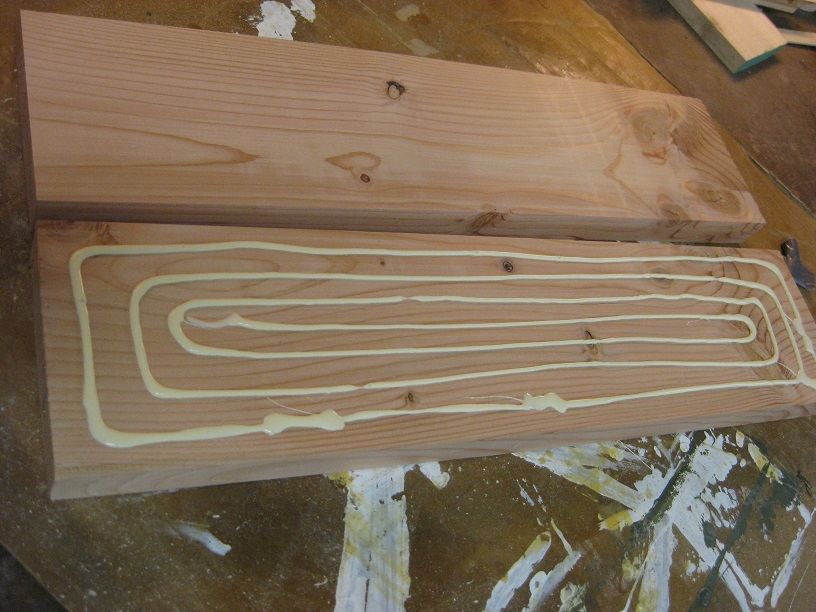
Starting with flat boards (to remove twist, these were flattened on the jointer), we get a nice lay of glue on one of them - with just the right amount and good bead spacing - you really don't need to spread it around. We just put the glue on one board and clamp it up.
|
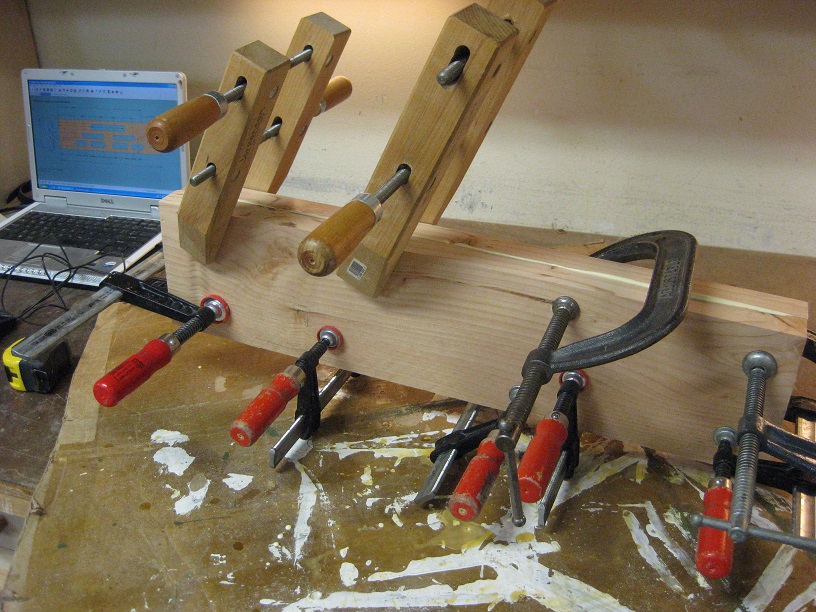
If you get squeeze out around the perimeter, you're golden.
|
We start with a couple pieces of 2x10 douglas fir left over from the roubo bench build. The main board is 6" wide x 24 1/2" long x 2 1/4" thick, so we do a glue up.
|
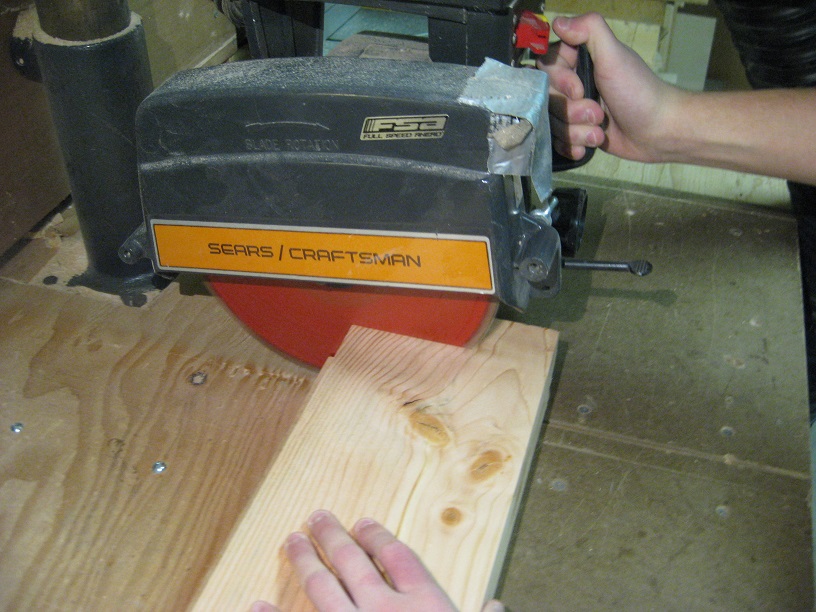
They are out of favor in most modern shops, but I still rely heavily on my radial arm saw for simple 90 degree crosscuts. These saws are great when set up properly - and they can be had very inexpensively.
|
|
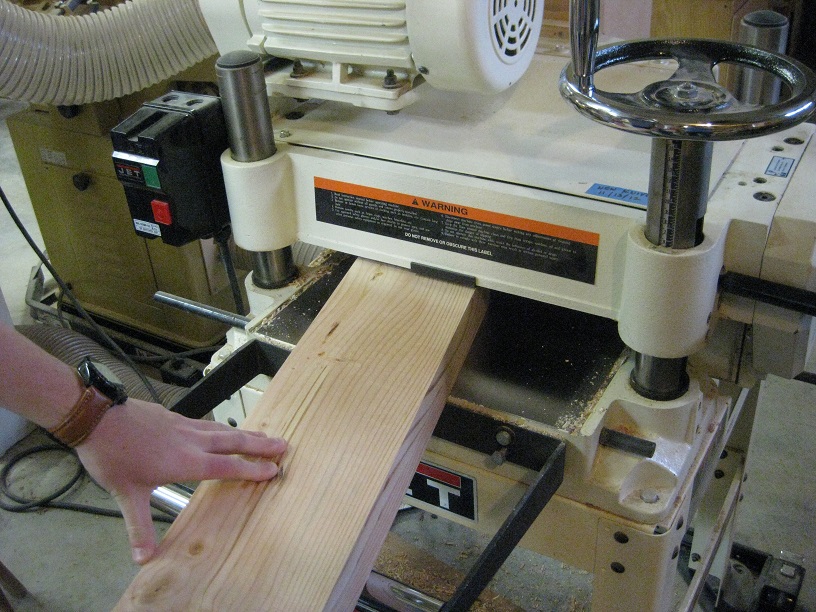
He joints an edge, crosscuts to length, rips to width, and planes to thickness, getting the piece to it's final size.
|
|
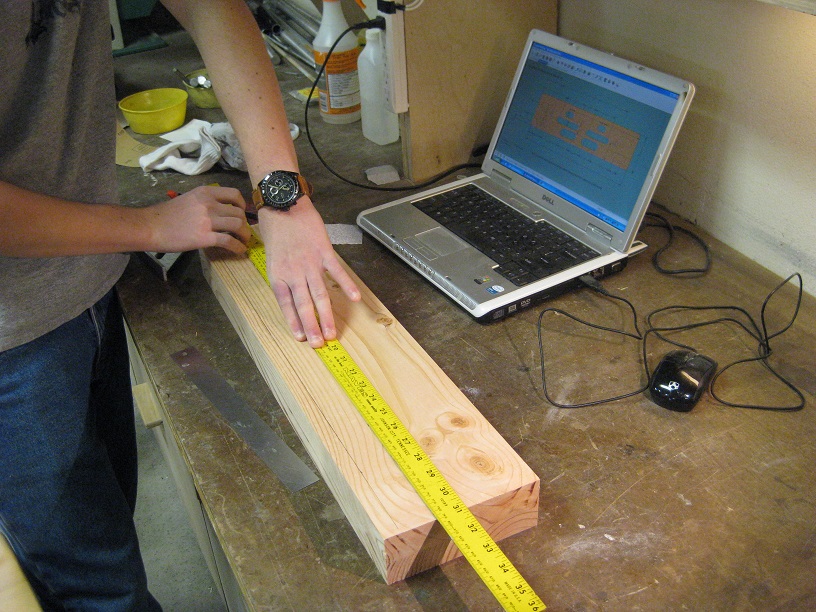
Then spends a bit of time laying out all of those mortises!
I have an old Dell core dual laptop that's kept in the shop. It has Windows XP (service pack 3) and can run the CAD software. I like using it for a number of reasons, including testing my plans on older platforms. This pc has survived many layers of dust and spills and I'm pretty sure everything still works on it. I often save plans on a USB thumbdrive and transfer them to this laptop. |
Ah, those Mattias Wandel designs! Gotta love em.
|
|
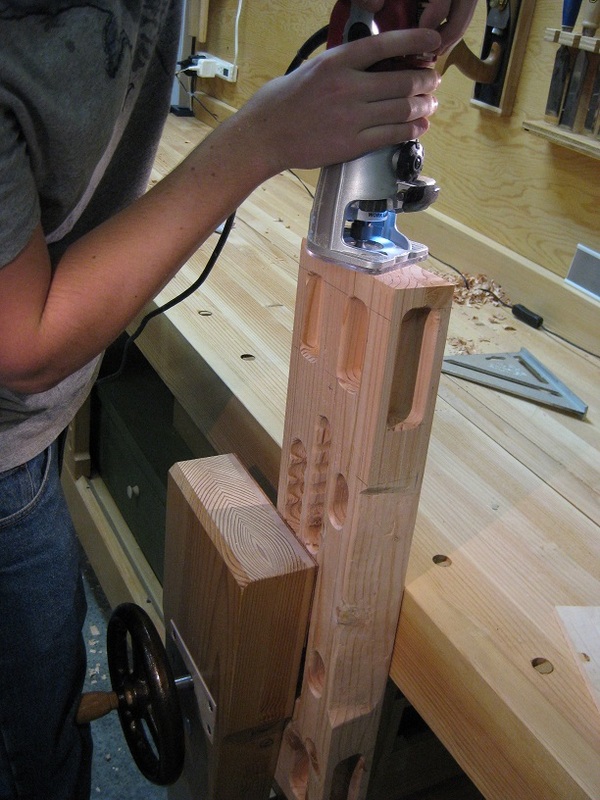
Via the mortise/tenon station, we use the slot mortiser to cut all of the shallow mortises.
My biggest straight router bit is 3/4" which will only go a bit over an inch deep, which is fine for some of the holds. The through mortises could have been started here and finished up on the drill press, but we decided to keep the operations separate - turned out pretty neat as you'll see... Go here for info on these (and more) Matthias Wandel machine designs. |
|
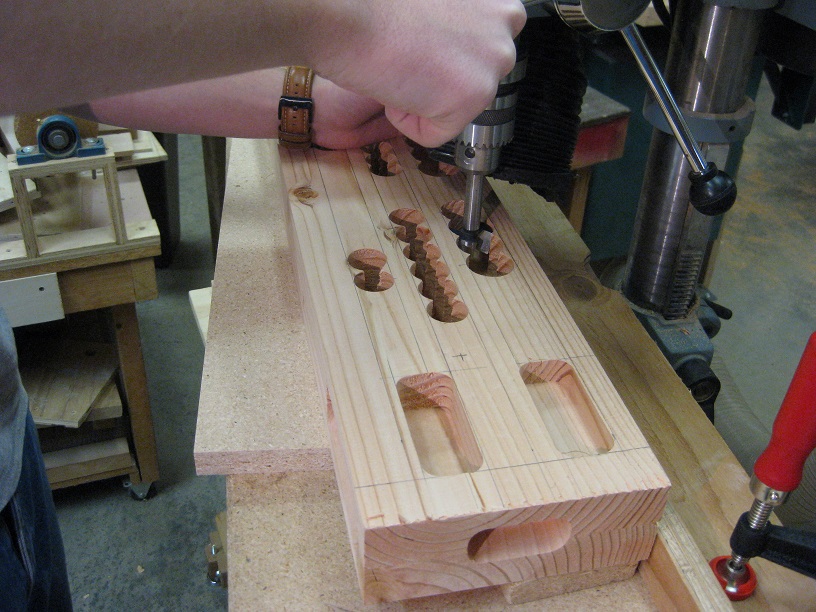
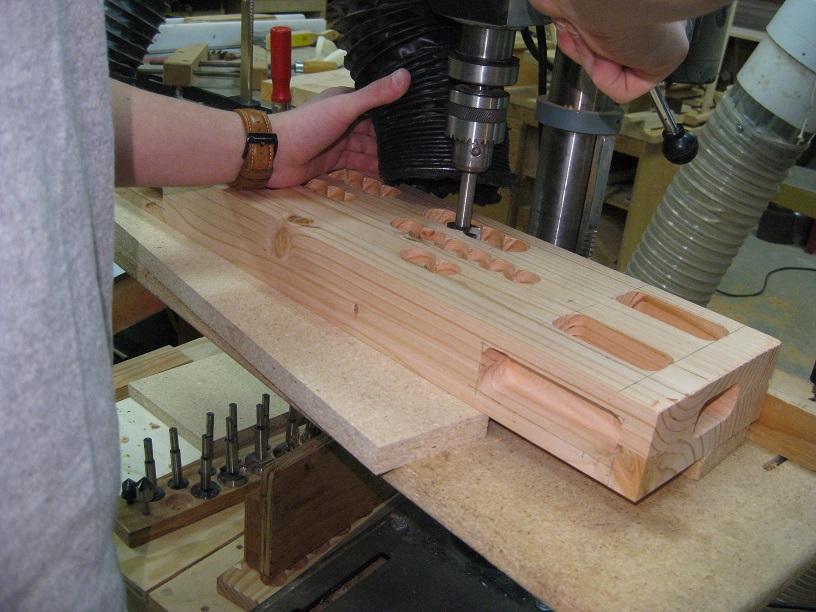
For these mortises, we simply set up a fence stop and drilled a series of holes for each hold.
|
My drill press is fairly pedestrian. It's an old delta 12" benchtop model that I've had well over 20 years. The power switch is going out (I've rebuilt it a couple times), and the main bearings are starting to show signs of wear. Depth capacity is limited to 2". As we were drilling these, my son was ok with not going all the way through the 2 1/4" stock. If he had wanted to, I would have stuck some thicker scrap under the piece and continued drilling through. It's better to do that than to raise the table, which throws off the fence in relation to the chuck.
|
|
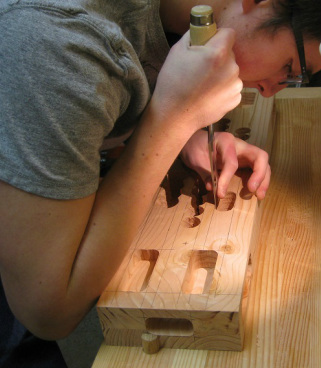
Next, we take it to the bench and start cleaning up the drilled mortises with chisels.
|
|
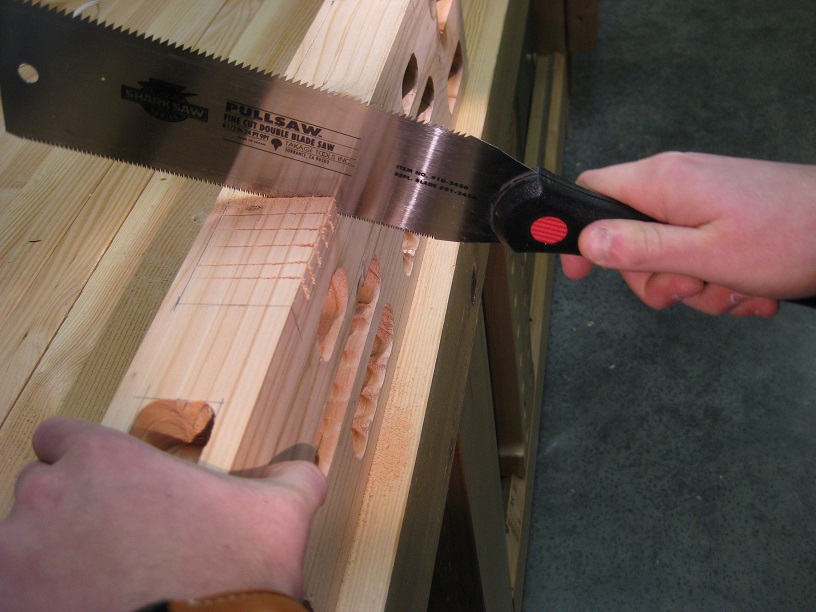
About that space between the 2 top mortises... he wanted a bit of a downward slope which makes it harder to hang from. Hmm... Ok. So, we layout a couple lines, and he cuts some kerfs to the lines.
|

|
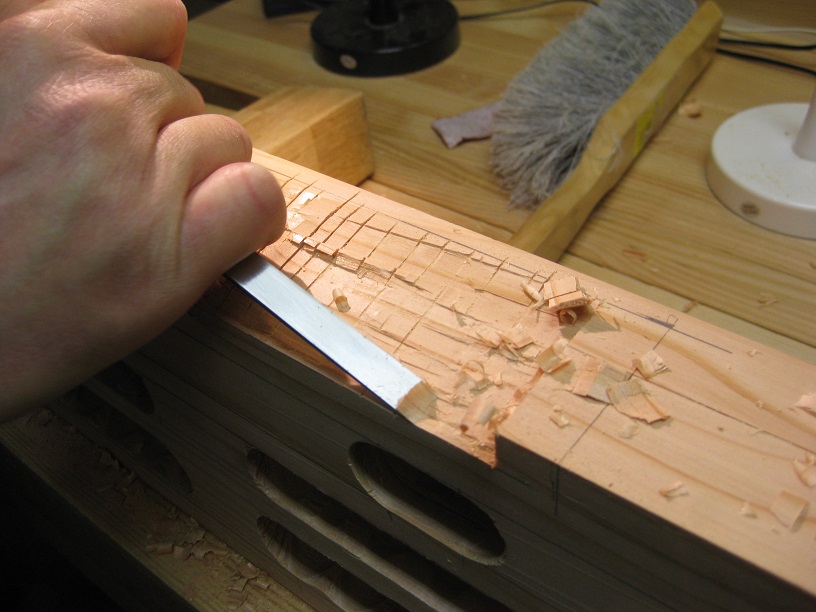
|
Then, we take the chisels and clean up the ledge.
The dogsled vise worked great for holding the board for these procedures - solid and efficient. |
|
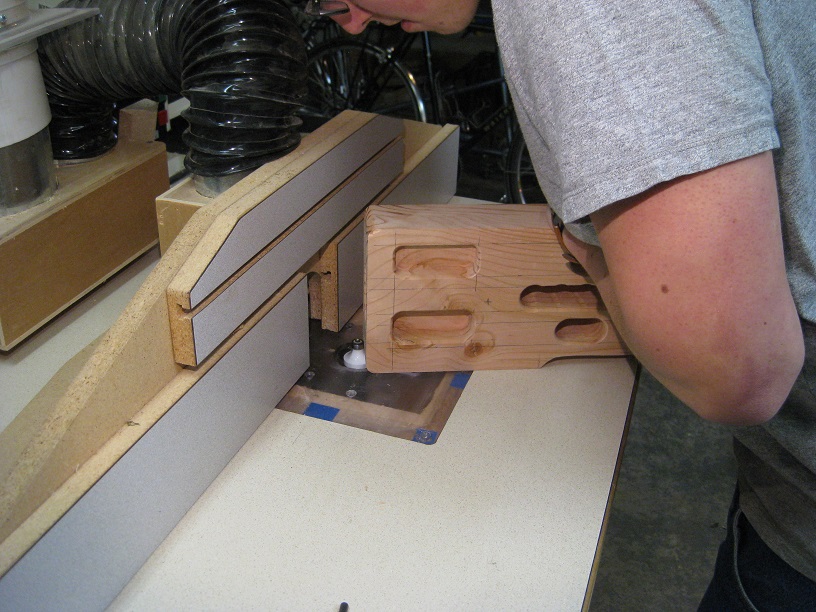
The 4 outer corners get a 1/2" round over, which we do on the router table.
|
|
|
Machining the main board is finished up by doing a 1/4" round over on the mortises and outer front edges. He wanted some of the mortise round overs to be smaller than 1/4", so he did those with a file and rough sandpaper.
|
|
|
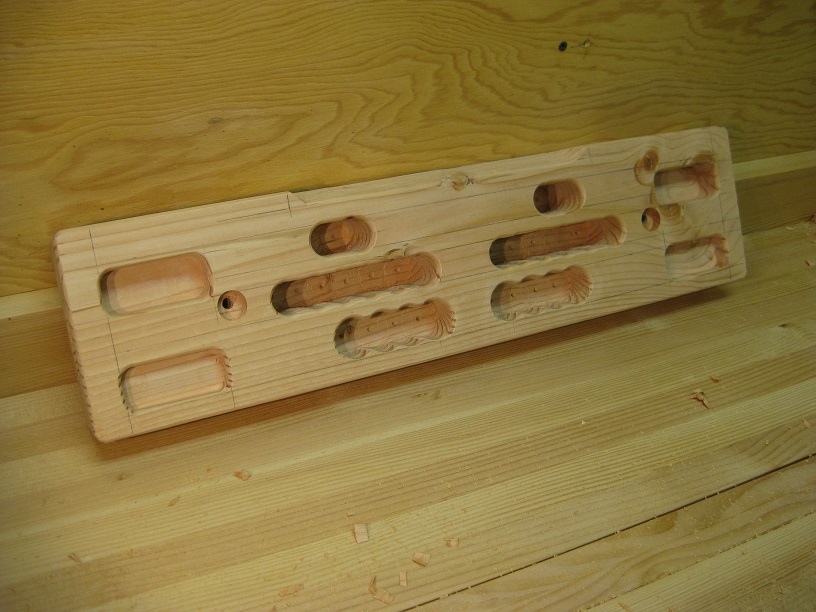
Here's where we were after a few hours of shop time. The ridges left by the forstner bit in the drill press give a bit more grip for those holds, so he decided not to completely clean up those mortises.
Conversely, the mortises cut with the router bit are totally smooth and not very deep, so those will be much harder to hang onto. |
|
The next day, we do a little more clean up on the board.
|
|
|
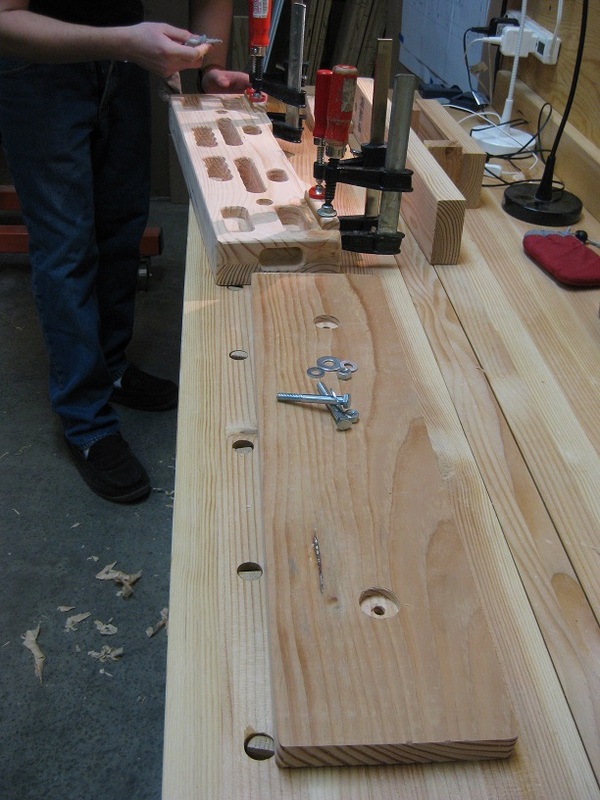
For the top edge, we made a couple small cleats rather than the long one we had originally planned. These get glued adjacent to the top mortises.
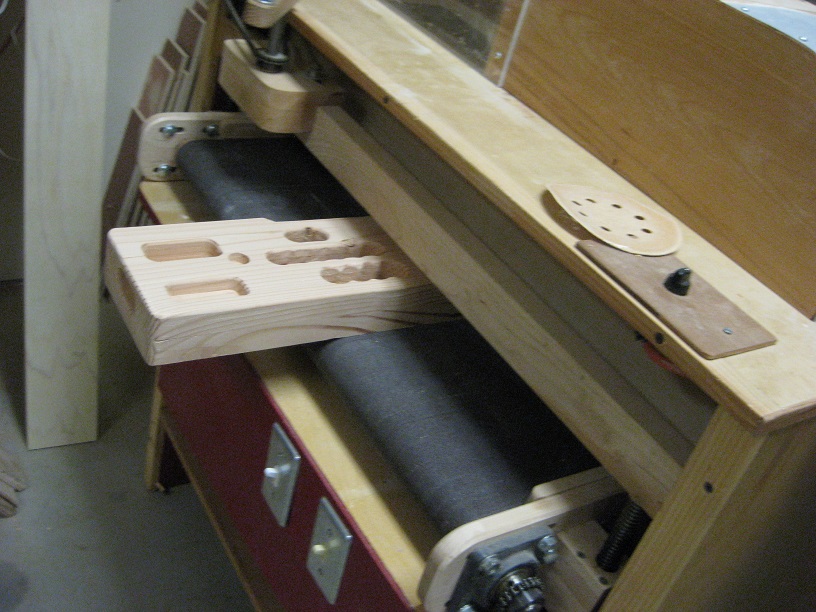
A back board is cut from a piece of 3/4" douglas fir. That board will have 2 bolts coming through it to attach it to the main board, so we counterbore and drill holes to align with the bolt holes on the main board. The back board first gets mounted to something solid, like wall studs or a door header with at least 4 strong wood screws. Then, using the bolts protruding from the back board, the main board gets attached. This way, it doesn't matter how far apart your wall studs are - just as long as the back board is mounted to something solid, it should be ok. The bolt countersinks in the back of the board enable us to use large washers to distribute the load over a broader area. |
|
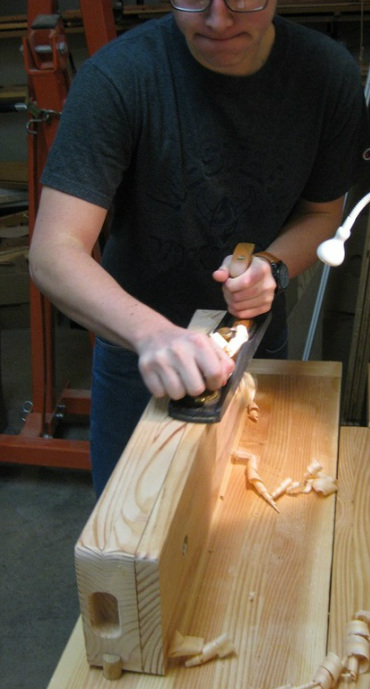
Here, he's using a jack plane to even up the back board to the main board. The bolts are first inserted to align the 2 boards.
|
Ready set....
|

|
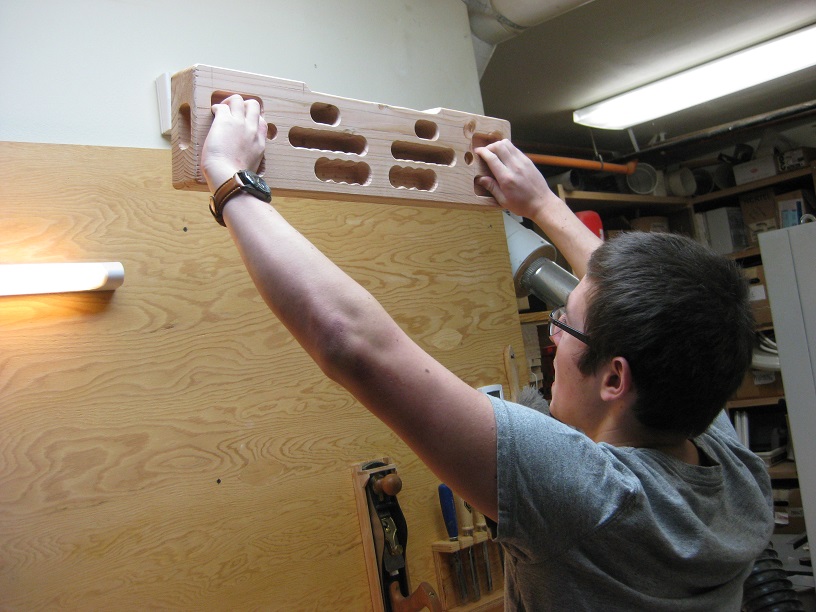
After a couple coats of water based poly, the back board is mounted to a wall and the main board is bolted to it.
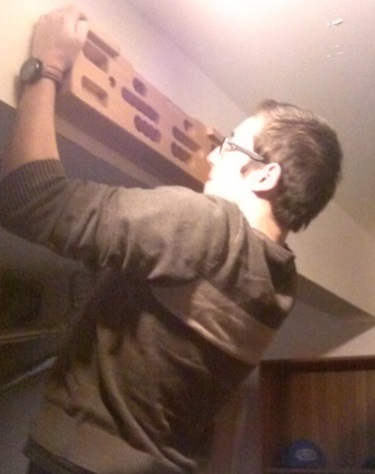
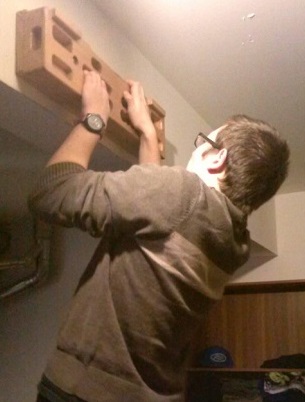
Action photos you say? That's what I say too...... |
Climb on!
|
|
...a couple shots working the board at his college house.... (thanks for those shots pal!)
|
