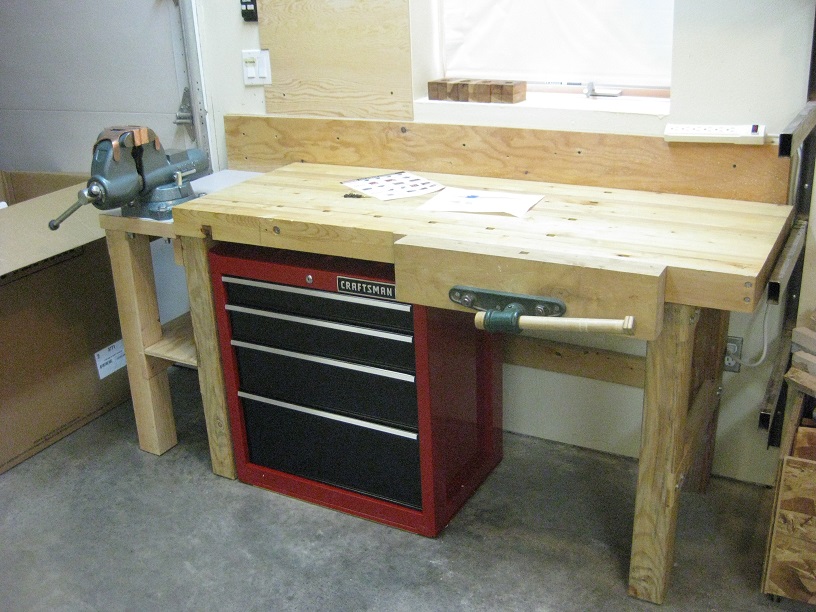
A metal working bench
I've been doing more and more work with metal and thought it would be a good idea to update my old bench to a dedicated metal working bench. After working on my roubo style bench for awhile, I have become spoiled to the benefits of a stable, non-yielding platform. Having to get out a bunch of clamps to hold a simple piece, or worse, thinking a piece is held securely when it's not is never a good thing. I suppose one of the lessons learned through the years is to have a bench and vise system that you simply don't have to think too much about knowing it'll do the job. The goal is to clamp a piece and work on it - and make it so it only takes a few seconds to do.
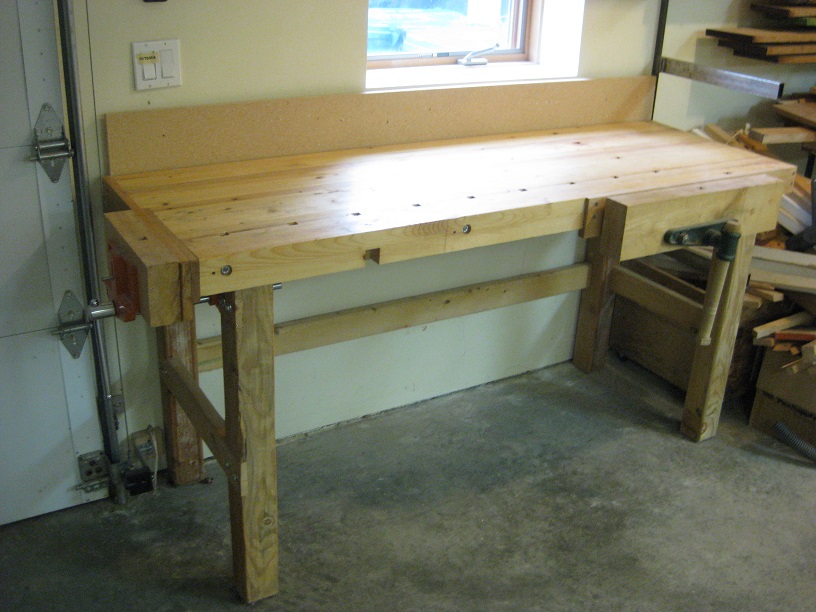
The old bench and new design
|
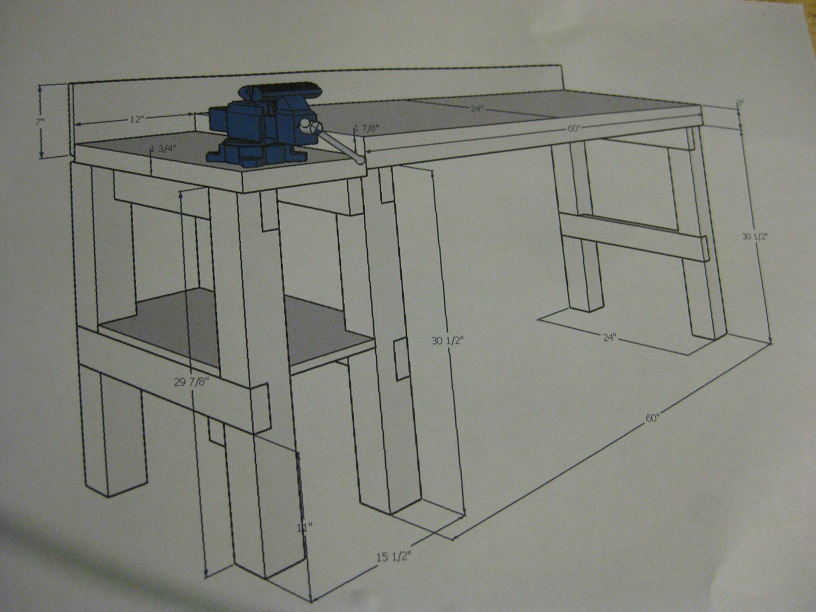
How about this. Its a photo of my CAD plan after I had printed it out for use in the shop. The plan is to first lower the old bench a couple inches or so, then add a second level to make the jaws of the metal working vise a bit lower. This is an effort to save my back - it should help a bit :{...
Because of the constraints of a garage door on one side and wood rack on the other, I needed to retain the same overall length of about 72", which meant the top and bottom rail had to be shortened to make room for the new lower top for the vise. To make the bench rigid, the design requires it to be screwed to a wall. The shelf on the vise platform will add some stability as well as a place to put stuff. |
The build
|
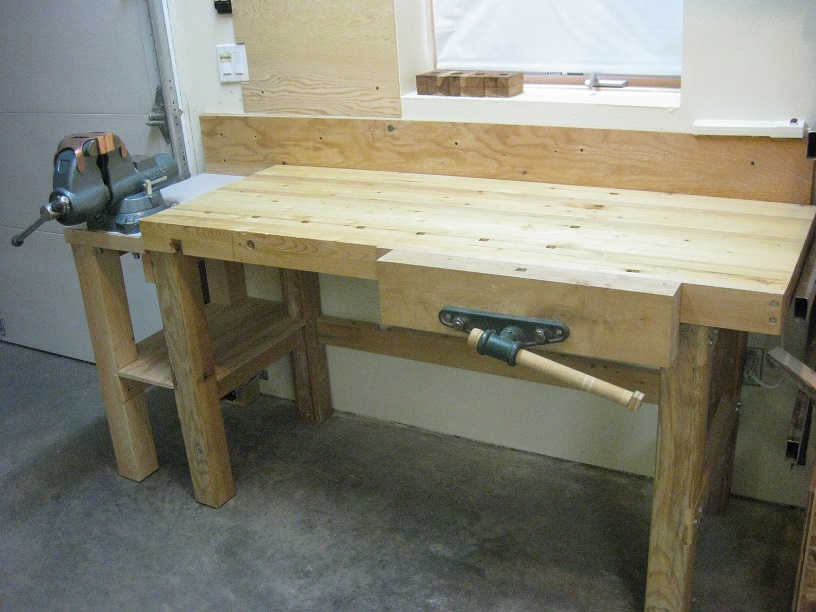
Construction photos of this project would have been kind of boring. I shortened the top and stretcher, built up the metal vise section and used lag bolts to attach it to the original bench. Lag bolts also attach the tops to the bases.
The small bench top for the vise is almost 2" thick, made up of a pieces of plywood, particle board, and counter top laminate all glued together. Because it's so small, I'm sure the 2" will be sufficiently strong. The legs had rabbets and dadoes cut into them to accept the 2x4 rails, which were also rabbeted on the ends. Wood screws were used to attach the shelf to the rails. |
|
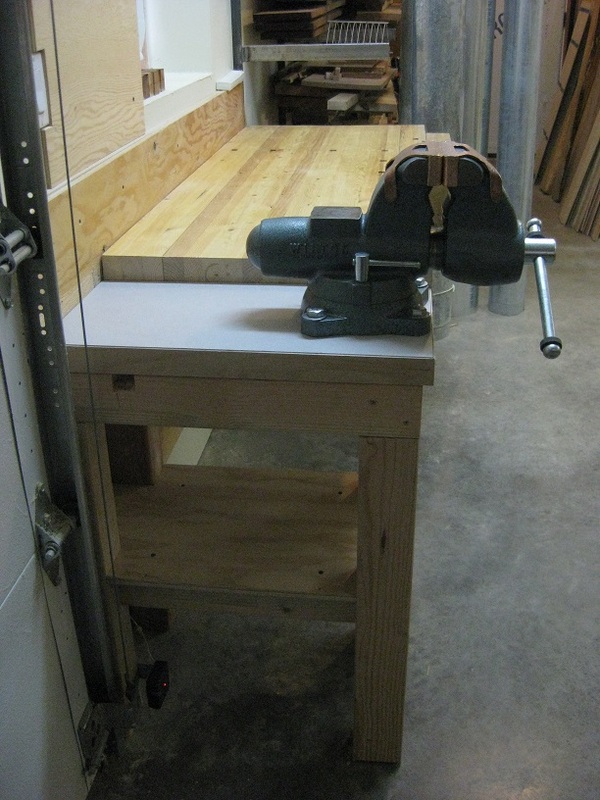
The vise is a Wilton C1 with copper jaw caps. It'll swing 360 degrees. When it's in the position as shown in this picture, the stationary jaw extends just past the front edge of the original bench. This will make it so that the bench top shouldn't interfere with long pieces. I can also open my garage door and angle the vise so super long or otherwise odd shaped pieces could go out there - if it's ever an issue.
That vise will eventually live a very long life. Wonder where it'll be in a couple hundred years... I hope one of my grandkids kids gets it. Ah well, I spose it doesn't care too much! For the bench, a couple coats of poly will provide a bit of protection from the nasty shavings from filing and sanding various metals. Otherwise, the metal working will quickly make it ugly. Most metal working benches are well, made out of metal. If I ever do tear up this bench, I'll have to build another out of steel. |
|
A toolbox (minus casters) fits nicely underneath. Two strips of wood were screwed to the bottom just to get the cabinet off the concrete floor - makes it easier to slide around. This toolbox isn't going to be moving too much so no casters required (I hope ;).
I'm leaving the old woodworking vise on the original top for now. It's got a nice maple chop and will more than likely come into play sooner or later. The dog holes on the top might be a problem. Eventually, I might put a steel top on the bench - need to find an appropriate piece first... |

