
Center channel home theater speaker - 2 way
We have needed, I mean, wanted a center channel speaker for many years. It's very simple to build these little speakers, so, I spent a couple hours one evening finding some parts, then, researching and designing a cabinet. The next day, I built the cabinet in about an hour and finished it up in another hour or so. In total, maybe about a half day invested and only $40 of parts.
So, with a plan, some parts and some scrap wood, here we go - another speaker project. This time a 2 way center channel.
For $150-200 USD this thing would be great, for $40, it's awesome. I always enjoy stuff more when great value is part of the equation.
I've had a fairly inexpensive home theater integrated amp for quite awhile. The amp supports many configurations including a left/center/right setup. We watched some movies with it and it's been a huge improvement. Having dialog and other sounds coming out of the center channel is awesome. The L/R speakers were built sometime in the late 90's or early 2000's - been a long time, but those still sound very sweet and some of my favorite speakers.
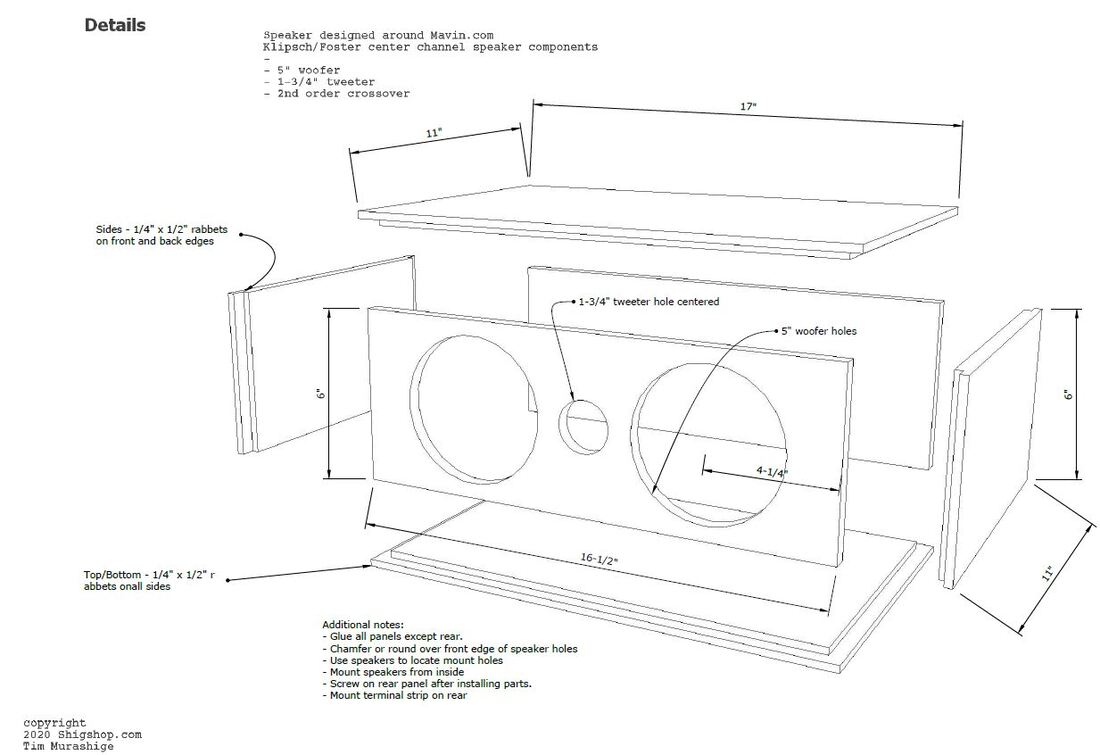
The design
|
This speaker uses parts from a new supplier - Mavin.com. John over there has some very inexpensive kits that looked like a fantastic value and worth a shot. More info below.
For this kit, John recommends a .4-.75 cubic foot cabinet. He doesn't specify a port, so I designed a cabinet of about .5 cubic foot with no port. It's designed to fit on a shelf that sits under our TV. Not much info on specs. Basically 5-1/4" 16 ohm woofers (2), an 8 ohm tweeter with a fairly nice crossover at 3500 hz. The crossover has a couple resistors, caps, and air core inductors. John also includes a nice gold plated screw down terminal. To get 8 ohms out of the twin 16 ohm woofers, they are wired in parallel. The woofers are manufactured by Foster who makes drivers for Klipsch, while the tweeter is from Samsung. Oh, the $40 included shipping costs - seemed too good to be true... All speaker components with purchase links are listed on the bottom. No affiliation with Shigshop on these. |
The build
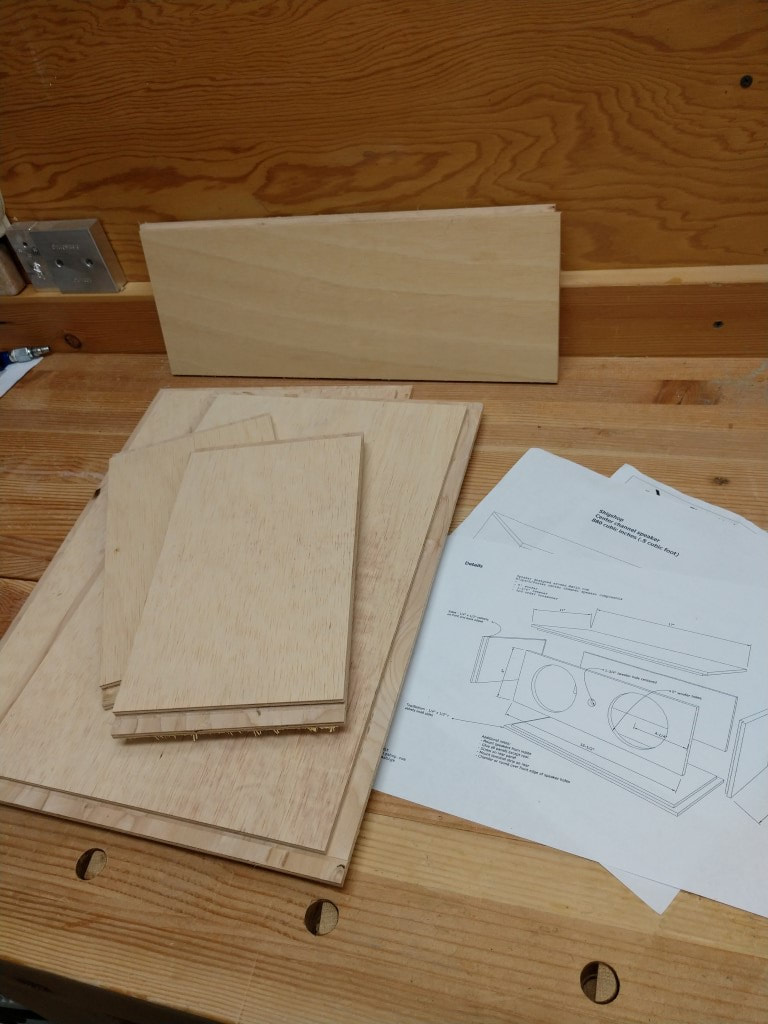
The cabinets get built first and for this super simple non-audiophile build, I'm using some scrap 1/2" plywood. Pieces got ripped on the table saw, then crosscut on the radial arm saw to final dimensions. For 1 simple cabinet like this, you need 6 pieces - top, bottom, 2 sides, front, and back.
For joinery, simple rabbetts were cut on the table saw.
For joinery, simple rabbetts were cut on the table saw.
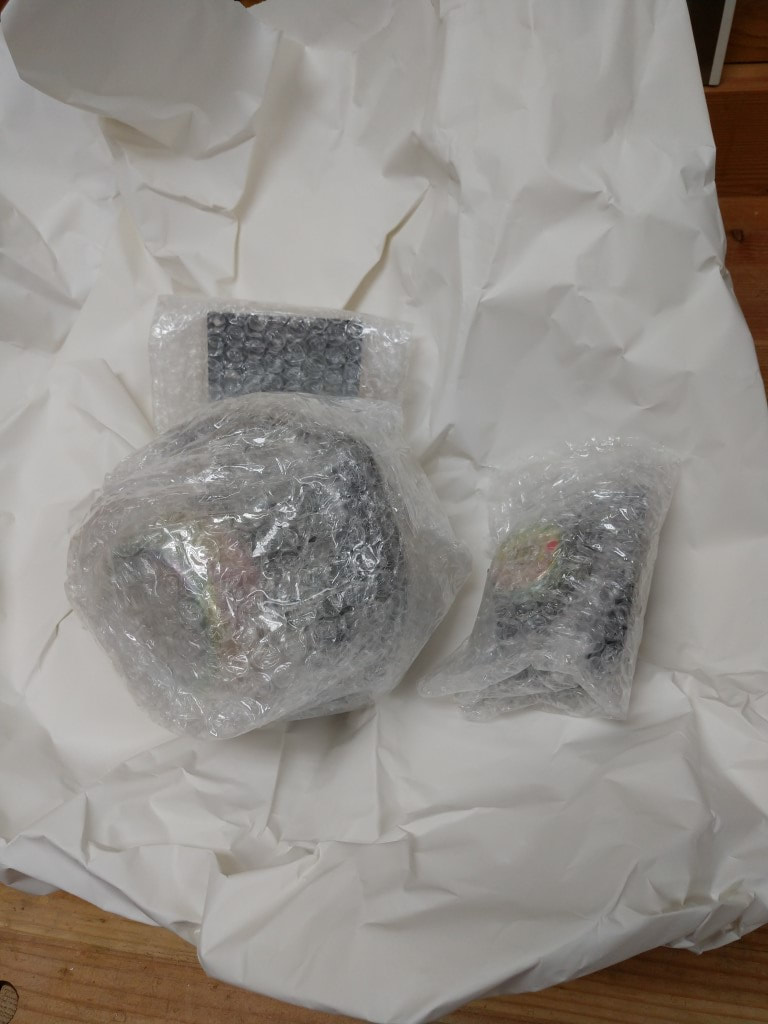
Always fun when parts show up at the Shigshop!
|
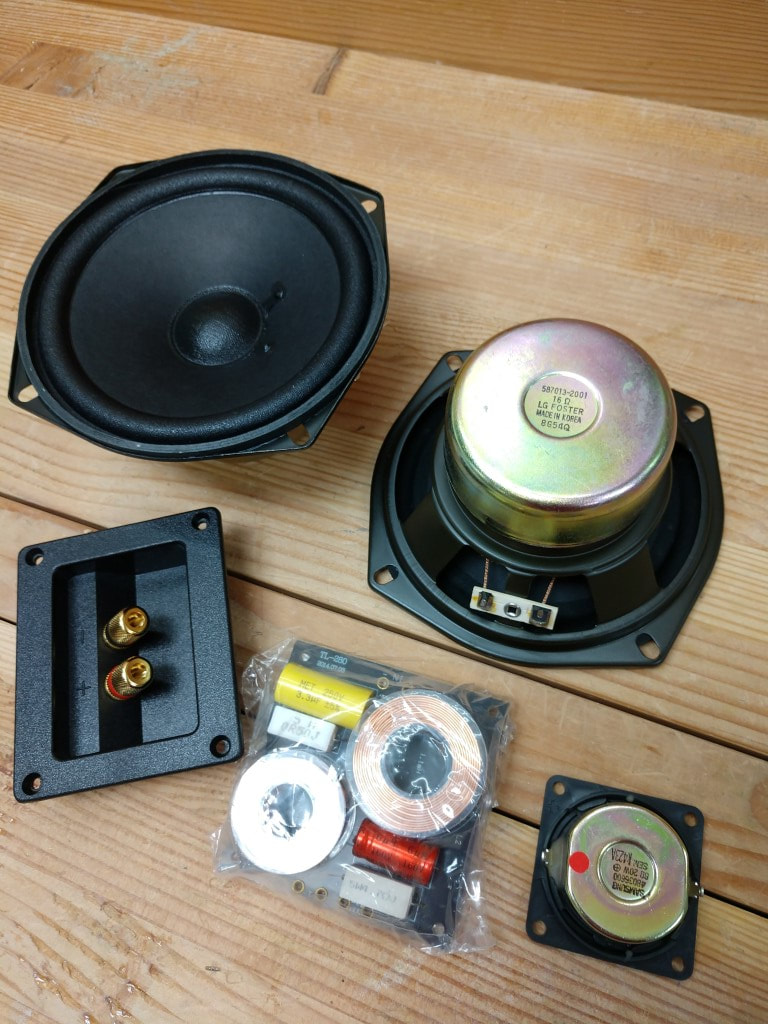
This is the complete kit.
|
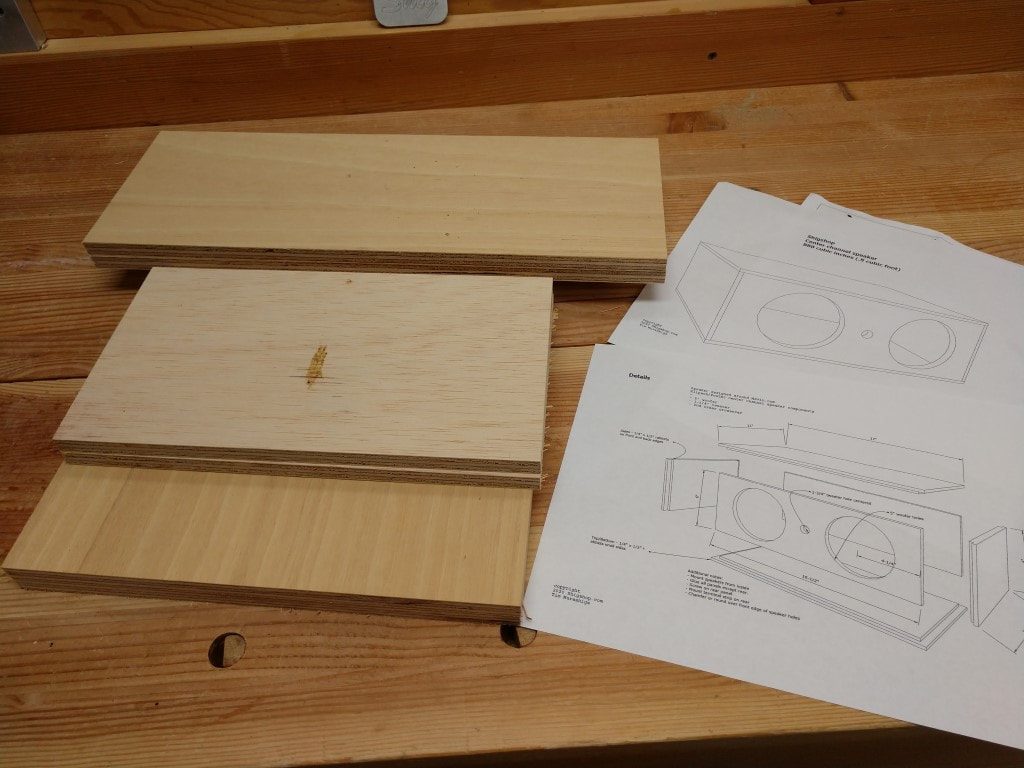
After ripping and crosscutting, we have a stack of pieces for the speaker cabinet.
|
Next up, rabbetts on the tablesaw.
|
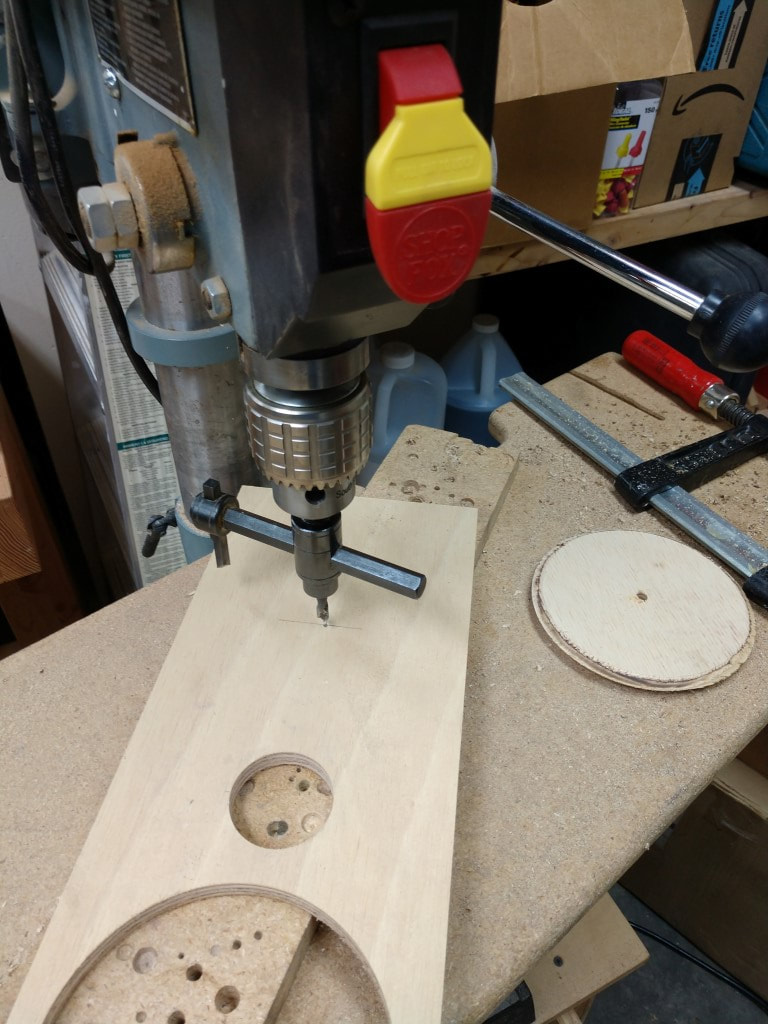
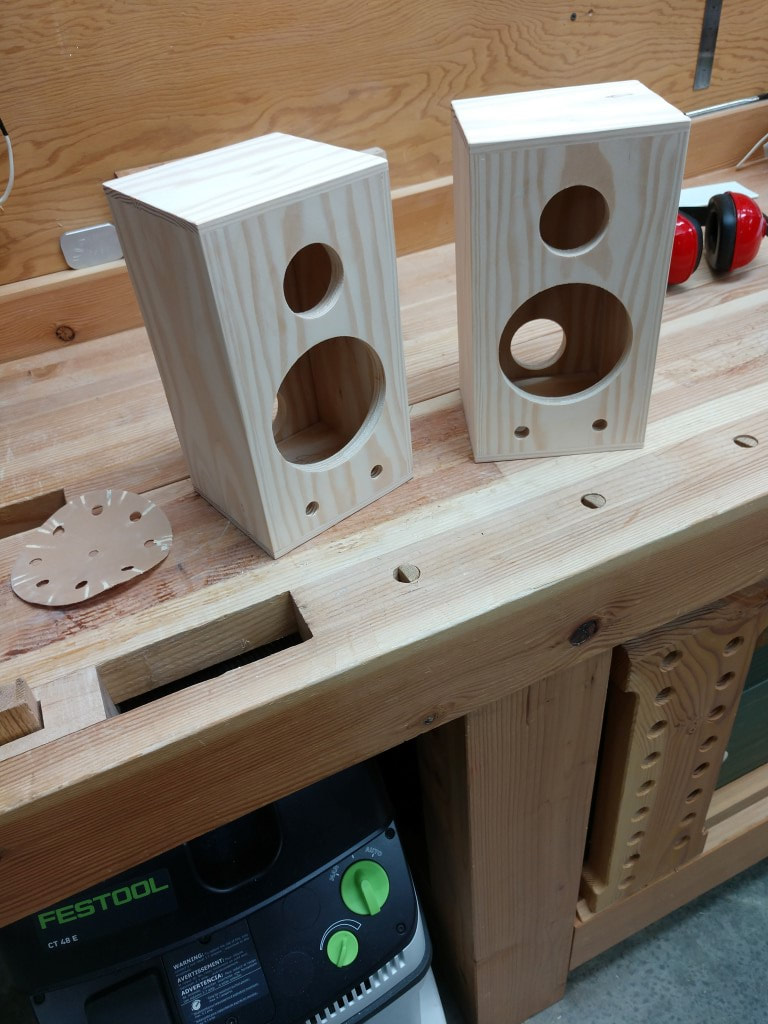
Using the fly cutter on the drill press to cut the holes.
|

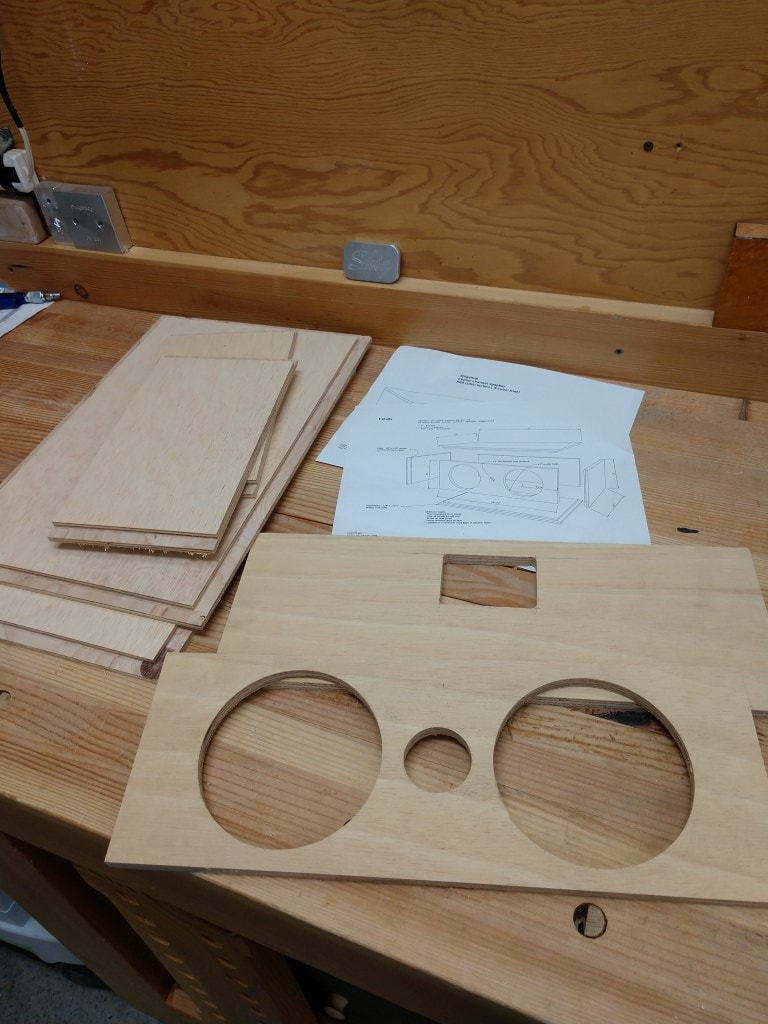
For the terminal hole on the rear panel, I drill holes in the corners, then the scroll saw made a rare guest appearance.
|
The holes for these speakers aren't standard holesaw sizes. I have a fly cutter that is fully adjustable and worked perfect for these guys. My biggest issue with this method is the fine dust it produces and not having a good way to capture it via my dust collection system, so I wear a respirator.
Here's an Amazon link to that fly cutter I use - a drill press is required....

Ready for assembly.
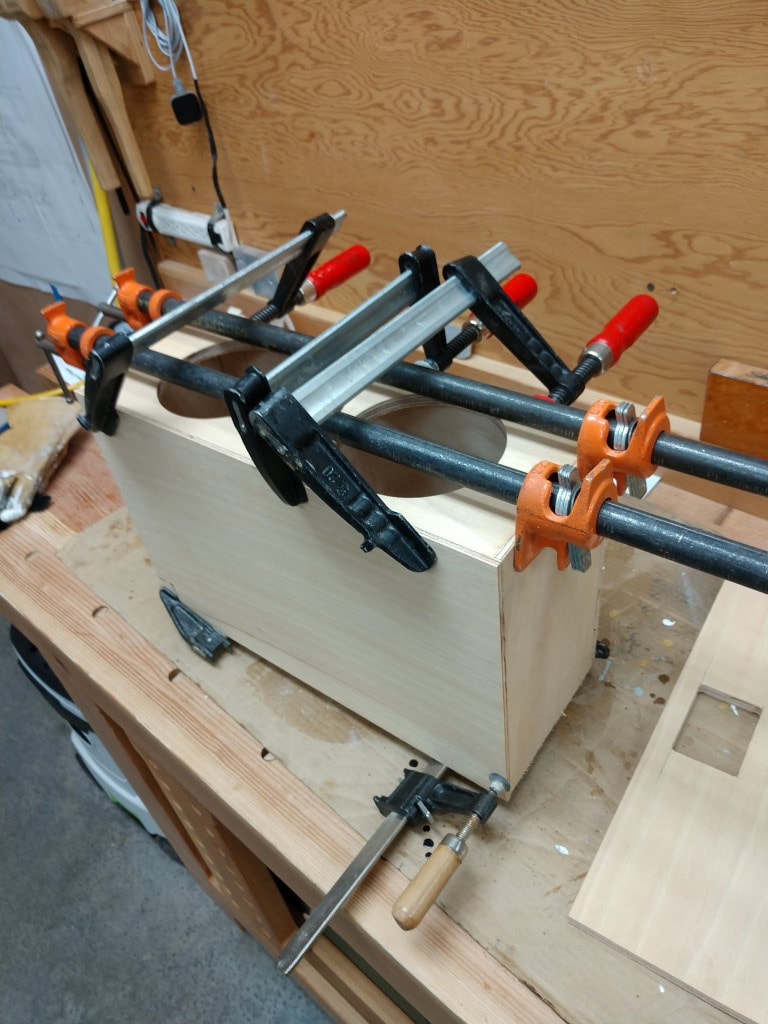
During glue up, I kept the clamping strategy as simple as possilbe (for me).

The speakers are mounted behind the baffle, so I round over the holes. A 1/4" round over bit was my best option.
|
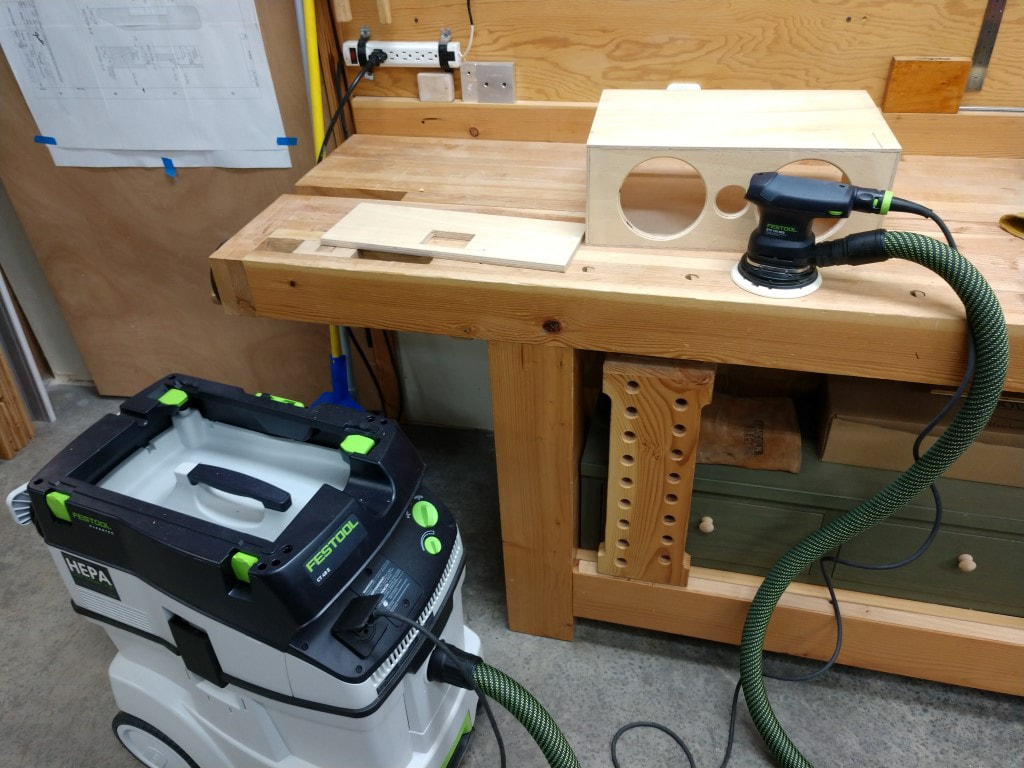
And for dust free palm sanding, the Festool of course. Hey, that's a major investment, but lungs are worth it.
|

I applied a couple coats of water based poly, then assembled everything before installing the parts.
|
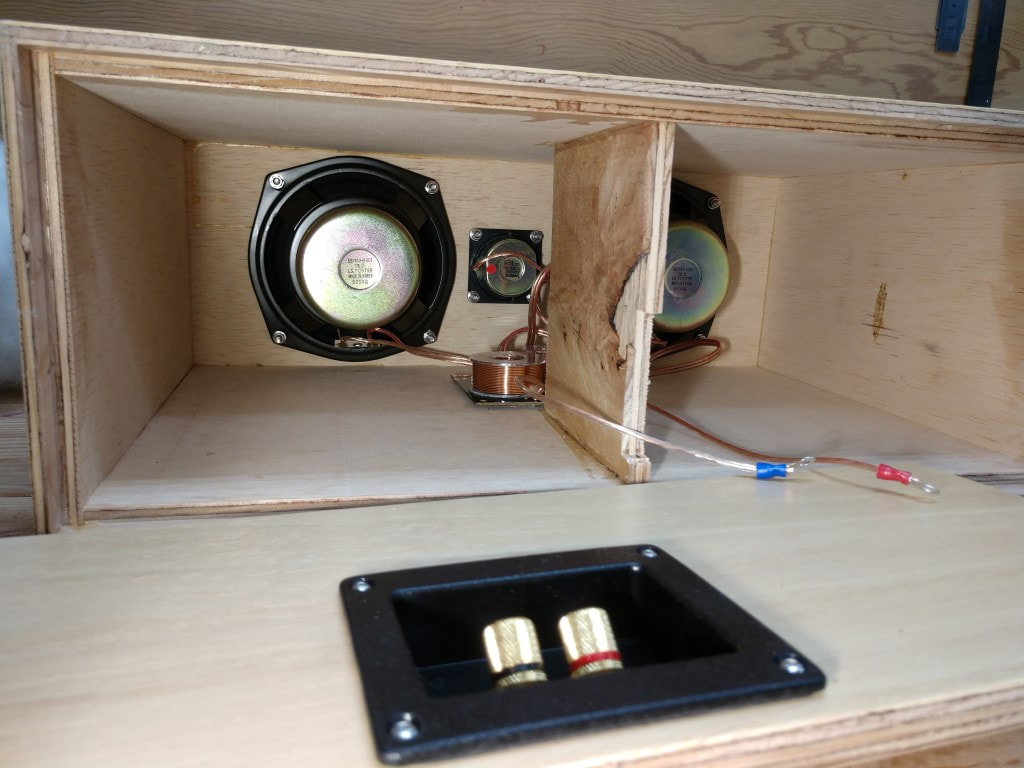
Everything is installed. The crossover is hot glued onto the bottom panel.
|
Not sure of this finish....
|
That vacuum under the bench has a palm sander attachment. It produces practically zero airborne dust - a revelation to use. After the edge sanding, I used the Festool sander, then brushed on 2 coats of water based poly with a light sanding between each coat.
|
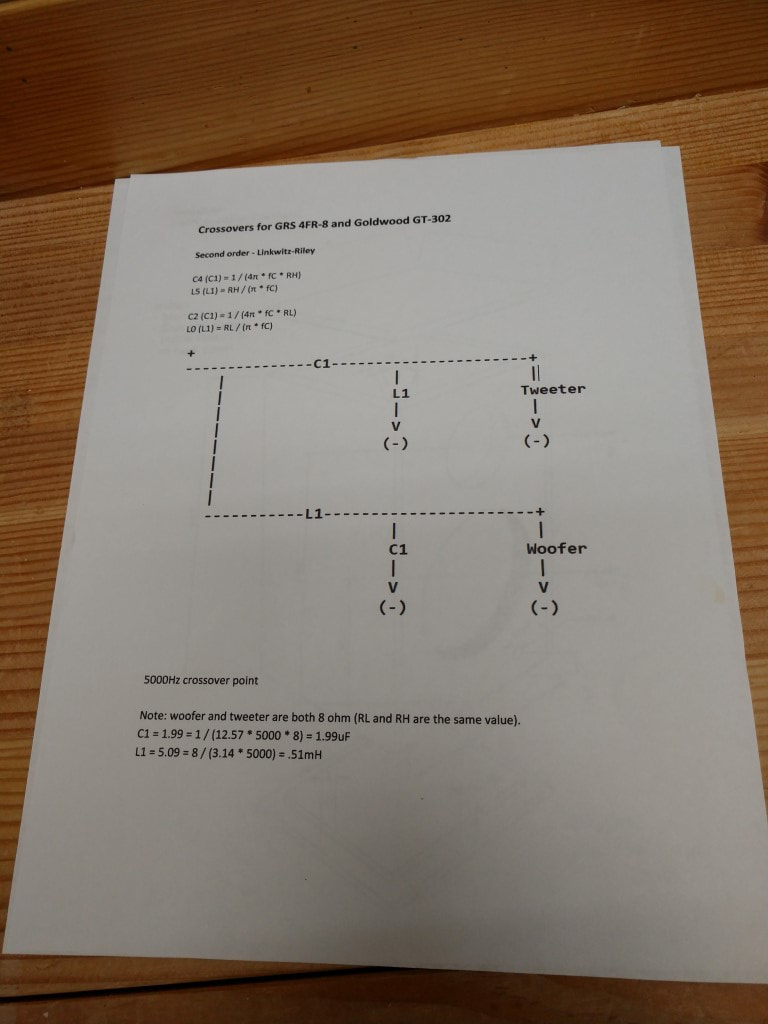
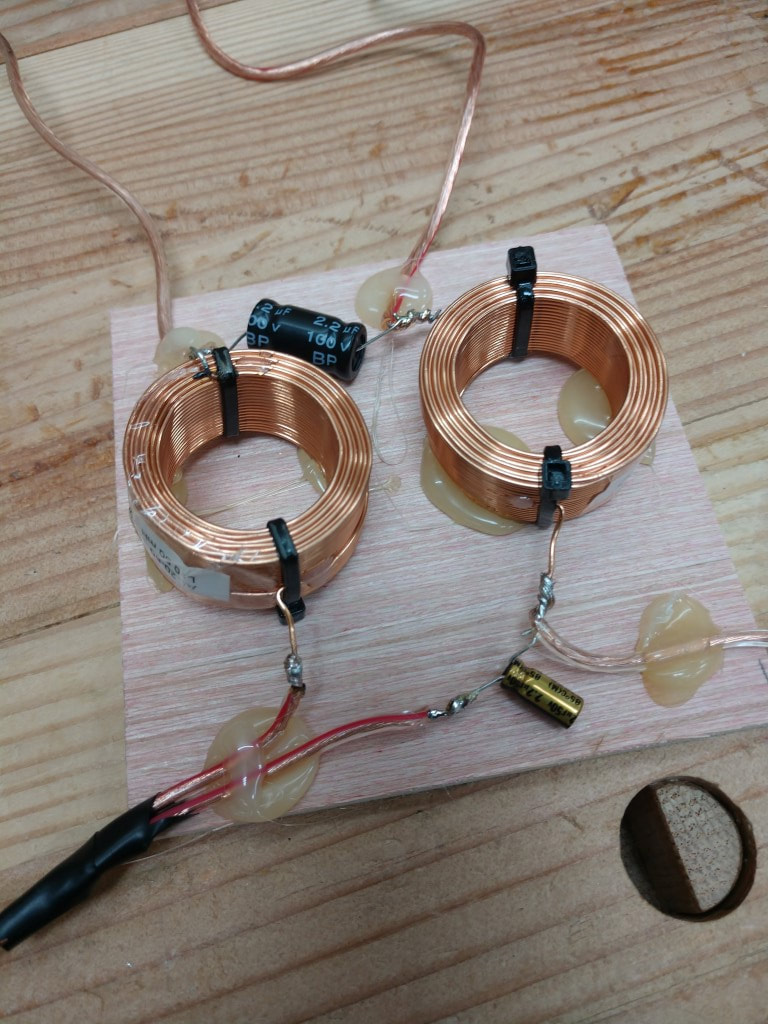
Fairly simple crossovers. Each one requires 2 inductors and 2 capacitors. See parts list at bottom.
|
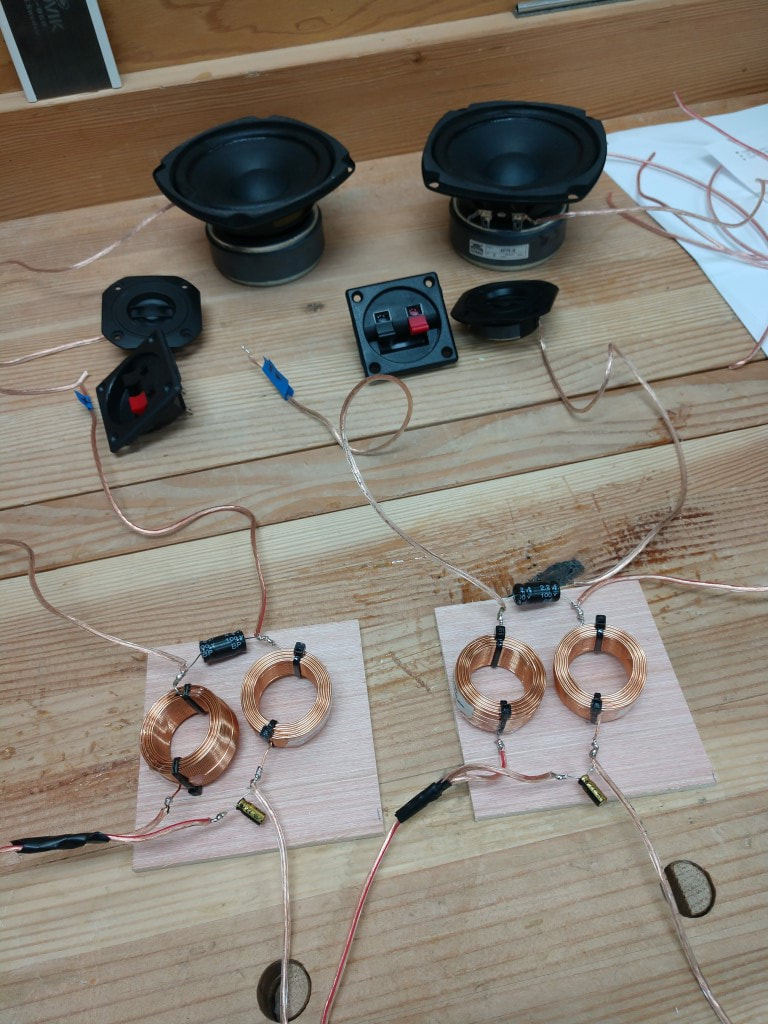
After soldering all of the joints, they were hot glued onto a couple of 1/4" plywood mounting boards. These then got hot glued into the cabinets.
|
|
Final assembly
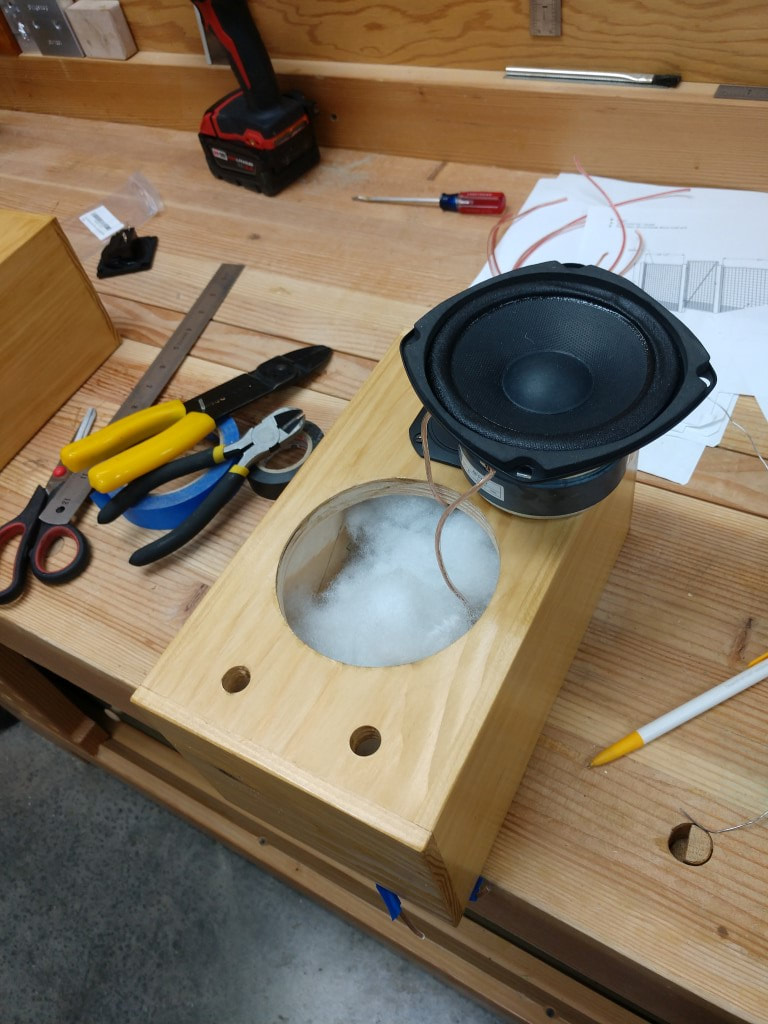
Polyfill is lightly stuffed into each cabinet via the woofer hole during assembly.
|
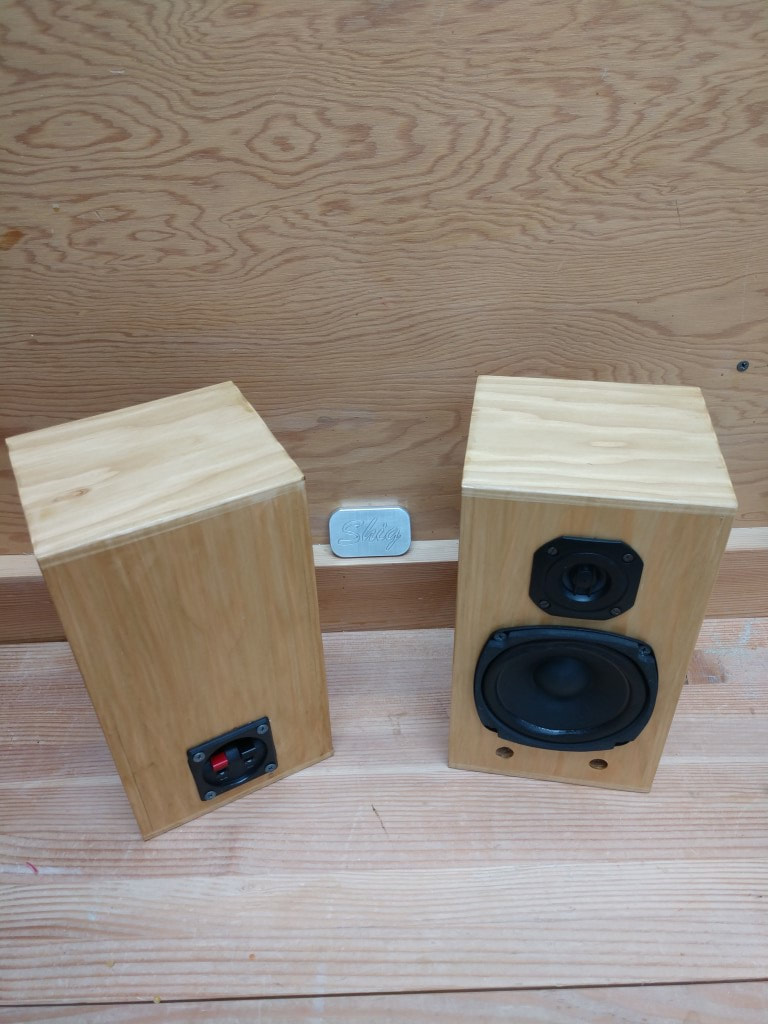
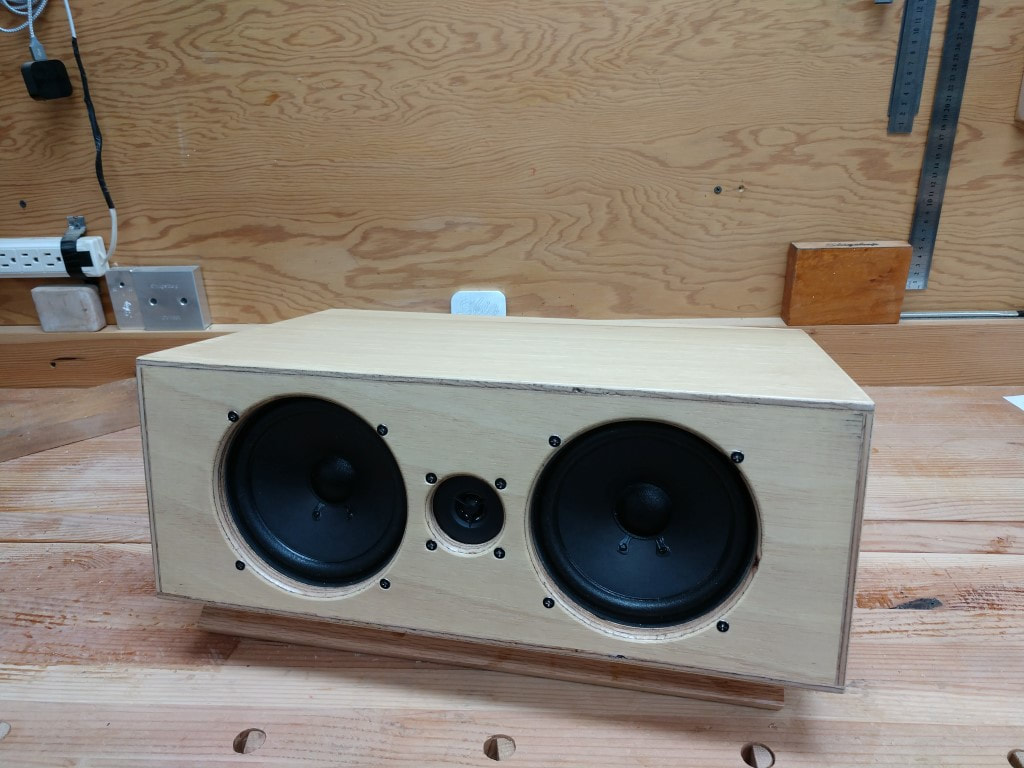
Complete.
|
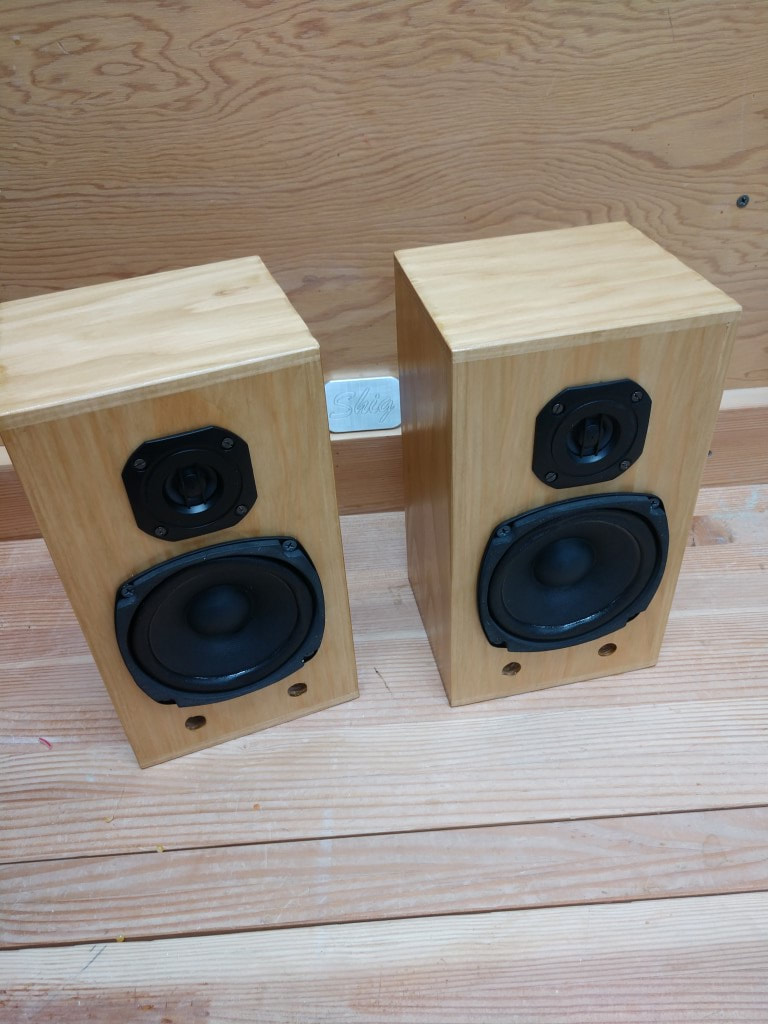
They took only took a few hours to build and are going to be perfect for Zwifting!
|
Time for a ride...
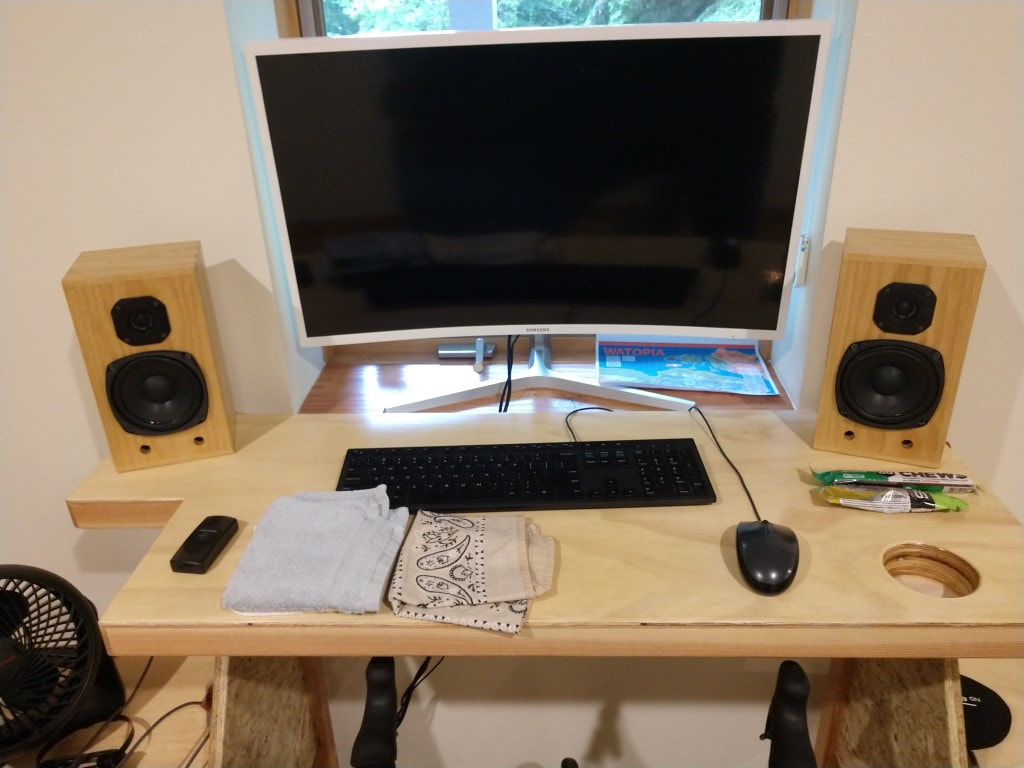
And now, ready to rock, jazz, pop, etc.!
|
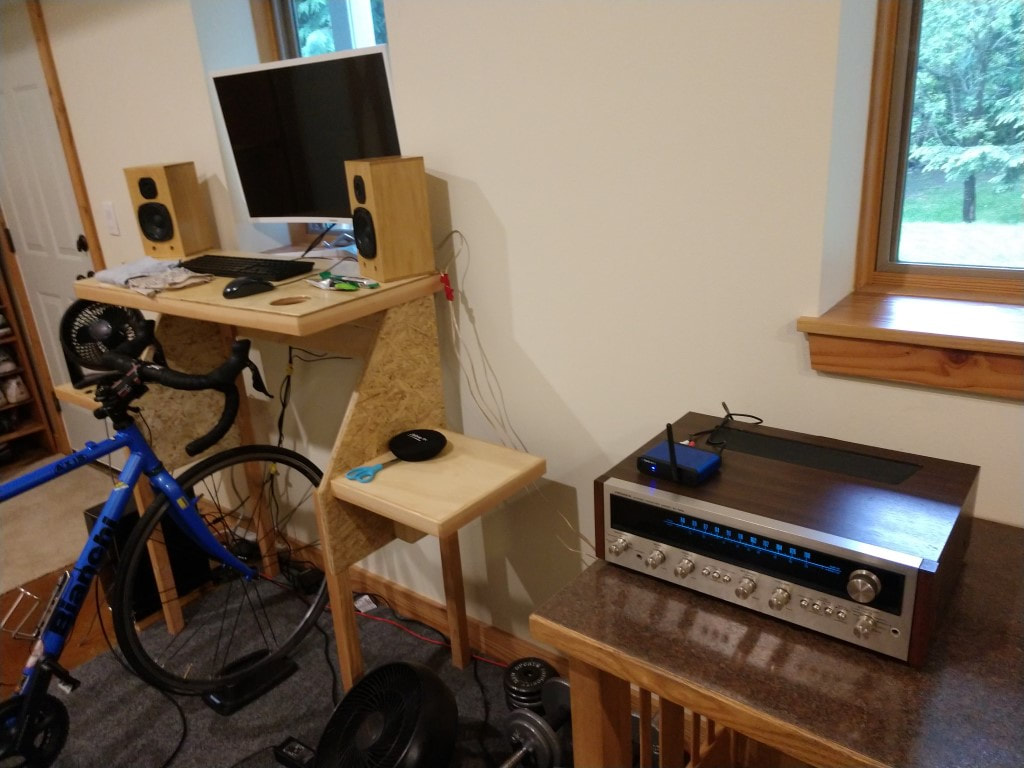
That Pioneer SX626 was an old eBay find. You can find nice old receivers like these for a very reasonable cost. Much cooler than anything modern and they can sound great. This one required a little Deoxit on all switches and pots. I'm not going to bother with recapping it - at least not yet.
|
Speaker components used in this build
If you choose to use the links below, a small amount will be credited to me to help support Shigshop.com. If you do, thank you for your support!
Woofers
I have used these woofers on all of my computer and now Zwift speakers. They would also make a good center channel speaker for a home theater system (wink...).
Obviously, 2 required for a pair of speakers.
I have used these woofers on all of my computer and now Zwift speakers. They would also make a good center channel speaker for a home theater system (wink...).
Obviously, 2 required for a pair of speakers.

Tweeters
These pair up nicely with that woofer. I tried a couple different tweeters and crossover designs, but prefer these Goldwoods.
These pair up nicely with that woofer. I tried a couple different tweeters and crossover designs, but prefer these Goldwoods.

Crossover parts and other stuff
The crossovers require 2 of these capacitors in each crossover, so, you'll need 4 in total. This is a pack of 6, which will do.
The crossovers require 2 of these capacitors in each crossover, so, you'll need 4 in total. This is a pack of 6, which will do.

Air core inductors. You'll need 2 in each crossover - so a total of 4.

No need to go overboard with speaker wire for these little guys. This wire will be used for the internal wiring, with plenty left over that can be used to connect the speakers to your amp.

For simple speakers, I like spring loaded terminals. Square or round ones can be found - I like the ones that have screw down anchor points, some are just a press fit into the cabinet hole. The spring loaded terminals make them easy to use - just strip the end of the speaker wire, push the tab and insert the wire.

Plenty of polyfill here for quite a few speakers.

Integrated amp
Here's an inexpensive amp that will work great. Kinter is another company that makes an almost identical one - either would be fine.
Here's an inexpensive amp that will work great. Kinter is another company that makes an almost identical one - either would be fine.

Bluetooth receiver
Assuming you want to make this super simple and stream music from your phone over bluetooth, you'll need a Bluetooth receiver for that little amp.
Assuming you want to make this super simple and stream music from your phone over bluetooth, you'll need a Bluetooth receiver for that little amp.

Deoxit
If you get an old receiver or integrated amp, you might need this....
If you get an old receiver or integrated amp, you might need this....

If you made it this far, here are some free plans for the cabinets and crossovers (use parts listed above). These are super simple plans, but should suffice for this build. After downloading, extract it since it's a compressed (.zip) file.
| zwift_speakers.zip |
Thanks for reading folks! I hope you build a pair. Contact me via the button below and let me know how it goes.
